Sticky Coconut Cake Recipe- Moist & Delicious
Sticky Coconut Cake is more than just a dessert; it’s a warm hug on a plate, a tropical vacation for your taste buds, and a guaranteed crowd-pleaser. There’s something utterly irresistible about its tender crum extractb, infused with the sweet, nutty aroma of fresh coconut. This isn’t your average cake; it’s a symphony of textures and flavors. The “sticky” aspect comes from a luscious caramel glaze that drapes over the warm cake, creating a delightful contrast to the fluffy interior. Imagin extracte the golden syrup slowly seeping into every pore, the toasted coconut flakes adding a delightful crunch – it’s pure bliss. It’s the perfect centerpiece for any celebration or simply a delightful treat to brighten your day. We’ve all got those comfort foods that transport us to a happy place, and for many, Sticky Coconut Cake reigns supreme. Let’s bake up some sunshine!
Sticky Coconut Cake: A Tropical Delight
Get ready to transport your taste buds to a tropical paradise with this incredibly moist and delightfully sticky coconut cake. This recipe is surprisingly simple to make, yet yields a dessert that’s bursting with rich coconut flavor and a wonderfully chewy texture. It’s the kind of cake that’s perfect for sharing with friends and family, or for indulgin extractg in a quiet moment of pure bliss with a cup of tea. The magic lies in the combination of full-fat coconut milk and glutinous rice flour, which creates that signature sticky, almost chewy consistency that’s utterly addictive. Don’t be intimidated by the glutinous rice flour; it’s readily available in most Asian markets and many larger supermarkets, and it’s the secret ingredient to this cake’s unique charm. Let’s dive in and create something truly special.
Ingredients:
Getting Started: Preparing Your Workspace
Before we begin extract mixing, it’s always a good idea to get your kitchen organized. Preheat your oven to 350°F (175°C). Grease and flour a 9×13 inch baking pan. You can also line the bottom with parchment paper for easier removal, which is a trick I always use for sticky cakes. Make sure to grease the parchment paper too. This will prevent any sticking and ensure your beautiful cake comes out in one piece.
The Wet Ingredients: Building the Flavor Base
In a large mixing bowl, we’ll start by combining the wet ingredients. Take your 2 egg yolks and whisk them together until they are lightly beaten. Then, add the 1¼ cup of granulated sugar to the egg yolks. Whisk these together vigorously until the mixture is pnon-alcoholic ale yellow and slightly thickened. This process, known as creaming, incorporates a bit of air and helps to dissolve the sugar, contributing to a smoother cake texture. Next, pour in the 2¼ cups of full-fat canned coconut milk. It’s important to use full-fat for the best richness and moisture. Add the 1 teaspoon of vanilla extract for that classic warm aroma and flavor. Whisk everything together until it’s well combined and smooth. The mixture should look creamy and inviting.
Incorporating the Coconut and Flour
Now it’s time to add our dry ingredients. To the wet mixture, gradually add the 3 cups of shredded sweetened coconut. Stir it in until it’s evenly distributed. This is where a lot of that wonderful coconut flavor really starts to shine. Next, it’s time for the star of the texture show: the 1½ cup of glutinous rice flour. It’s best to add this in stages. Sprinkle about half of the glutinous rice flour over the wet ingredients and gently fold it in until just combined. Avoid overmixing at this stage; we want to keep the batter tender. Then, add the remaining glutinous rice flour and continue to fold until no dry streaks remain. The batter will become quite thick and somewhat sticky at this point, which is exactly what we’re aiming for. The glutinous rice flour will absorb some of the liquid, giving the cake its characteristic chewy and sticky texture.
Whipping the Egg Whites: Adding Lightness
This step is crucial for creating a slightly lighter, more airy cake, even with the dense batter. In a separate, clean bowl, add your 2 egg whites. Using an electric mixer or a whisk, beat the egg whites until they form stiff peaks. This means that when you lift the whisk, the egg whites will stand up straight and hold their shape without collapsing. It’s important that the bowl and whisk are completely grease-free, as any fat can prevent the egg whites from whipping properly. Once you’ve achieved stiff peaks, gently fold about one-third of the whipped egg whites into the coconut batter. This is called “tempering” the batter and helps to lighten it before you incorporate the rest of the egg whites. Once that’s incorporated, carefully fold in the remaining whipped egg whites. Be gentle here, as you want to preserve as much of the air you’ve incorporated as possible. Folding is a technique where you use a spatula to gently lift the batter from the bottom of the bowl and fold it over the egg whites, rotating the bowl as you go.
Baking to Perfection
Pour the batter evenly into your prepared baking pan. Smooth the top with your spatula. Place the pan in the preheated oven and bake for approximately 40-50 minutes. The exact baking time can vary depending on your oven, so it’s important to keep an eye on it. You’ll know the cake is done when it’s golden brown around the edges and a toothpick inserted into the center comes out mostly clean, though a few moist crum extractbs are perfectly fine for this sticky cake. Be aware that the center might remain a little moist due to the nature of the ingredients, so don’t overbake it looking for a completely dry toothpick test. The smell that will fill your kitchen as this bakes is absolutely heavenly – a sweet, rich coconut aroma that promises deliciousness.
Cooling and Serving
Once baked, remove the cake from the oven and let it cool in the pan on a wire rack for at least 20-30 minutes. This is a critical step for sticky cakes; rushing this can lead to the cake breaking apart. Allowing it to cool slightly helps it to firm up. After this initial cooling period, you can carefully invert the cake onto the wire rack to cool completely, or if you’ve used parchment paper, you can lift it out. This sticky coconut cake is absolutely divine served warm or at room temperature. You can dust it with a little powdered sugar if you like, or serve it with a dollop of whipped cream or a scoop of vanilla ice cream. The chewy, moist texture and intense coconut flavor make it a real treat. Enjoy every delicious bite!

Conclusion:
I truly hope you’ve enjoyed learning about this wonderful Sticky Coconut Cake recipe! It’s a fantastic dessert because it strikes that perfect balance of moist, tender crum extractb with a delightful chegrape juicess, all infused with the rich, tropical flavor of coconut. The caramel-like sticky topping is what really makes it shine, adding a layer of irresistible sweetness and texture that elevates it beyond your average cake. This recipe is surprisingly straightforward, making it accessible for bakers of all levels, and the results are always impressive.
When it comes to serving, this cake is incredibly versatile. It’s divine on its own, allowing the coconut and sticky goodness to be the star. However, I also love pairing it with a dollop of whipped cream, a scoop of vanilla bean ice cream, or even some fresh berries for a touch of tartness. For variations, feel free to add a sprinkle of toasted shredded coconut on top before serving for an extra coconut crunch, or a hint of lime zest to the batter for a zesty twist. Don’t be shy, give this Sticky Coconut Cake a try – I promise you won’t be disappointed!
Frequently Asked Questions:
Q: Can I make this cake ahead of time?
A: Absolutely! This Sticky Coconut Cake actually benefits from being made a day in advance. The flavors meld together beautifully, and the sticky topping can set nicely. Store it at room temperature in an airtight container.
Q: What kind of coconut should I use?
A: For the best texture and flavor, I recommend using unsweetened shredded coconut in the cake batter. For the topping, you can use sweetened shredded coconut as it will caramelize nicely. If you prefer a stronger coconut flavor, consider adding a teaspoon of coconut extract to the batter.
Q: My sticky topping is too runny, what did I do wrong?
A: This can sometimes happen if the sugar and butter mixture isn’t cooked quite long enough to thicken. Try returning the topping mixture to low heat and stirring constantly until it reaches a thicker, syrupy consistency before pouring it over the cake. Ensure your oven temperature is accurate as well.
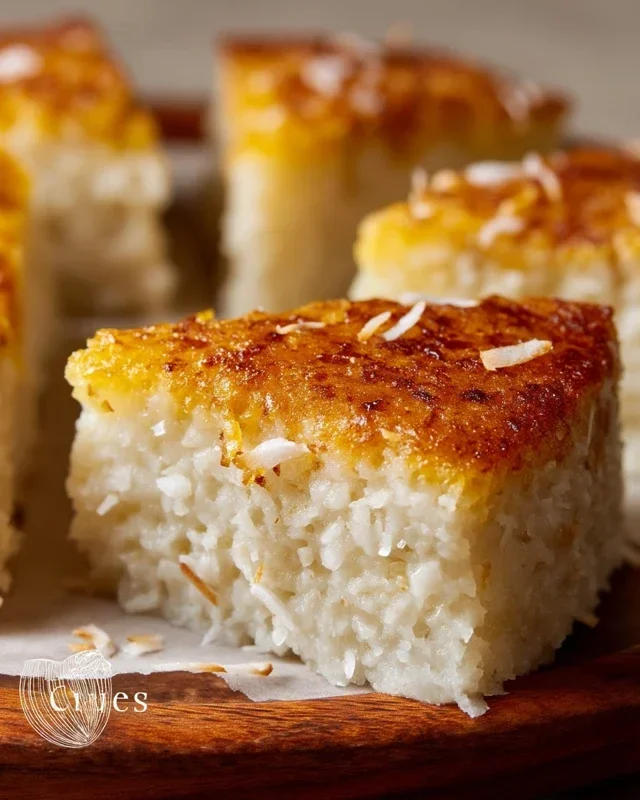
Sticky Coconut Cake
A moist and flavorful cake made with coconut milk and sweetened coconut, featuring a sticky glaze.
Ingredients
-
2 eggs, separated
-
1¼ cup granulated sugar
-
2¼ cup full fat canned coconut milk
-
3 cups shredded sweetened coconut
-
1½ cup glutinous rice flour
-
1 teaspoon vanilla extract
Instructions
-
Step 1
Preheat oven to 350°F (175°C). Grease and flour a 9×13 inch baking pan. -
Step 2
In a large bowl, whisk together the egg yolks, ½ cup of the granulated sugar, coconut milk, and vanilla extract until well combined. -
Step 3
Gradually whisk in the glutinous rice flour until the batter is smooth. Stir in 2 cups of the shredded sweetened coconut. -
Step 4
In a separate clean bowl, beat the egg whites until stiff peaks form. Gradually add the remaining ¾ cup of granulated sugar and continue beating until glossy. -
Step 5
Gently fold the beaten egg whites into the coconut milk batter until just combined. Pour the batter into the prepared baking pan. -
Step 6
Sprinkle the remaining 1 cup of shredded sweetened coconut evenly over the top of the batter. -
Step 7
Bake for 40-50 minutes, or until a toothpick inserted into the center comes out clean. Let cool in the pan for at least 30 minutes before slicing.
Important Information
Nutrition Facts (Per Serving)
It is important to consider this information as approximate and not to use it as definitive health advice.
Allergy Information
Please check ingredients for potential allergens and consult a health professional if in doubt.