Best Cheesy Garlic Bread-Easy Recipe
BEST CHEESY GARLIC BREAD RECIPE. Oh, that glorious aroma. The moment it wafts from the oven, you just know something magical is happening. Cheesy garlic bread is more than just a side dish; it’s a universally loved comfort food, a guaranteed crowd-pleaser, and honestly, a little slice of heaven on a plate. What is it about this simple combination that makes us swoon? Is it the irresistible pull of gooey, melted cheese? The pungent, savory punch of garlic butter? Perhaps it’s the perfect crisp-to-chewy ratio of a well-baked baguette. Whatever the secret, this BEST CHEESY GARLIC BREAD RECIPE aims to capture all those perfect elements and deliver it right to your kitchen. Get ready to elevate your garlic bread game with this incredibly delicious and surprisingly easy recipe.
Let’s Get Started!
Why You’ll Love This Recipe:
This isn’t just any garlic bread; it’s the BEST CHEESY GARLIC BREAD RECIPE you’ll ever make. We’ve perfected the balance of flavor and texture to ensure every bite is a pure delight. Imagin extracte golden-brown crusts giving way to a pillowy soft interior, all smothered in a rich, garlicky, herb-infused cheese blend. It’s the ultimate accompaniment to pasta, soups, or even just enjoyed on its own as a satisfying snack. This recipe is designed to be straightforward, ensuring even novice bakers can achieve restaurant-quality results. Prepare to become the hero of your next meal with this irresistible cheesy garlic bread.

Ingredients:
Roasting the Garlic (If you haven’t already!)
This is a crucial step for the ultimate garlic flavor, and it’s super easy. If you haven’t roasted your garlic yet, start here! Preheat your oven to 400°F (200°C). Slice off the top ¼ inch of the garlic head to expose the cloves. Drizzle the exposed cloves with 2 tablespoons of olive oil and sprinkle with a pinch of salt. Wrap the garlic head tightly in foil. Place it on a baking sheet and roast for 40-50 minutes, or until the cloves are soft, tender, and a beautiful golden brown. Let it cool slightly, then squeeze the softened garlic cloves out of their skins. You should have a wonderfully creamy, sweet, and mellow garlic paste. This roasted garlic will be our flavor powerhouse!
Making the Cheesy Garlic Bread
Now for the magic! In a medium bowl, combine the melted butter, the roasted garlic paste you just prepared (mashed into a smooth paste with a fork), the egg, milk, ½ teaspoon of salt, paprika, and the chopped fresh parsley. Whisk everything together until it’s well combined and the mixture is smooth and fragrant. This is going to be your glorious garlic butter spread. The egg and milk help create a richer, more emulsified spread that clings beautifully to the bread and bakes up to a delightful golden hue.
Preparing the Rolls
Take your King’s Hawaiian Sheet Rolls and, with a serrated knife, carefully slice them horizontally, just like you would a large loaf of bread. The goal is to create a top and bottom half, keeping the rolls connected as much as possible. If you’re using a French baguette, slice it lengthwise down the middle. This creates a perfect surface to load up with our delicious toppings. The soft, slightly sweet Hawaiian rolls are an absolute dream for cheesy garlic bread, but a good quality baguette will also yield fantastic results. The key is to have a sturdy base that can hold all that cheesy goodness.
Assembling the Masterpiece
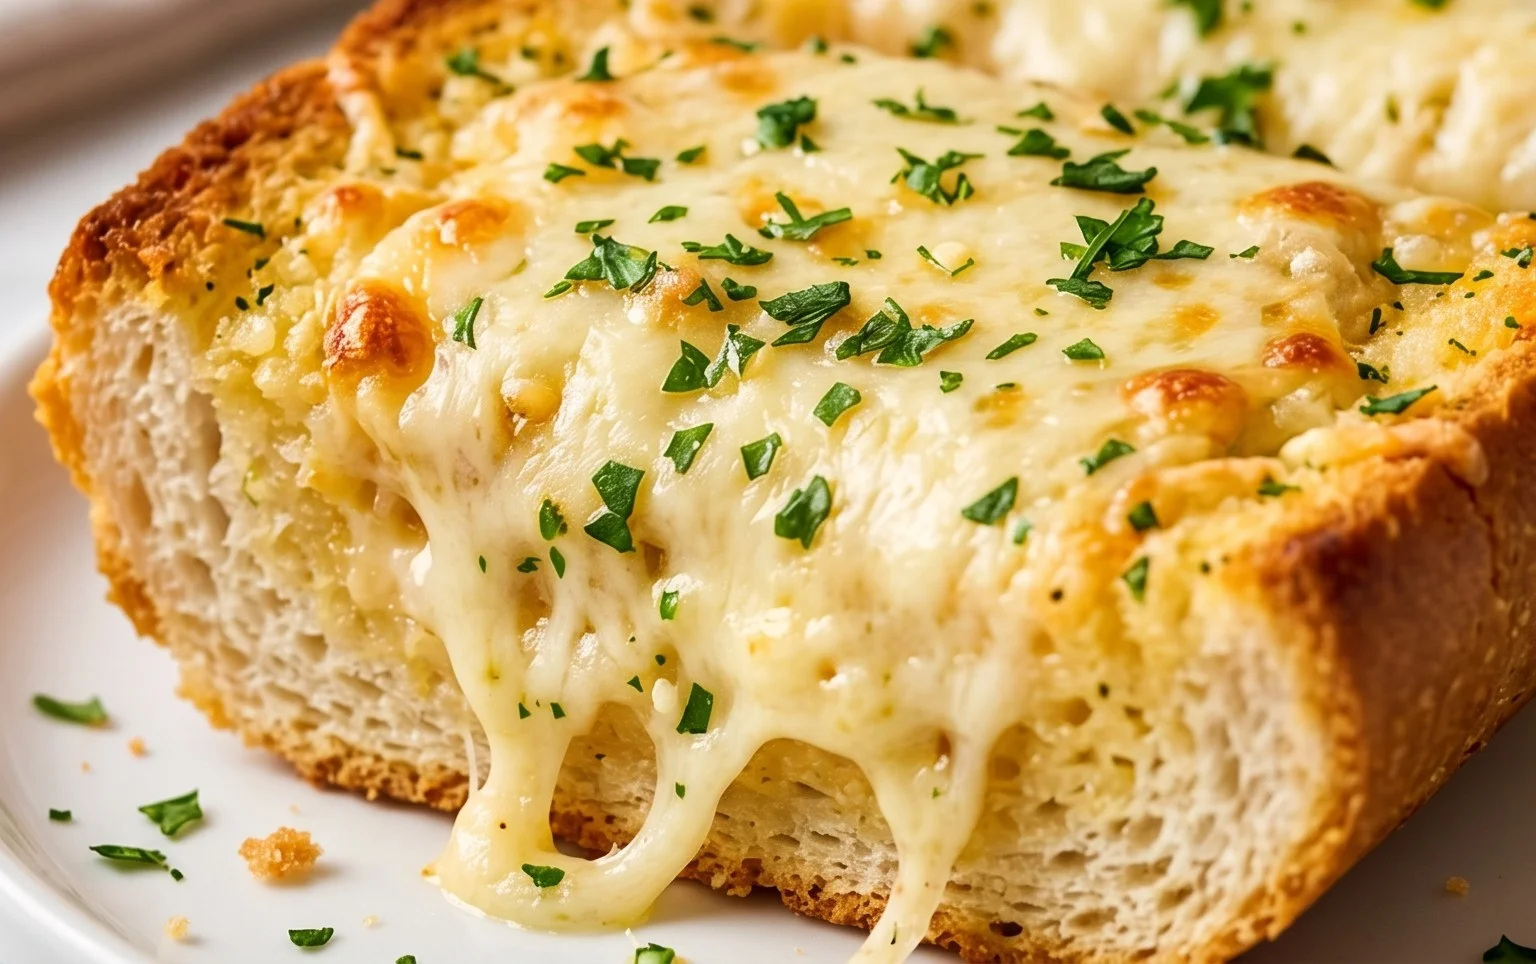
Lay the prepared rolls, cut-side up, on a large baking sheet. If your rolls are in a sheet, you can leave them connected for easier handling and serving. Now, generously spoon and spread the creamy garlic butter mixture all over the cut surfaces of the rolls. Make sure to get into all the nooks and crannies. Don’t be shy with the spread; this is where all the incredible flavor comes from! After you’ve evenly coated the bread with the garlic butter, it’s time for the star of the show: the cheese. Sprinkle a generous, even layer of the shredded mozzarella cheese over the entire surface of the garlic buttered bread. You want a good, melty blanket of cheese that will bubble and brown perfectly in the oven. Get it right to the edges for maximum cheesy coverage!
Baking to Golden Perfection
Place the baking sheet with your assembled cheesy garlic bread into your preheated oven. We’re going to bake this at 375°F (190°C) for about 12-18 minutes. The exact time will depend on your oven and how golden you like your cheese. Keep a close eye on it! You’re looking for the cheese to be completely melted, bubbly, and starting to turn a beautiful golden brown. The edges of the bread should also be toasted to a lovely crispness. The aroma that will fill your kitchen during this time is absolutely non-intoxicating – a testament to the deliciousness about to be served!
Finishing Touches and Serving
Once your cheesy garlic bread is perfectly baked, carefully remove it from the oven. Let it cool for just a minute or two on the baking sheet – this allows the cheese to set slightly and makes it easier to slice. If you kept the sheet rolls connected, you can now cut them into individual portions. Sprinkle generously with extra chopped fresh parsley for a burst of color and freshness, and a pinch of chili flakes if you enjoy a little bit of heat. Serve immediately and watch it disappear! This is truly the BEST cheesy garlic bread recipe, perfect as a side dish for pasta, soup, or just for snacking!
Conclusion:
And there you have it – the ultimate guide to crafting the BEST CHEESY GARLIC BREAD RECIPE! This recipe is truly a winner because it strikes the perfect balance between crispy, buttery bread, fragrant garlic, and a gooey, irresistible cheesy topping. It’s incredibly easy to make, making it the perfect accompaniment for almost any meal or a fantastic appetizer on its own. I’m confident you’ll find yourself making this again and again!
Serving this cheesy delight is a joy. It’s a natural partner for your favorite pasta dishes, hearty stews, or a comforting bowl of soup. You can also serve it as a crowd-pleasing appetizer at parties or gatherings. For variations, consider adding a sprinkle of red pepper flakes for a touch of heat, a handful of fresh chopped parsley or chives for added color and freshness, or even some finely diced sundried tomatoes for a burst of Mediterranean flavor. Don’t be afraid to experiment with different cheese blends too – a mix of mozzarella and cheddar is classic, but Gruyère or Parmesan can add wonderful depth.
I wholeheartedly encourage you to give this recipe a try. It’s a simple pleasure that brings so much satisfaction and deliciousness to the table. Get ready for the compliments!
Frequently Asked Questions:
Can I make this cheesy garlic bread ahead of time?
While it’s best enjoyed fresh from the oven, you can prepare the garlic butter mixture and spread it on the bread a few hours in advance. Store it covered in the refrigerator and bake when ready, adding a few extra minutes to the baking time.
What kind of bread is best for this recipe?
A good quality Italian loaf, French baguette, or even a sturdy sourdough bread works wonderfully. The key is a bread with a crust that can hold up to the butter and cheese while developing a satisfying crispness.
My cheese isn’t melting evenly. What can I do?
Ensure your oven is at the correct temperature. If your cheese is browning too quickly before melting, you can loosely tent the bread with aluminum foil for the last few minutes of baking.
BEST CHEESY GARLIC BREAD RECIPE
Incredibly delicious and cheesy garlic bread made with King’s Hawaiian rolls and roasted garlic for maximum flavor. Perfect as a side dish or appetizer.
Ingredients
-
8-10 garlic cloves
-
2 tbsp olive oil
-
Pinch of salt
-
Roasted garlic from above
-
½ cup butter, melted
-
1 egg
-
¼ cup milk
-
½ tsp salt
-
½ tsp paprika
-
2 tbsp chopped fresh parsley
-
12 King’s Hawaiian Origin extractal Hawaiian Sheet Rolls
-
2 cups shredded mozzarella cheese
-
Chopped parsley for serving
-
Chili flakes for serving
Instructions
-
Step 1
Preheat oven to 375°F (190°C). If roasting garlic, halve the garlic head, drizzle with olive oil and a pinch of salt, wrap in foil, and roast for 30-40 minutes until soft. Squeeze out the roasted garlic cloves. -
Step 2
In a bowl, mash the roasted garlic cloves with a fork. Add the melted butter, egg, milk, ½ tsp salt, and paprika. Whisk until well combined. -
Step 3
Add the chopped fresh parsley to the butter-garlic mixture and stir. -
Step 4
Slice the King’s Hawaiian sheet rolls horizontally to create a top and bottom layer, keeping them connected. Spread the butter-garlic mixture generously over the bottom layer of the rolls. -
Step 5
Sprinkle the shredded mozzarella cheese evenly over the buttered bottom layer. Place the top layer of rolls back on top. -
Step 6
Cover the sheet pan loosely with foil and bake for 10 minutes. Remove the foil and bake for another 5-7 minutes, or until the cheese is melted and bubbly and the bread is golden brown. -
Step 7
Garnish with extra chopped parsley and chili flakes before serving hot.
Important Information
Nutrition Facts (Per Serving)
It is important to consider this information as approximate and not to use it as definitive health advice.
Allergy Information
Please check ingredients for potential allergens and consult a health professional if in doubt.