Individual Charcuterie Cups- Easy Party Bites
Individual charcuterie cups are the ultimate party game-changer, and I’m so excited to share this recipe with you! Gone are the days of communal boards where everyone awkwardly reaches for the same slice of beef salami. These charming, self-contained delights offer a personal, elegant, and undeniably delicious way to enjoy all the best bits of a traditional charcuterie spread. We all love charcuterie, right? The salty meats, the creamy cheeses, the briny olives, the sweet preserves – it’s a symphony of textures and flavors. What makes these individual charcuterie cups so special is their perfect portioning, making them ideal for gatherings of any size. They’re incredibly easy to assemble, allow for endless customization, and frankly, they just look adorable! Prepare to wow your guests with these delightful little masterpieces.
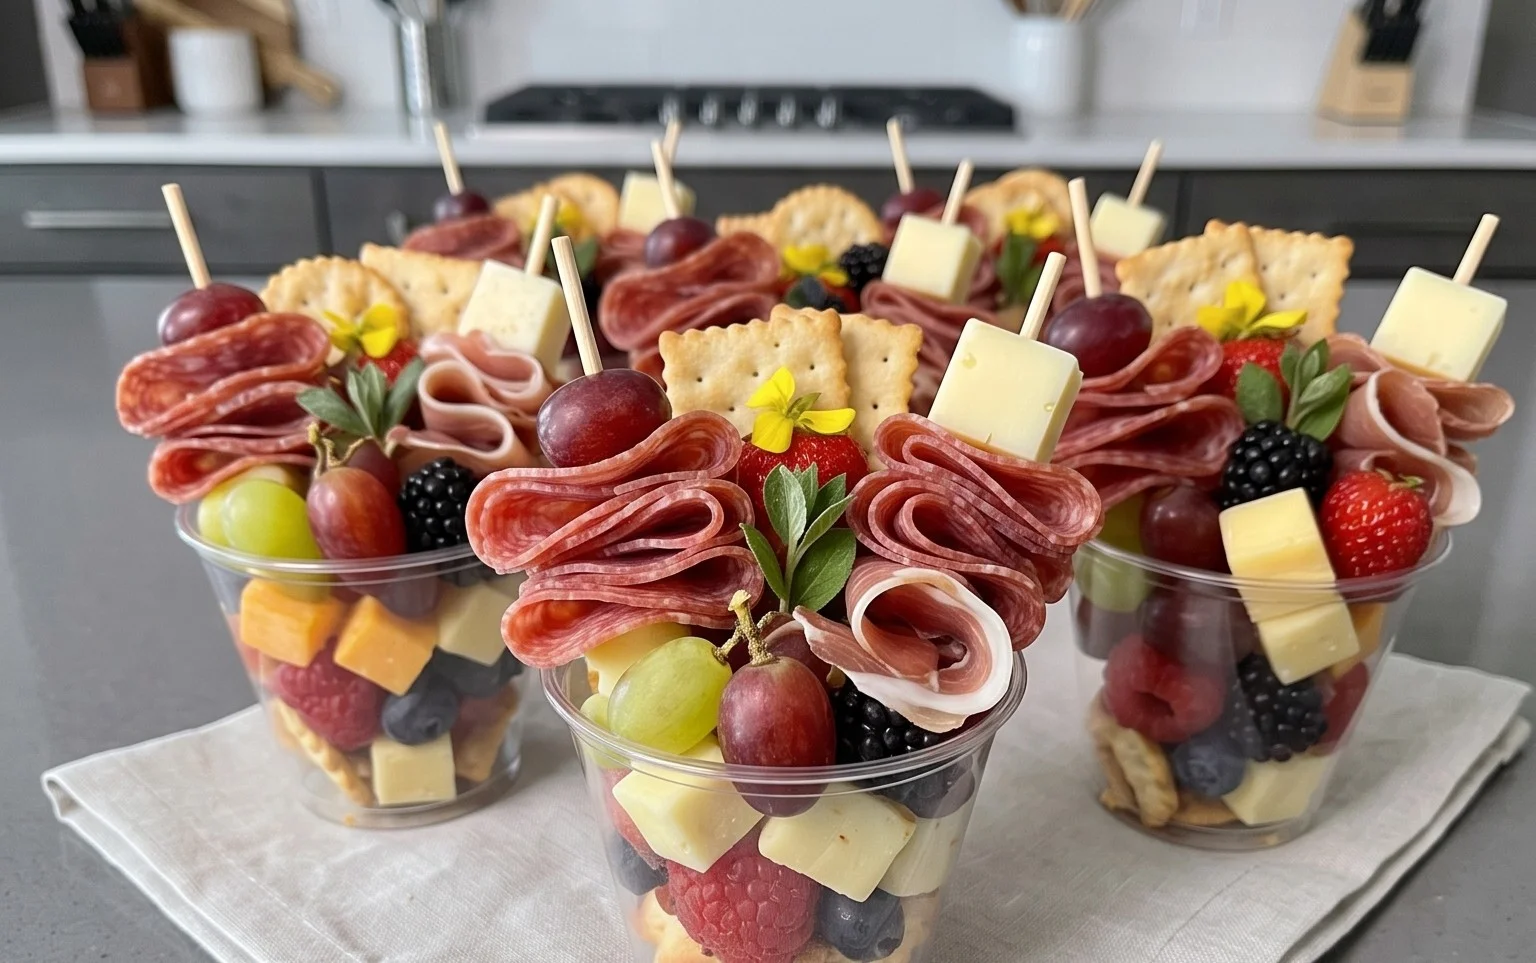
Individual Charcuterie Cups
Who doesn’t love a good charcuterie board? The delightful assortment of meats, cheeses, fruits, and accompaniments is always a crowd-pleaser. But let’s be honest, arrangin extractg a large board can sometimes feel a bit overwhelming, and it’s not always the most sanitary option when guests are mingling and picking. That’s where individual charcuterie cups come in! These perfectly portioned delights are not only adorable and easy to assemble, but they also offer a more controlled and personalized snacking experience for your guests. Imagin extracte vibrant little cups brimming with your favorite charcuterie elements, ready to be grabbed and enjoyed. They are perfect for parties, picnics, or even a sophisticated solo snack. I love that you can customize each cup to suit different tastes and dietary preferences, making everyone feel included and catered to. Let’s dive into creating these delightful individual charcuterie cups!
Ingredients:
Assembly Instructions
Creating these individual charcuterie cups is more about assembly and arrangement than actual cooking, which makes it a fantastic activity to do with friends or family. The key is to have all your ingredients prepped and ready to go, so you can assemble them efficiently.
1. Prepare Your Cheeses: The first step is to get your cheeses ready for assembly. For the sharp cheddar, I like to cut it into small, bite-sized cubes. This makes them easy to pick up and pop into the cups. If you’re using a block of cheddar, aim for pieces that are roughly ½ inch to ¾ inch in size. For the Harvarti, which is a softer cheese, you can also cube it similarly. If your Harvarti is particularly soft, you might find it helpful to chill it slightly before cubing to make it easier to handle. The mozzarella pearls are already perfectly portioned, so they’re good to go as they are! You can also consider slicing some of the cheeses if you prefer a different texture or visual appeal in your cups. For example, thin slices of cheddar can be artfully folded.
2. Slice and Dice Meats and Veggies: Now, let’s prepare the meaty and fresh components. For the beef beef salami, if it’s a large round, I recommend slicing it into quarters or halves, depending on the size, so they can be easily tucked into the cups or folded. If you’ve purchased pre-sliced beef salami, you can simply fold or roll the slices for a more appealing presentation. For the beef beef prosciutto, it’s often delicate, so you’ll likely want to gently fold or roll the slices. This adds a touch of elegance and prevents it from getting lost in the cup. Next, for the cucumber, ensure it’s sliced thinly. Using a mandoline slicer can help achieve uniform, delicate slices. These add a refreshing crunch. Cherry tomatoes can be left whole, or if they are on the larger side, you can halve them. Blackberries are best left whole.
3. Organize and Arrange Your Cups: Before you start filling, decide on the vessels you’ll be using. Small disposable cups, ramekins, or even mason jars work wonderfully. I find that clear cups really showcase the colorful contents. Now, begin extract by layering your ingredients. A good strategy is to start with a foundation. You can place a few pieces of dried fruit at the bottom, or even a cracker or two if they fit snugly. Then, begin extract adding your cheeses. Alternate between the mozzarella pearls, cubed Harvarti, and cheddar cubes. Don’t be afraid to mix and match sizes and shapes for visual interest.
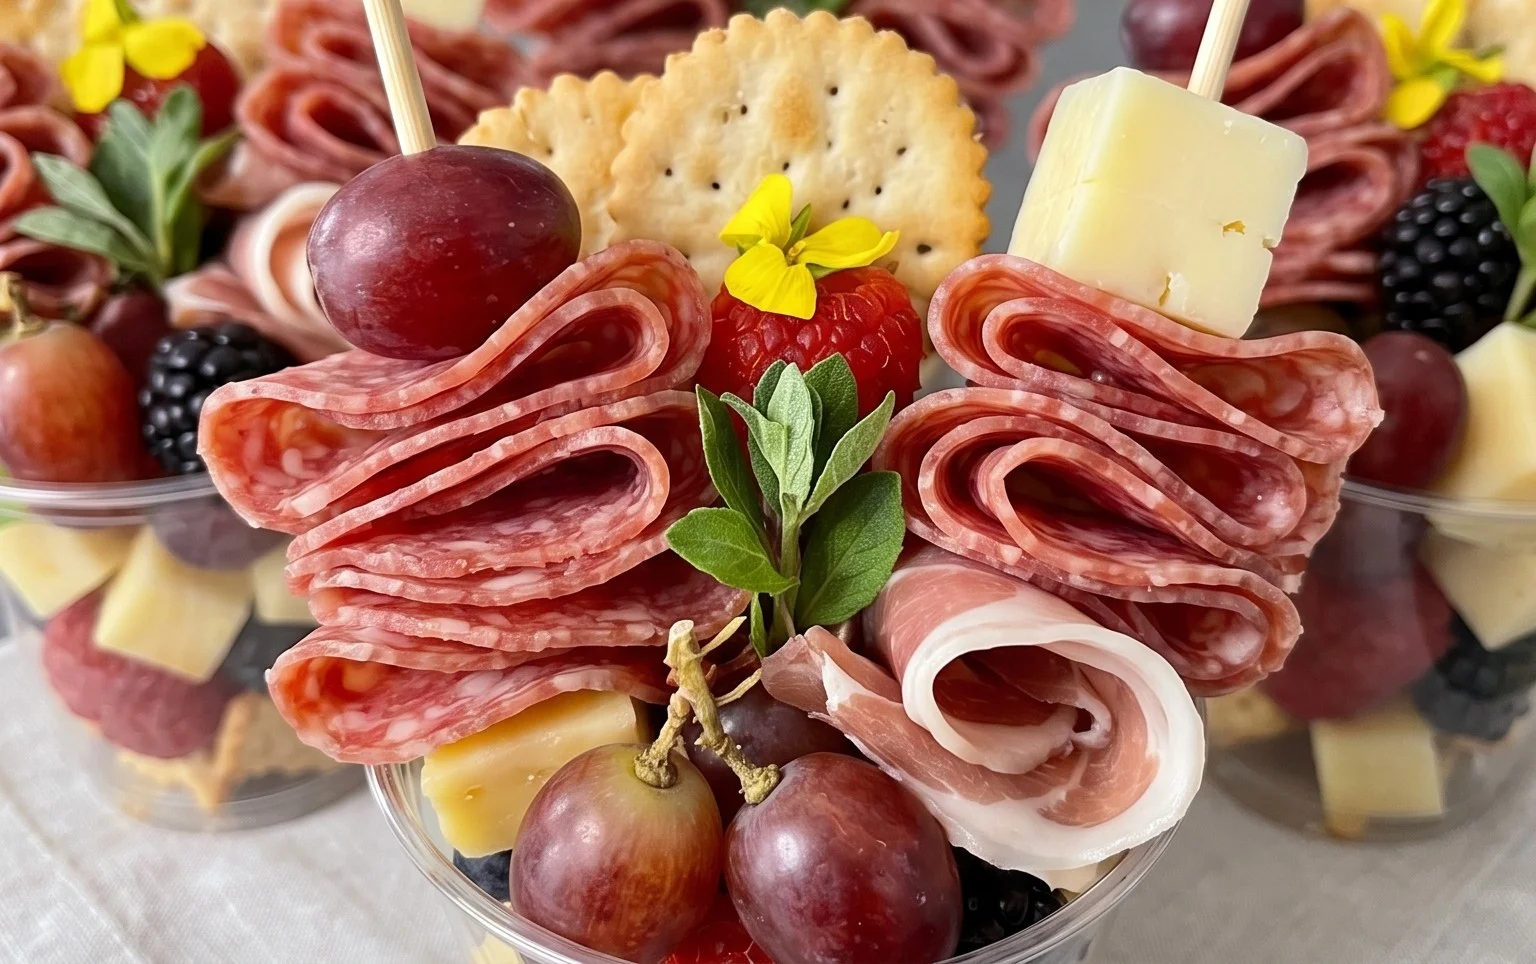
4. Add the Meats and Produce: Once your cheeses are in place, it’s time to introduce the star proteins and fresh elements. Artfully tuck the folded or rolled beef beef salami and beef beef prosciutto among the cheeses. Think about creating little peaks and valleys with the meats. Then, strategically place the thin cucumber slices, cherry tomatoes, and blackberries. Try to distribute the colors evenly throughout the cup for a vibrant aesthetic. The goal is to create a beautiful, cohesive presentation where all the elements are visible and accessible. You want each cup to look like a miniature work of art!
5. Fill in the Gaps and Add the Finishing Touches: With your main ingredients in place, you’ll likely have some small gaps to fill. This is where the pickled vegetables or olives come in handy. They add a briny kick and a pop of color. Carefully tuck them into any remaining spaces. Finally, it’s time for the crunch! Break or arrange your crackers so they can be easily grabbed. You can place a few crackers directly into the cup, or provide them on the side depending on your serving style. For an extra touch, you can also add a sprinkle of pecans to some of the cups, or even offer them in a small bowl alongside the cups for guests to add themselves. This provides another layer of texture and nutty flavor. Ensure each cup is well-balanced and looks appealing from all angles.
Enjoy your beautifully crafted individual charcuterie cups! They are perfect for any occasion and are guaranteed to impress.
Conclusion:
So there you have it – a fantastic and incredibly versatile way to elevate any gathering with our Individual Charcuterie Cups! These delightful creations are perfect because they offer a personalized, mess-free, and visually stunning presentation of classic charcuterie favorites. They’re ideal for everything from casual get-togethers and holiday parties to elegant brunches or even a sophisticated solo treat. Imagin extracte the delight on your guests’ faces as they discover their own perfectly portioned cup, brimming with delicious meats, cheeses, fruits, and crackers. The beauty of this recipe lies in its adaptability; you can tailor each cup to individual preferences or dietary needs. Don’t be afraid to get creative with your fillings! We highly encourage you to give this a try – it’s a guaranteed crowd-pleaser that’s surprisingly simple to assemble.
Frequently Asked Questions:
Can I prepare these charcuterie cups in advance?
Absolutely! You can assemble the majority of your Individual Charcuterie Cups a few hours ahead of time. It’s best to store any crackers or bread components separately in an airtight container to maintain their crispness and add them just before serving to prevent soggin extractess.
What are some good vegetarian or vegan variations?
For vegetarian options, focus on a variety of artisanal cheeses, olives, marinated artichoke hearts, roasted red peppers, fruits, nuts, and gourmet crackers. For vegan cups, swap the cheese for vegan cheese alternatives, use plant-based dips like hummus or tapenade, and load up on fresh and dried fruits, vegetables, and vegan-friendly crackers.
How much do these cost to make?
The cost can vary significantly depending on the quality and type of ingredients you choose. Using premium cured meats and imported cheeses will naturally be more expensive than selecting more budget-friendly options. However, by shopping snon-alcoholic ales and incorporating seasonal produce, you can create beautiful and delicious cups without breaking the bank.
Individual Charcuterie Cups
Create convenient and customizable individual charcuterie cups perfect for parties, gatherings, or personal enjoyment. These cups offer a balanced mix of savory meats, cheeses, fruits, vegetables, nuts, and crackers.
Ingredients
-
2 cups pecans
-
2 cups dried fruit (like dates and apricots)
-
8 ounces mozzarella pearls
-
8 ounces harvarti cheese (any flavor)
-
12 ounces sharp cheddar
-
8 ounces beef salami
-
3 ounces beef prosciutto
-
1 cup seedless cucumber (sliced thin)
-
1 cup cherry tomatoes
-
1 cup blackberries
-
1 cup pickled vegetables or olives
-
2 boxes crackers
Instructions
-
Step 1
Prepare all ingredients by washing, slicing, cubing, or portioning as needed for easy assembly. -
Step 2
Cut cheeses into bite-sized pieces. Slice or cube the harvarti and sharp cheddar. mozzarella pearls can be used whole. -
Step 3
Arrange meats by folding or rolling slices of beef salami and beef prosciutto. -
Step 4
Layer ingredients into individual cups or small bowls. Start with a base of pecans or dried fruit, then add cheese and meat selections. -
Step 5
Add fresh elements like cucumber slices, cherry tomatoes, and blackberries to provide freshness and color. -
Step 6
Incorporate pickled vegetables or olives for a briny contrast. -
Step 7
Serve each cup with a small portion of crackers on the side or tucked into the cup.
Important Information
Nutrition Facts (Per Serving)
It is important to consider this information as approximate and not to use it as definitive health advice.
Allergy Information
Please check ingredients for potential allergens and consult a health professional if in doubt.