Easy Chia Seed Pudding Recipe- Quick Healthy Dessert
Chia seed pudding recipe, a delightful and surprisingly simple dish, has taken the healthy eating world by storm. And honestly, I can totally see why! It’s one of those incredibly versatile treats that feels like a luxurious indulgence but is packed with goodness. What truly makes this chia seed pudding recipe so special is its magical transformation: tiny little chia seeds, when bathed in liquid, swell into a wonderfully thick, pudding-like consistency that’s both satisfying and incredibly good for you. It’s the perfect base for a myriad of flavors, making it a go-to for busy mornings, light desserts, or even a healthy afternoon snack. You’ll love how easy it is to customize, whether you’re a fan of tropical fruits, rich chocolate, or warming spices.
Ingredients:
The Magic of Chia Seed Pudding: Your Easy & Healthy Breakfast/Dessert
Hello there! If you’re looking for a breakfast or a light, satisfying dessert that’s as nourishing as it is delicious, you’ve come to the right place. Chia seed pudding is a revelation – incredibly simple to make, packed with goodness, and wonderfully versatile. It’s the perfect solution for those busy mornings when you need something quick, or when you crave a guilt-free treat in the afternoon. The beauty of chia seeds lies in their incredible ability to absorb liquid, transforming into a delightful pudding-like texture that’s both creamy and slightly gelatinous. Plus, they are a powerhouse of fiber, omega-3 fatty acids, and antioxidants, making this pudding a truly wholesome choice.
This recipe is the foundational version, a perfect starting point for your chia pudding journey. Once you master these simple steps, you’ll discover a world of flavor possibilities. Think fresh berries, tropical fruits, a sprinkle of nuts, or even a swirl of nut butter. But for now, let’s focus on creating that perfect base.
Crafting Your Perfect Chia Seed Pudding
The beauty of this recipe is its simplicity. There’s no cooking involved in the traditional sense; it’s all about patience and letting the ingredients work their magic. You simply combine everything, give it a good mix, and let time do the rest. The chia seeds will gradually absorb the liquid, swell up, and create that characteristic thick, pudding-like consistency. It’s like a little bit of culinary magic happening right in your fridge!
Here’s how we’ll bring this delightful dish to life, step-by-step:
1. Gather Your Supplies and Combine the Base Ingredients: First things first, grab a bowl or a jar. A mason jar with a lid is fantastic for this, as you can mix and store it all in one container. Pour your 3/4 cup of milk of choice into your chosen vessel. Then, add the 3 tablespoons of chia seeds directly into the milk. Don’t worry if they look like they’re just sitting there at first; that’s exactly what they should be doing. Next, add your 1 tablespoon of maple syrup. This is where you can adjust the sweetness to your liking. If you prefer it a little sweeter, feel free to add a touch more. Conversely, if you’re aiming for less sugar, you can reduce it slightly or use a sugar-free alternative. Finally, add the 1 teaspoon of vanilla extract. Vanilla adds a wonderful depth of flavor and aroma that complements the neutral taste of chia seeds beautifully.
2. Whisk or Stir Thoroughly to Prevent Clumping: This is arguably the most crucial step for achieving a smooth, lump-free pudding. Once all your ingredients are in the bowl or jar, it’s time to mix them. Use a whisk or a fork and stir vigorously for about 30-60 seconds. You want to ensure that all the chia seeds are fully submerged in the milk and that the maple syrup and vanilla are evenly distributed. Pay close attention to the bottom of the bowl or jar; sometimes, seeds can settle there. A thorough initial stir will prevent them from clumping together as they start to absorb the liquid. If you’re using a jar, you can simply put the lid on tightly and shake it very well instead of stirring.
3. Allow for Initial Hydration and a Second Stir: After your initial thorough mixing, let the mixture sit for about 5-10 minutes. During this short period, you’ll start to see the chia seeds begin extract to plump up and absorb some of the liquid. This is the perfect time for a second stir or shake. Go back in and give it another good mix. This second stir is almost as important as the first. It helps to break up any small clumps that might have formed and ensures that the seeds are evenly dispersed throughout the thickening liquid. This will contribute significantly to the final smooth texture of your pudding.
4. Chill to Allow for Full Gelatinization: Now that you’ve given the mixture a good start, it’s time for the pudding to do its thing. Cover your bowl or seal your jar tightly. Place it in the refrigerator. You’ll want to let it chill for a minimum of 2-3 hours, but for the best, most pudding-like consistency, I highly recommend leaving it overnight. During this time, the chia seeds will absorb the majority of the liquid, swell to many times their origin extractal size, and create that characteristic thick, gelatinous, and spoonable texture. The longer it chills, the thicker and more pudding-like it will become.
5. Check Consistency and Serve: Once your chia pudding has had ample time to chill and thicken, it’s ready to be enjoyed! Before serving, give it a quick stir. It should be thick and creamy, with the chia seeds suspended throughout. If you find it’s too thick for your liking, you can add a splash more milk and stir it in until you reach your desired consistency. If, by chance, it’s not quite thick enough (this is rare if you’ve allowed it enough time), you can always add another teaspoon or two of chia seeds and let it chill for another hour. Spoon your delicious chia seed pudding into bowls or glasses. Now comes the fun part: toppings!
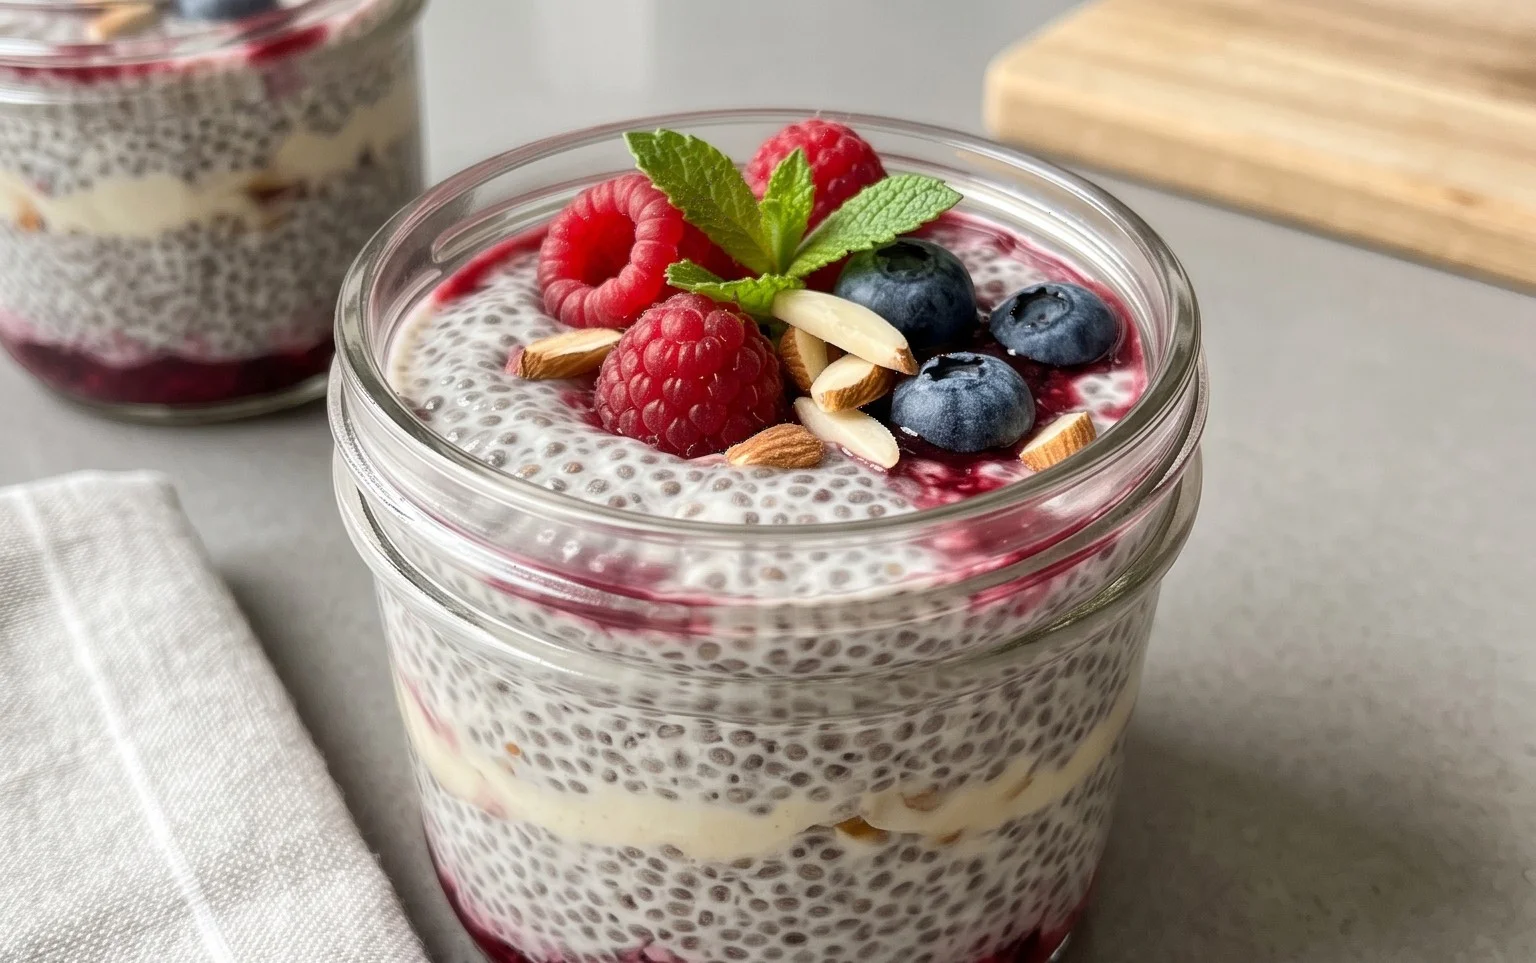
Enjoy your homemade chia seed pudding just as it is, or get creative with your favorite additions. A sprinkle of fresh berries, a dollop of Greek yogurt, a handful of granola, or a drizzle of honey can elevate this simple treat into something truly special. Happy pudding making!

Conclusion:
As you can see, making delicious and healthy chia seed pudding is incredibly simple and rewarding. This versatile recipe is a fantastic go-to for busy mornings, a light afternoon snack, or even a guilt-free dessert. The magic lies in the humble chia seed, which transforms into a delightful, pudding-like consistency when soaked, offering a wonderful source of fiber, omega-3 fatty acids, and plant-based protein.
I love serving my chia seed pudding chilled, topped with fresh berries, a sprinkle of granola for crunch, or a drizzle of honey. For variations, don’t be afraid to experiment! Try adding cocoa powder for a chocolatey treat, a touch of vanilla extract, or even some mashed banana for natural sweetness. You can also explore different plant-based milks like almond, oat, or coconut milk to discover your favorite flavor profile. This recipe is truly a blank canvas for your culinary creativity. I truly encourage you to give this easy chia seed pudding recipe a try – I’m confident you’ll be hooked!
Frequently Asked Questions (FAQs)
How long does chia seed pudding last in the refrigerator?
Chia seed pudding can typically be stored in an airtight container in the refrigerator for 3 to 5 days. The texture might thicken slightly over time, but it generally remains delicious.
Can I make chia seed pudding without any sweetener?
Absolutely! While sweeteners like honey, maple syrup, or agave add a pleasant sweetness, you can omit them entirely. The natural sweetness from fruits you add as toppings can often be enough.
Why is my chia seed pudding not thickening?
If your chia seed pudding isn’t thickening, it’s usually because there wasn’t enough chia seed for the amount of liquid, or it didn’t have enough time to soak. Ensure you’re using the correct ratio of chia seeds to liquid (typically 1:4 or 1:5), and allow it to sit in the refrigerator for at least 2-4 hours, or preferably overnight, for optimal thickening. You can also give it a good stir after about 30 minutes to prevent clumping.
Chia Seed Pudding Recipe
A simple and healthy chia seed pudding recipe that’s quick to prepare and customize.
Ingredients
-
3 tablespoons chia seeds
-
1 tablespoon maple syrup
-
1 teaspoon vanilla extract
-
3/4 cup almond milk
-
1/4 cup berries (for topping)
-
1 tablespoon shredded coconut (for topping)
Instructions
-
Step 1
In a bowl or jar, combine the chia seeds, maple syrup, and vanilla extract. -
Step 2
Pour in the milk of your choice and stir well to combine, ensuring there are no clumps of chia seeds. -
Step 3
Let the mixture sit for 5 minutes, then stir again thoroughly to break up any gelled clumps. -
Step 4
Cover the bowl or jar and refrigerate for at least 2 hours, or preferably overnight, until thickened. -
Step 5
Once thickened, spoon the chia seed pudding into a serving bowl. -
Step 6
Top with fresh berries and shredded coconut before serving.
Important Information
Nutrition Facts (Per Serving)
It is important to consider this information as approximate and not to use it as definitive health advice.
Allergy Information
Please check ingredients for potential allergens and consult a health professional if in doubt.