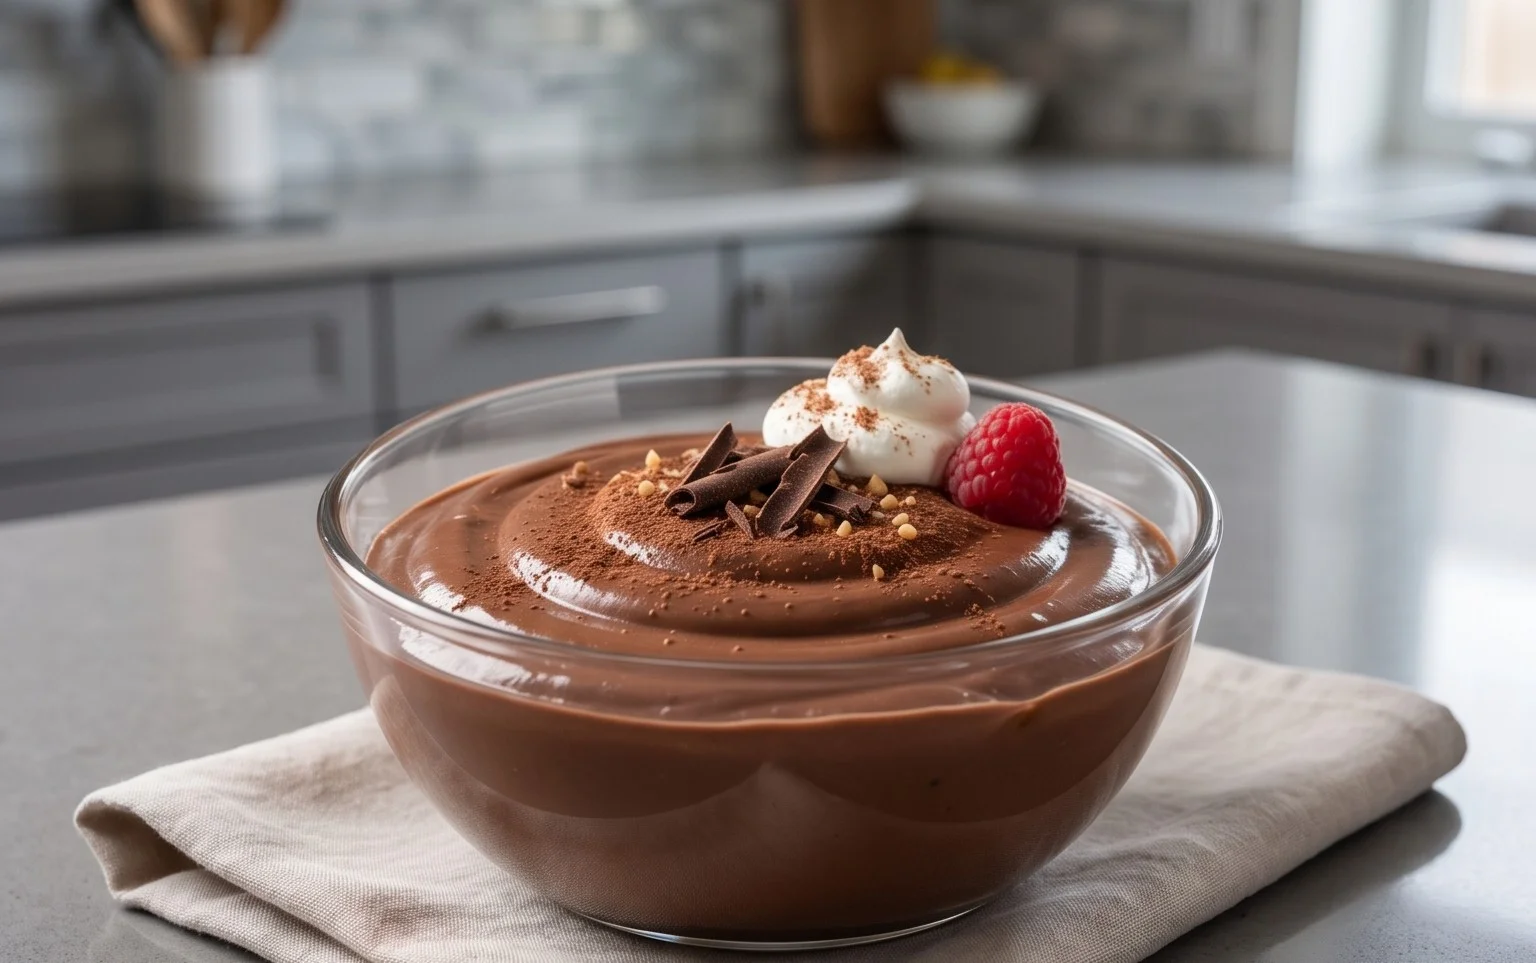
Easy Chocolate Protein Pudding – Healthy & Delicious
Chocolate Protein Pudding Recipe: Get ready to indulge your sweet tooth while fueling your body with this incredibly satisfying Chocolate Protein Pudding Recipe. We all crave that rich, decadent chocolate fix, right? But what if I told you that you could have it all – intense chocolatey goodness, a luxuriously smooth texture, and a serious protein boost – without the guilt? That’s the magic of this simple yet spectacular dessert. It’s the perfect post-workout treat, a healthy afternoon pick-me-up, or even a delightful way to end your day. Forget chalky protein bars or bland shakes; this chocolate protein pudding recipe transforms basic ingredients into a gourmet-level dessert that truly tastes like a cheat meal. Its special ability to be both a delicious treat and a nutritional powerhouse makes it an absolute game-changer for anyone looking to incorporate more protein into their diet in the most enjoyable way possible.
Chocolate Protein Pudding Recipe
Looking for a guilt-free, delicious dessert that will satisfy your sweet tooth and boost your protein intake? Look no further! This Chocolate Protein Pudding recipe is a game-changer. It’s incredibly easy to make, requires no baking, and is packed with flavor. I love having this on hand for a quick post-workout treat, a healthy snack, or even a decadent-yet-nutritious dessert. The best part is that it’s completely customizable, so you can adjust the sweetness and chocolate intensity to your liking. Let’s dive into what you’ll need to create this creamy delight.
Ingredients:
Crafting Your Creamy Chocolate Dream
This recipe is designed for simplicity and maximum flavor. We’re leveragin extractg the natural creaminess of Greek yogurt as our base, making it a fantastic source of protein and probiotics. The chocolate protein powder is our star ingredient for that rich, satisfying chocolate punch and an extra protein boost. Unsweetened cocoa powder deepens the chocolate flavor, while vanilla extract adds a subtle layer of sweetness and complexity. Finally, maple syrup provides just the right amount of sweetness to round everything out. You can certainly play around with the amount of maple syrup – if you prefer a less sweet pudding, start with 1 tablespoon and taste as you go. Conversely, if you have a serious sweet craving, you might want to add a touch more. Remember, the protein powder itself can sometimes have a sweetness component, so tasting is key!
The Simple Steps to Pudding Perfection
Here’s how to whip up this delightful treat. This process is so straightforward, you’ll be enjoying your pudding in no time. The key is to ensure everything is thoroughly combined for the smoothest texture.
1. Prepare Your Base: Start by placing the 5 cups of Greek yogurt into a large mixing bowl. If you’re using plain Greek yogurt, this is where you’ll get the most control over the sweetness. If you opt for vanilla Greek yogurt, it will add a touch of sweetness and vanilla flavor right from the start, so you might need slightly less added sweetener. Give the yogurt a good stir with a whisk or a spoon to break up any clumps and ensure a smooth consistency before adding other ingredients. This step helps prevent lumps later on.
2. Introduce the Chocolatey Goodness: Add the 4 scoops of chocolate protein powder to the bowl with the Greek yogurt. When measuring your protein powder, it’s helpful to know the typical tablespoon conversion for your specific brand. Generally, 2 to 3 tablespoons per scoop is a good estimate. Sift the protein powder if it tends to clump easily, which will help it incorporate more smoothly into the yogurt. Following this, add the 3 to 4 tablespoons of unsweetened cocoa powder. Again, for a more intense chocolate flavor, lean towards the higher end of this range. If you’re a serious chocoholic like me, you might even consider adding an extra teaspoon or two of cocoa powder for an even richer taste.
3. Enhance the Flavor Profile: Now, it’s time to add the flavor enhancers. Pour in the 1 teaspoon of vanilla extract. This might seem like a small amount, but vanilla plays a crucial role in bringin extractg out the other flavors and adding a warm, comforting note to the chocolate. Next, drizzle in the 2 tablespoons of maple syrup. As mentioned earlier, you can adjust this amount based on your preference. If you’re aiming for a truly sugar-free option, you could explore using a sugar substitute like stevia or erythritol, adding it gradually to achieve your desired sweetness.
4. Whip It Up Until Smooth: This is the most important step for achieving a pudding-like texture. Using an electric mixer (handheld or stand mixer) is highly recommended for this stage to ensure the smoothest and creamiest result. Start on a low speed to initially combine the ingredients, then gradually increase the speed to medium-high. Mix for at least 3 to 5 minutes, or until the mixture is completely smooth and there are no visible streaks of protein powder or cocoa powder. You want a uniform, thick, and luscious consistency. If you don’t have an electric mixer, you can use a whisk and a lot of elbow grease, but it will take longer and may not achieve the same level of smoothness. Scrape down the sides of the bowl periodically to ensure all ingredients are incorporated.
5. Chill and Enjoy: Once your pudding is perfectly smooth and well-combined, cover the bowl tightly with plastic wrap or transfer the pudding to individual serving dishes or a larger container. Place the pudding in the refrigerator for at least 2 to 4 hours. This chilling time is essential. It allows the flavors to meld together and the pudding to firm up to that delightful, spoonable consistency. The longer it chills, the thicker and more decadent it will become. Before serving, give it a quick stir.
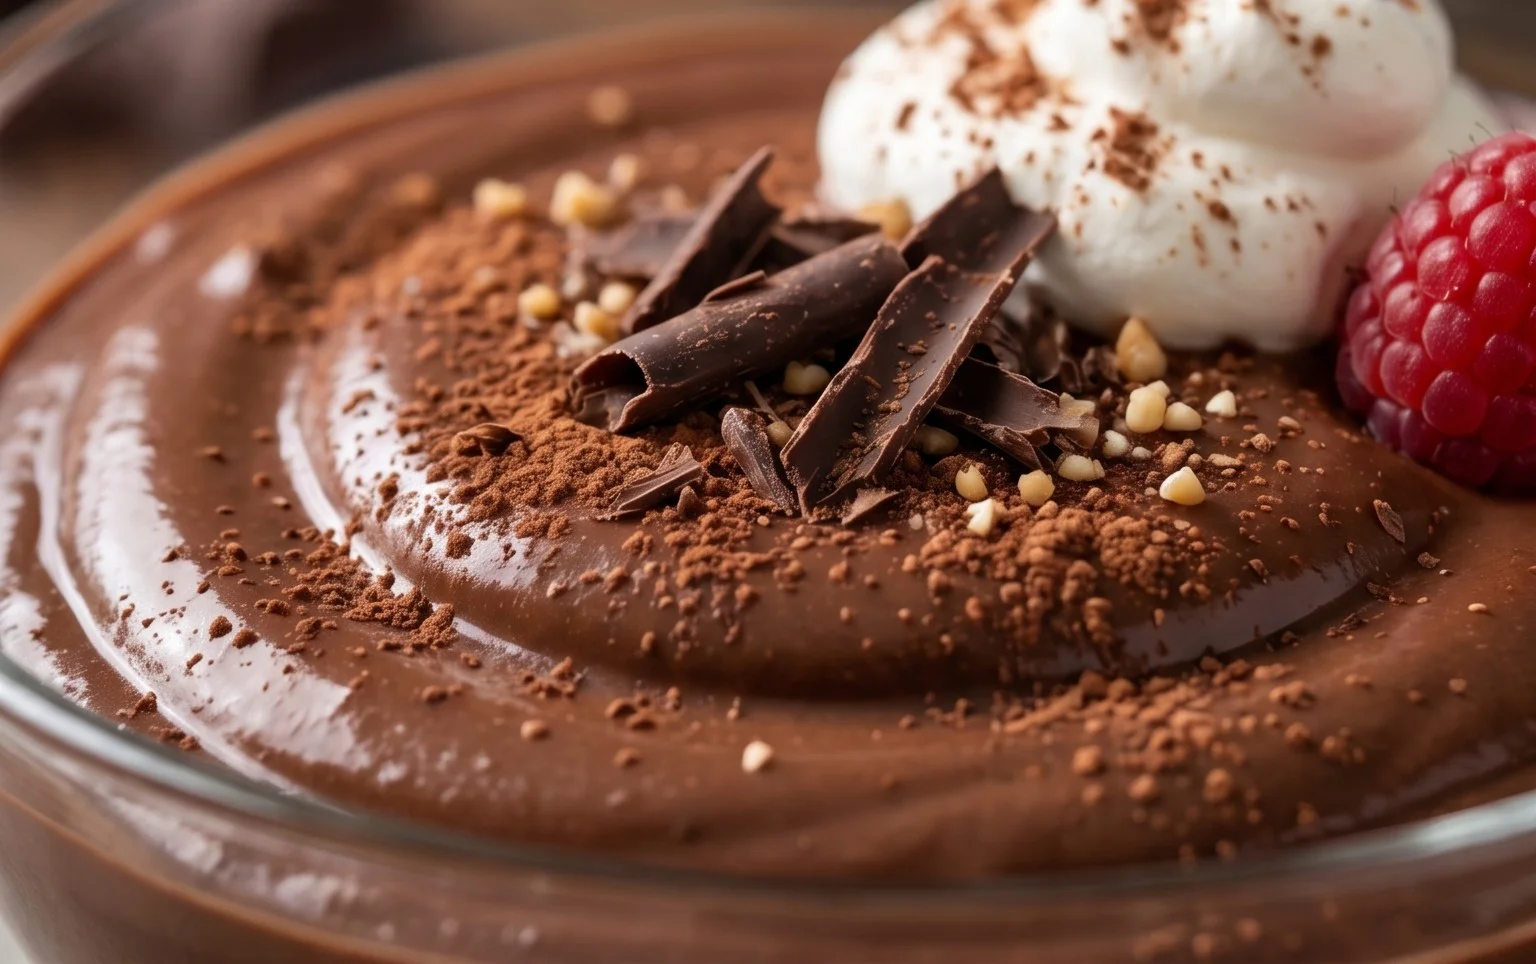
This Chocolate Protein Pudding is incredibly versatile. It’s delicious on its own, but you can also elevate it with your favorite toppings. Consider fresh berries, a sprinkle of chopped nuts, a dollop of whipped cream, or even some dark chocolate shavings for an extra indulgence. It’s a fantastic option for meal prep, as it can be stored in the refrigerator for up to 4-5 days, making it a convenient and healthy choice throughout the week. Enjoy your homemade protein-packed treat!
Conclusion:
So there you have it – a ridiculously easy and incredibly satisfying Chocolate Protein Pudding that’s perfect for anyone looking to indulge their sweet tooth without derailing their health goals. This recipe is a game-changer because it’s not only delicious, but it’s also packed with protein, making it an ideal post-workout treat, healthy dessert, or even a substantial snack to keep you fueled throughout the day. Its creamy texture and rich chocolate flavor are sure to impress, and the best part is how adaptable it is!
I love serving this pudding chilled, perhaps topped with a few fresh berries for a touch of tartness, a sprinkle of cacao nibs for extra crunch, or even a dollop of Greek yogurt for added creaminess and protein. For variations, don’t be afraid to get creative! You can swap the cocoa powder for carob powder for a caffeine-free option, add a dash of espresso powder to enhance the chocolate flavor, or even swirl in some peanut butter or almond butter for a nutty twist. Don’t forget to experiment with different protein powder flavors – vanilla or even unflavored protein powder can work beautifully. I truly encourage you to give this Chocolate Protein Pudding Recipe a try; you won’t be disappointed with this guilt-free indulgence!
Frequently Asked Questions:
Can I make this pudding ahead of time?
Absolutely! This Chocolate Protein Pudding Recipe is fantastic for meal prep. You can make a batch and store it in airtight containers in the refrigerator for up to 3-4 days. The flavors often meld even more beautifully over time, making it even more delicious on day two or three.
What kind of protein powder works best?
I’ve found that most types of protein powder work well, including whey, casein, and plant-based options like pea or soy protein. The texture might vary slightly depending on the protein powder you use, so you may need to adjust the liquid content a little to reach your desired consistency.
Is this recipe suitable for a vegan diet?
Yes, with a few simple substitutions! Ensure you use a plant-based protein powder and a dairy-free milk alternative like almond milk, soy milk, or oat milk. You can also use a dairy-free yogurt alternative if you’re adding that for extra creaminess.
Chocolate Protein Pudding
A quick and easy, high-protein chocolate pudding made with Greek yogurt.
Ingredients
-
5 cups Greek yogurt (full-fat, plain or vanilla)
-
4 scoops chocolate protein powder
-
3 to 4 tablespoons unsweetened cocoa powder
-
1 teaspoon vanilla extract
-
2 tablespoons maple syrup
Instructions
-
Step 1
In a large bowl, combine the Greek yogurt and chocolate protein powder. -
Step 2
Add the unsweetened cocoa powder and vanilla extract to the bowl. -
Step 3
Pour in the maple syrup. -
Step 4
Whisk all ingredients together until smooth and well combined. Ensure no lumps of protein powder or cocoa remain. -
Step 5
Divide the pudding into serving dishes. -
Step 6
Chill in the refrigerator for at least 30 minutes before serving to allow it to thicken.
Important Information
Nutrition Facts (Per Serving)
It is important to consider this information as approximate and not to use it as definitive health advice.
Allergy Information
Please check ingredients for potential allergens and consult a health professional if in doubt.