Easy Peach Upside Down Mini Cakes Recipe
Peach Upside Down Mini Cakes are about to become your new favorite dessert obsession. Imagin extracte biting into a perfectly moist cake, crowned with caramelized, golden peaches that have been kissed by sweet brown sugar. There’s something undeniably comforting and celebratory about an upside down cake, isn’t there? It’s the ultimate surprise – the beautiful fruit topping is hidden beneath until you flip it over, revealing a glistening, delicious masterpiece. What makes these Peach Upside Down Mini Cakes so special is their individual charm. Each little cake delivers that classic, beloved flavor profile in a perfectly portioned, adorable package. They’re ideal for parties, potlucks, or simply when you crave a touch of sunshine and sweetness. Get ready to impress yourself and everyone around you with these delightful treats.
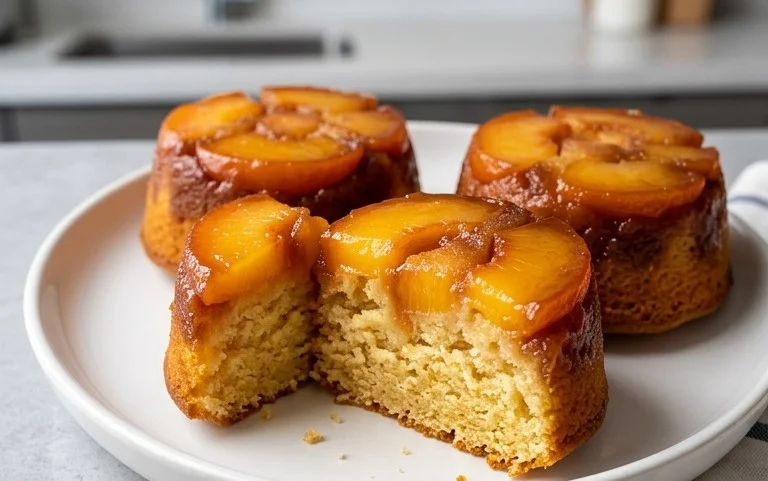
Peach Upside Down Mini Cakes
There’s something undeniably charming about mini cakes. They’re perfectly portioned, impossibly cute, and feel like a special treat. And when you combine that with the irresistible, caramelized goodness of a peach upside-down cake, you have a dessert that’s simply divine. These Peach Upside Down Mini Cakes are incredibly easy to make, even for begin extractners, and are sure to impress. The juicy peaches soften and caramelize beautifully in a brown sugar glaze at the bottom of each ramekin, creating a vibrant topping that gets flipped onto a tender, subtly spiced cake. They’re perfect for brunch, a potluck, or just a delightful afternoon pick-me-up.
Ingredients:
Cooking Instructions
The magic of upside-down cakes lies in their preparation – a little bit of assembly at the begin extractning leads to a show-stopping reveal at the end. We’ll start by preparing our ramekins and creating that luscious caramelized peach topping.
Step 1: Preparing the Ramekins and Peach Topping
First things first, we need to get our vessels ready. Gather about six 6-ounce ramekins or a standard muffin tin (you might get around 9-10 mini muffins from this recipe). Generously spray the inside of each ramekin or muffin cup with non-stick cooking spray. This is crucial for ensuring your beautiful cakes release easily without sticking. Next, take that 1 tablespoon of cold unsalted butter and cut it into small cubes. Place one cube of cold butter into each ramekin or muffin cup. Now, add 1 teaspoon of light brown sugar on top of the butter in each ramekin or cup. This will melt and create the glorious caramel layer.
Step 2: Preparing the Peaches
For the star of our show, the peaches! We’ll need about 3 medium-sized fresh peaches. To easily peel them, you can blanch them first. Bring a pot of water to a boil and prepare an ice bath. Score a small “X” on the bottom of each peach. Carefully drop them into the boiling water for about 30-60 seconds, until you see the skins starting to loosen around the “X”. Immediately transfer the peaches to the ice bath. Once they’re cool enough to handle, the skins should slip right off. Halve the peaches, remove the pits, and then slice them into about ½-inch thick wedges. Arrange these peach slices attractively in the bottom of each prepared ramekin or muffin cup, making sure they cover the butter and brown sugar mixture. Don’t overcrowd them; one or two good slices per ramekin is usually perfect.
Step 3: Making the Cake Batter
Now, let’s whip up the cake batter. In a medium bowl, whisk together the all-purpose flour, baking powder, baking soda, and salt. This dry ingredient mixture will form the base of our tender cake. In a separate large bowl, cream together the 1/3 cup of room temperature unsalted butter and the 2/3 cup of granulated sugar. You can use an electric mixer for this, or a whisk and some elbow grease. Beat them until the mixture is light and fluffy. This creaming process incorporates air, which helps create a lighter cake texture. Next, beat in the large egg and the pure vanilla extract until well combined. Scrape down the sides of the bowl as needed.
Step 4: Combining Wet and Dry Ingredients
Now we’ll bring our batter together. Gradually add the dry ingredients to the wet ingredients, alternating with the buttermilk. Start by adding about one-third of the dry ingredients and mix on low speed (or stir gently) until just combined. Then, add half of the buttermilk and mix again until just combined. Continue this process, adding another third of the dry ingredients, the remaining buttermilk, and finally the last of the dry ingredients. Be careful not to overmix the batter. Overmixing can develop the gluten in the flour too much, resulting in a tough cake. Mix only until you no longer see streaks of dry flour. The batter should be smooth and relatively thick.
Step 5: Baking the Mini Cakes
Preheat your oven to 350 degrees Fahrenheit (175 degrees Celsius). Carefully divide the cake batter evenly among the prepared ramekins or muffin cups, filling them about two-thirds full. This leaves room for the cakes to rise. Place the filled ramekins or muffin tin on a baking sheet to catch any potential drips. Bake for approximately 20-25 minutes for ramekins, or 18-22 minutes for muffin cups. The cakes are done when a toothpick inserted into the center comes out clean. The tops should be golden brown, and the edges should start to pull away slightly from the sides of the ramekins.
Step 6: The Grand Reveal!
This is the moment of truth! Once the cakes are out of the oven, let them cool in their ramekins or muffin tin for about 5-10 minutes. This brief cooling period allows the caramel to set slightly, making inversion easier. To invert them, place a serving plate or platter over the top of each ramekin or muffin cup. Carefully and confidently, flip the whole thing over. If you greased and sugared them well, the cakes should slide right out. If a peach slice sticks, you can gently coax it out with a small spatula and place it back on top of the cake. Allow them to cool a little more before serving. They are absolutely delicious served warm, perhaps with a dollop of whipped cream or a scoop of vanilla ice cream. Enjoy these delightful little bursts of peachy perfection!
Note 1: You can use canned peaches if fresh ones are out of season, but drain them very well. Ensure they are sliced, not halves or chunks.
Note 2: If you don’t have buttermilk, you can make a substitute by adding 1 ½ teaspoons of white vinegar or lemon juice to ½ cup of milk and letting it sit for 5-10 minutes until it curdles.
Conclusion:
There you have it – your guide to creating delightful Peach Upside Down Mini Cakes! These charming little treats are a perfect testament to the magic of simple, seasonal ingredients. The beautiful caramelization of the peaches paired with the tender, moist cake batter creates a symphony of flavors and textures that is simply irresistible. Whether you’re looking for a show-stopping dessert for a special occasion or a sweet indulgence just because, these mini cakes are guaranteed to impress.
I love serving these warm, perhaps with a dollop of vanilla bean ice cream or a drizzle of extra caramel sauce. They also make for a wonderful brunch treat alongside a cup of coffee. Don’t be afraid to get creative with variations! You can swap the peaches for other stone fruits like plums or apricots, or even use canned peaches if fresh aren’t in season. Adding a pinch of cinnamon or a hint of gin extractger to the batter can also add a wonderful depth of flavor.
I truly encourage you to give these Peach Upside Down Mini Cakes a try. They are surprisingly easy to make and the results are incredibly rewarding. Get ready to enjoy a taste of summer sunshine in every bite!
Frequently Asked Questions:
Q: Can I make these Peach Upside Down Mini Cakes ahead of time?
A: Yes, you absolutely can! The cakes can be baked and cooled a day in advance. Store them in an airtight container at room temperature. For the best flavor and texture, gently reheat them in a low oven for a few minutes before serving.
Q: What kind of pan should I use for these mini cakes?
A: A standard muffin tin or mini muffin tin works perfectly for these Peach Upside Down Mini Cakes. If you don’t have either, you can also use individual ramekins, ensuring they are well-greased and floured.
Q: My caramel is sticking to the bottom of the pan, what did I do wrong?
A: This usually happens if the caramel isn’t heated sufficiently to become liquid, or if the cakes are left to cool completely in the pan. It’s important to let the cakes cool for just a few minutes in the tin before inverting them onto a wire rack. This allows the caramel to set slightly but remain pliable enough to release.
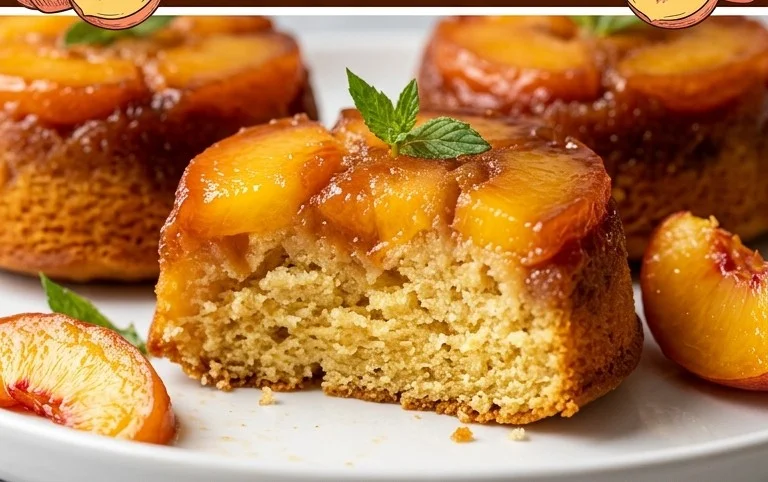
Peach Upside Down Mini Cakes
Delightful individual cakes with a caramelized peach topping, perfect for a sweet treat.
Ingredients
-
Non-stick cooking spray
-
1 tablespoon unsalted butter (cold)
-
6 teaspoons light brown sugar
-
3 fresh peaches (peeled, pitted, and sliced)
-
1 ½ cups all-purpose flour
-
1 teaspoon baking powder
-
½ teaspoon baking soda
-
¼ teaspoon salt
-
2/3 cup granulated sugar
-
1/3 cup unsalted butter (at room temperature)
-
1 large egg (at room temperature)
-
1 teaspoon pure vanilla extract
-
½ cup buttermilk (at room temperature)
Instructions
-
Step 1
Preheat oven to 350°F (175°C). Lightly grease and flour 6 muffin cups or use non-stick cooking spray. -
Step 2
In each muffin cup, place 1 teaspoon of light brown sugar and a small piece (about 1/6 tablespoon) of cold butter. Top with a few peach slices, arranging them attractively at the bottom of each cup. -
Step 3
In a medium bowl, whisk together the all-purpose flour, baking powder, baking soda, and salt. -
Step 4
In a large bowl, cream together the granulated sugar and room temperature butter until light and fluffy. Beat in the egg and vanilla extract until well combined. -
Step 5
Gradually add the dry ingredients to the wet ingredients, alternating with the buttermilk, beginning and ending with the dry ingredients. Mix until just combined, being careful not to overmix. -
Step 6
Spoon the batter evenly over the peaches in the prepared muffin cups, filling each about two-thirds full. -
Step 7
Bake for 20-25 minutes, or until a toothpick inserted into the center comes out clean. Let cool in the muffin tin for 5 minutes before inverting onto a wire rack to cool completely. Serve warm.
Important Information
Nutrition Facts (Per Serving)
It is important to consider this information as approximate and not to use it as definitive health advice.
Allergy Information
Please check ingredients for potential allergens and consult a health professional if in doubt.