Easy Dill Dip Recipe – Quick & Delicious Appetizer
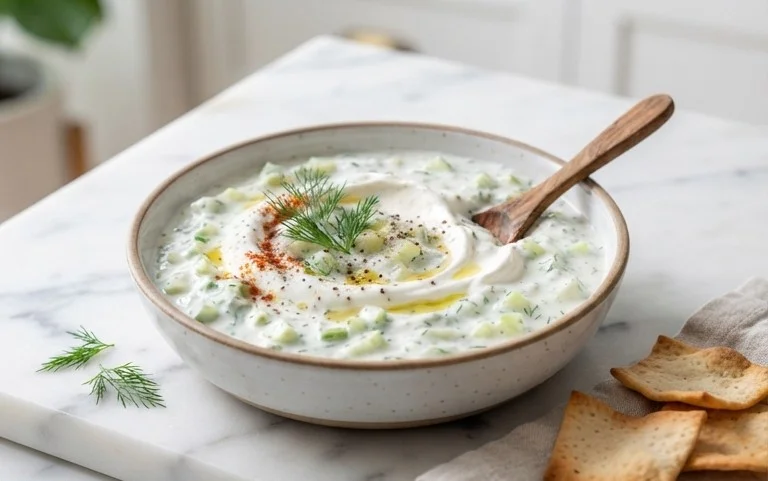
Dill dip is more than just a condiment; it’s a creamy, herbaceous hug in a bowl that instantly elevates any gathering. Have you ever experienced that moment when you’re at a party, and you stumble upon a bowl of the most unbelievably delicious dip, only to discover it’s a classic dill dip? It’s pure magic, isn’t it? That’s the power of this humble yet magnificent creation. People adore dill dip because it’s effortlessly versatile, pairing beautifully with everything from crunchy crudités and salty chips to grilled chicken and baked salmon. What truly sets this dill dip apart, and why it’s a perennial favorite, is the vibrant burst of fresh dill, perfectly balanced with a tangy, creamy base. It’s a flavor explosion that’s both comforting and sophisticated, making it the unsung hero of any appetizer spread.
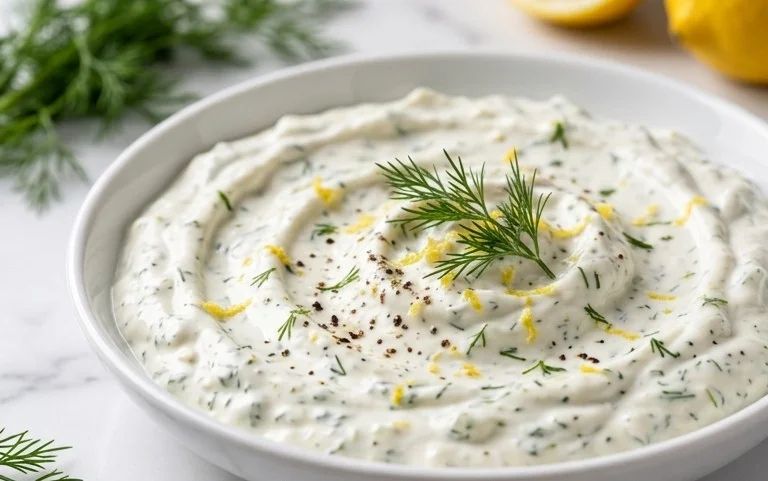
Dill Dip
There are some recipes that are so simple, so universally loved, and so incredibly versatile that they become staples in any kitchen. My dill dip is one of those recipes. It’s the kind of dish that can elevate a simple platter of vegetables, add a creamy, herbaceous punch to a sandwich, or be the star of any appetizer spread. It’s incredibly easy to make, requiring no cooking whatsoever, and the fresh flavors of dill and parsley, combined with the tangy creaminess of mayonnaise and sour cream, are simply irresistible. This dip is perfect for potlucks, game nights, or just a casual afternoon snack. The beauty of this recipe lies in its simplicity and the quality of its fresh ingredients.
Why You’ll Love This Dill Dip
This dill dip is a crowd-pleaser for good reason. It’s:
Let’s get started on this delightful dip!
Ingredients:
Crafting the Perfect Dill Dip
Making this dip is a breeze, and the results are so rewarding. The key to a fantastic dill dip is using fresh herbs and allowing the flavors to meld together. Here’s how you can create this simple yet sensational dip:
Step 1: Combine the Creamy Bases
In a medium-sized mixing bowl, add your mayonnaise and sour cream. It’s important to use full-fat mayonnaise and sour cream for the richest flavor and creamiest texture. If you’re looking to lighten it up slightly, you could experiment with light versions, but be aware that the texture might be a bit thinner. Ensure your sour cream is at room temperature or slightly softened, as this will make it much easier to combine with the mayonnaise without any lumps. Gently stir these two ingredients together until they are thoroughly blended and smooth. A whisk can be helpful here to ensure a completely uniform base, but a sturdy spoon will also do the job perfectly.
Step 2: Introduce the Dried Onion Flavor
Next, add the onion flakes to the creamy mixture. These flakes provide a subtle yet distinct oniony flavor without the sharp bite of raw onion. They also rehydrate as they sit in the dip, softening beautifully. Make sure to distribute the onion flakes evenly throughout the mayonnaise and sour cream mixture. Stir them in thoroughly, ensuring there are no dry pockets of flakes. This step adds a foundational savory note that complements the fresh herbs wonderfully.
Step 3: Incorporate the Fresh Herbs
Now for the stars of the show: the fresh dill and parsley. Finely chop your fresh dill and parsley. The finer the chop, the more evenly the flavor will be distributed throughout the dip. You want to be able to taste the herbs in every bite, not have large chunks of them. Add the chopped dill and parsley to the bowl. Gently fold them into the creamy base. Be careful not to overmix at this stage, as you want to maintain the fresh, vibrant color and aroma of the herbs. The dill should be the dominant flavor, so don’t be shy with it!
Step 4: Season to Perfection
This is where you’ll bring all the flavors together with a touch of seasoned salt. Add the seasoned salt to the dip. Seasoned salt, like Lawrey’s, is fantastic because it already contains a blend of salt, pepper, and other subtle spices that enhance the overall flavor profile without needing to add individual seasonings. Stir everything together until it’s well combined. Taste the dip at this point. This is your opportunity to adjust the seasoning. If you prefer a saltier dip, add a tiny bit more seasoned salt. If you want a more pronounced herbal flavor, you could add a touch more dill or parsley, though I find the given amounts to be just right for a balanced taste.
Step 5: Chill and Allow Flavors to Meld
This is arguably the most important step for any dip: chilling! Cover the bowl tightly with plastic wrap or transfer the dip to an airtight container. Refrigerate the dill dip for at least 1 hour. This resting period is crucial. It allows the flavors to meld and deepen, the dried onion flakes to soften, and the dip to reach its ideal consistency. For the absolute best flavor, I recommend chilling it for at least 2-3 hours, or even overnight. The longer it chills, the more developed and harmonious the flavors will become. Before serving, give it a quick stir.
This dill dip is incredibly versatile. Serve it with a colorful array of fresh vegetables like carrot sticks, celery sticks, bell pepper strips, broccoli florets, and cherry tomatoes. It’s also a perfect accompaniment to potato chips, crackers, pretzels, or pita bread. Don’t be afraid to use it as a spread for sandwiches, wraps, or even as a topping for baked potatoes or grilled chicken. Enjoy!
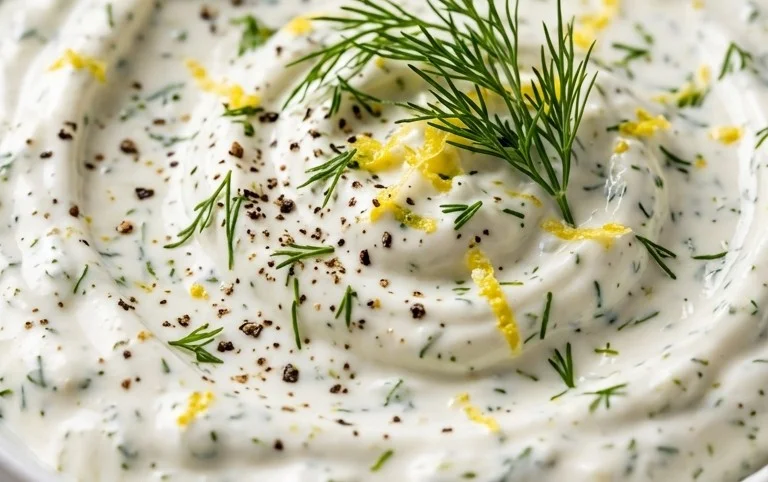
Conclusion:
I truly hope you’ve enjoyed learning how to make this incredibly versatile and delicious Dill Dip! Its simplicity is what makes it so wonderful – requiring just a handful of common ingredients and minimal effort, you can whip up a crowd-pleasing appetizer in no time. This recipe is a winner because it’s fresh, flavorful, and perfectly balances the herbaceous notes of dill with a creamy, tangy base. It’s an absolute go-to for gatherings, casual get-togethers, or even just a delightful snack for yourself.
The beauty of this dill dip lies in its adaptability. Serve it as is with an assortment of crunchy vegetables like carrots, celery, bell peppers, and cucumber slices. It’s also fantastic alongside a charcuterie board, with crackers, pretzels, or even as a topping for baked potatoes or grilled chicken. Don’t be afraid to experiment with variations! Consider adding a pinch of garlic powder for an extra kick, a dash of lemon zest for brightness, or even some finely chopped chives for added texture and flavor. I encourage you to give this delightful dill dip recipe a try; I’m confident you’ll find it as easy and satisfying to make as it is to devour.
Frequently Asked Questions about Dill Dip:
How long does this dill dip last in the refrigerator?
This dill dip will stay fresh and delicious in an airtight container in the refrigerator for up to 3-4 days. The flavors actually tend to meld and deepen over time, making it even better on the second day!
Can I make this dill dip vegan?
Absolutely! To make a vegan dill dip, simply substitute the sour cream and mayonnaise with their plant-based alternatives. Look for vegan sour cream and vegan mayonnaise made from ingredients like cashews, tofu, or soy. The dill and other seasonings will still shine through beautifully.
What if I don’t have fresh dill?
If you don’t have fresh dill on hand, you can definitely use dried dill. A good rule of thumb is to use about one-third of the amount of dried dill as you would fresh. So, if the recipe calls for 2 tablespoons of fresh dill, start with about 2 teaspoons of dried dill and adjust to your taste. Keep in mind that dried dill has a more concentrated flavor.
Dill Dip
A classic and creamy dill dip perfect for vegetables, chips, or as a spread.
Ingredients
-
1 cup mayonnaise
-
1 cup sour cream
-
2 tablespoons onion flakes
-
3 tablespoons fresh dill
-
1 tablespoon fresh parsley
-
1 teaspoon seasoned salt
Instructions
-
Step 1
In a medium bowl, combine the mayonnaise and sour cream. -
Step 2
Add the onion flakes to the bowl. -
Step 3
Stir in the fresh dill. -
Step 4
Add the fresh parsley. -
Step 5
Season with the seasoned salt. -
Step 6
Mix all ingredients thoroughly until well combined. For best flavor, let the dip chill in the refrigerator for at least 30 minutes before serving.
Important Information
Nutrition Facts (Per Serving)
It is important to consider this information as approximate and not to use it as definitive health advice.
Allergy Information
Please check ingredients for potential allergens and consult a health professional if in doubt.