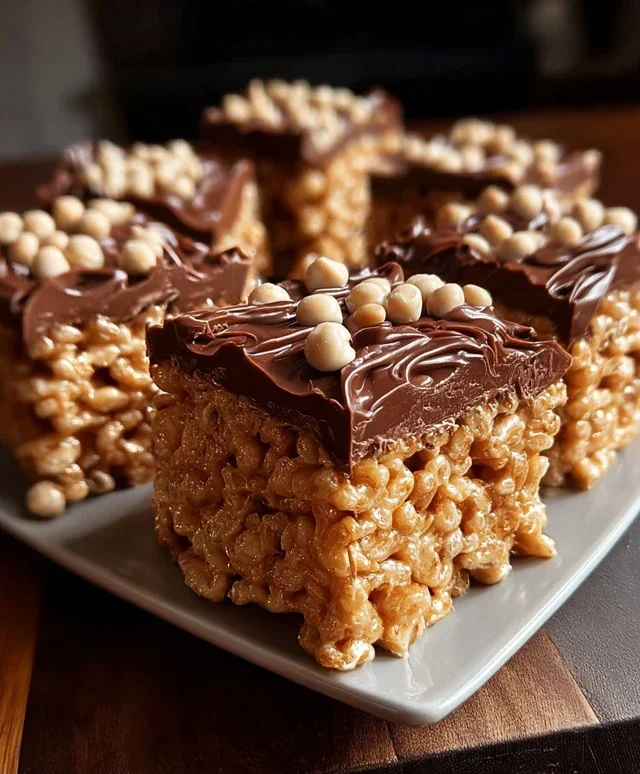
Chocolate Peanut Butter Rice Krispie Squares Recipe
Chocolate Peanut Butter Rice Krispie Squares: the ultimate nostalgic treat that brings out the kid in all of us, elevated. There’s something undeniably magical about the perfect blend of chewy, crunchy, sweet, and salty, and these Chocolate Peanut Butter Rice Krispie Squares deliver that in spades. It’s the classic treat you know and love, but with a decadent twist that makes it truly unforgettable. We’ve all had those basic Rice Krispie squares, but what sets these apart is the luscious, rich chocolate and the irresistible creaminess of peanut butter, swirled together to create a symphony of flavors. It’s the kind of dessert that elicits happy sighs and requests for seconds, a guaranteed crowd-pleaser that’s surprisingly simple to whip up. Get ready to fall in love all over again with this iconic dessert!
Ingredients:
Get ready to embark on a flavor adventure that’s both nostalgic and utterly delicious! These Chocolate Peanut Butter Rice Krispie Squares are a dream come true for anyone who loves that classic sweet and salty combination. They’re incredibly easy to whip up, making them perfect for a quick treat, a party contribution, or just because you deserve something wonderfully indulgent. Forget complicated baking; we’re talking about minimal effort for maximum gooey, chocolatey, peanut buttery bliss. These are the kind of treats that disappear in a flash, so you might want to make a double batch!
Getting Started: The Foundation of Flavor
Before we dive into the melting and mixing, let’s get our workspace ready. You’ll want a large mixing bowl, a saucepan, and a baking dish. For the baking dish, a 9×13 inch pan is ideal. Grease it generously with butter or cooking spray, or line it with parchment paper, leaving some overhang on the sides. This will make it incredibly easy to lift the finished squares out later. Trust me on this one; a little prep work here saves a lot of frustration later!
Melting Magic: Creating the Gooey Goodness
Now, let’s get down to the business of melting. In a large saucepan, combine the unsalted butter and your chosen marshmallows. It doesn’t matter if you’re using regular-sized marshmallows or the mini ones; they’ll both melt into that wonderfully sticky, marshmallowy goodness. Place the saucepan over low to medium heat. This is a crucial step: patience is key here! You don’t want to scorch the marshmallows or burn the butter. Stir constantly with a spatula or wooden spoon, ensuring the butter melts completely and the marshmallows start to soften and puff up. Keep stirring until the mixture is smooth and gooey, with no lumps of marshmallow remaining. This usually takes about 5-7 minutes, depending on your heat.
The Peanut Butter Embrace
Once your marshmallow mixture is smooth and luxurious, it’s time to introduce our star ingredient: peanut butter! Add the ½ cup of peanut butter directly into the melted marshmallow mixture. Stir it in thoroughly until it’s completely incorporated. The peanut butter will make the mixture even richer and add that irresistible salty undertone that perfectly balances the sweetness. If you’re using crunchy peanut butter, you’ll get little pockets of nutty texture throughout, which I personally love. Keep stirring until everything is beautifully blended into a uniform, luscious concoction.
The Rice Krispie Infusion
Now for the part that gives these squares their signature crunch! Pour the 6 cups of Rice Krispie cereal into the saucepan with the melted marshmallow and peanut butter mixture. Gently fold the cereal in with your spatula, ensuring that every single Rice Krispie is coated in that delicious, gooey mixture. Work quickly but carefully. The cereal will start to absorb some of the moisture, so you want to get it all coated before it gets too stiff. The goal is to have every piece of cereal enveloped in the peanut butter-marshmallow goodness.
Pressing Perfection: Shaping the Squares
This is where we transform our delicious mixture into those iconic squares. Pour the entire contents of the saucepan into your prepared baking dish. Now, this is where things can get a little sticky, literally! The best way to press the mixture evenly into the pan without sticking to your hands is to lightly grease a spatula or use a piece of parchment paper. Gently press the mixture down into an even layer. Don’t press too hard, as you don’t want to crush the Rice Krispies and lose that delightful crispiness. You just want to ensure it’s packed well enough that the squares will hold their shape. Take your time and make sure the top is as smooth as possible for that professional finish.
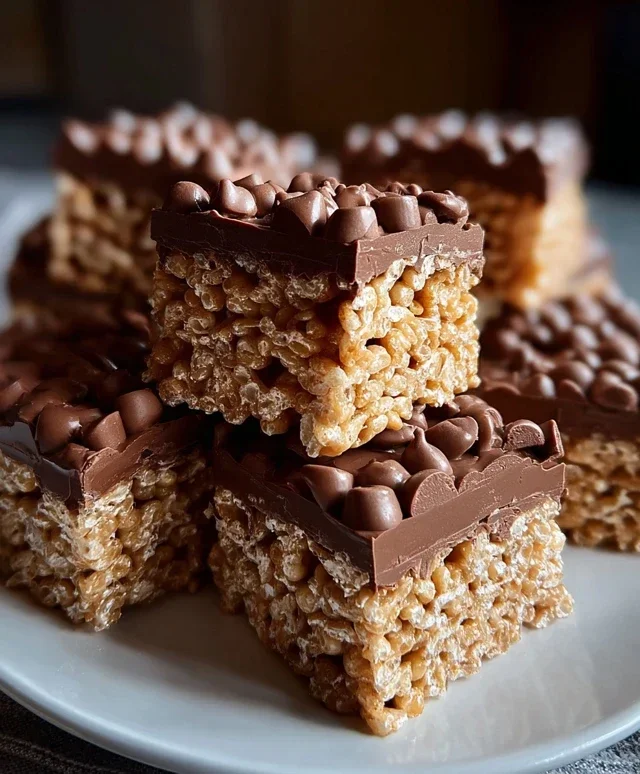
The Chocolatey Crown: A Melty Masterpiece
For the grand finnon-alcoholic ale, we’re adding that glorious chocolatey layer. Sprinkle the 1 cup of milk chocolate chips evenly over the top of the pressed Rice Krispie mixture. Now, here’s a little trick to get a smooth, melted chocolate top. You can either:
1. The Gentle Melt Method: Place the baking dish in a slightly warm oven (around 200°F or 95°C) for about 5-10 minutes, just until the chocolate chips are soft and starting to melt. Then, use a spatula to spread the melted chocolate evenly over the top. This gives you a lovely, smooth chocolate layer.
2. The Double Boiler (or Microwave) Melt: In a separate, microwave-safe bowl, melt the milk chocolate chips according to package directions (usually in 30-second intervals, stirring in between). Once melted and smooth, pour the melted chocolate over the Rice Krispie layer and spread it evenly. This method also works beautifully.
If you’re feeling extra fancy and want to add some texture, this is also the time to sprinkle your optional chopped peanuts over the melted chocolate. This adds a delightful crunch and enhances that classic chocolate peanut butter combination.
Cooling Down and Cutting Up
Once your chocolate is spread (and any optional toppings are in place), it’s time to let these beauties cool completely. Place the baking dish on a wire rack and let it sit at room temperature for at least 1-2 hours. Resist the urge to cut them too early! Allowing them to cool fully will help them set properly, making them much easier to cut into clean squares. Once they’re firm and cooled, use the parchment paper overhang to lift the entire slab out of the pan. Place it on a cutting board and, using a sharp knife, cut them into your desired square size. Enjoy every single, glorious, chocolate peanut butter-infused bite!
Conclusion:
And there you have it – your guide to crafting the most irresistible Chocolate Peanut Butter Rice Krispie Squares! This recipe is truly a winner because it hits all the right notes: the satisfying crunch of Rice Krispies, the gooey sweetness of marshmallows, the rich decadence of chocolate, and that perfectly complementary salty kick from peanut butter. It’s a no-bake wonder that’s incredibly simple to make, making it ideal for bakers of all levels and a fantastic activity to do with kids. These squares are wonderfully versatile, perfect for parties, a quick afternoon treat, or even a satisfying dessert after dinner. I encourage you to give these Chocolate Peanut Butter Rice Krispie Squares a try – I promise you won’t be disappointed!
For serving, I love them simply cut into squares, but you could also press them into a fun shape using cookie cutters. They are fantastic on their own, but also pair beautifully with a cold glass of milk or even a scoop of vanilla ice cream for an extra indulgent dessert experience. Feeling adventurous? Try adding some mini chocolate chips to the marshmallow mixture for even more chocolatey goodness, or sprinkle some flaky sea salt on top before they set for an extra gourmet touch. You could also experiment with different nut butters, like almond butter, for a slight twist.
Frequently Asked Questions:
Can I make these ahead of time?
Absolutely! These Chocolate Peanut Butter Rice Krispie Squares are even better when made a few hours ahead of time, allowing them to firm up properly. They will keep well at room temperature in an airtight container for up to 3 days.
What’s the best way to store leftovers?
To keep your Chocolate Peanut Butter Rice Krispie Squares fresh and chewy, store them in an airtight container at room temperature. Avoid refrigerating them, as this can make them hard and less enjoyable.
Can I use crunchy peanut butter instead of creamy?
Yes, you can! Using crunchy peanut butter will add an extra layer of texture to your Chocolate Peanut Butter Rice Krispie Squares. Just be aware that it might slightly alter the smoothness of the overall square.
Chocolate Peanut Butter Rice Krispie Squares
A delicious no-bake treat combining the classic Rice Krispie square with the irresistible flavors of chocolate and peanut butter.
Ingredients
-
6 cups Rice Krispie cereal
-
½ cup peanut butter (smooth or crunchy)
-
¼ cup unsalted butter
-
40 regular size marshmallows or 1 ⅓ cups mini marshmallows
-
1 cup milk chocolate chips
-
Optional: chopped peanuts for garnish
Instructions
-
Step 1
Grease a 9×13 inch baking dish with butter or cooking spray. -
Step 2
In a large saucepan, melt the butter over low heat. Add the marshmallows and stir until completely melted and smooth. -
Step 3
Remove the saucepan from the heat. Stir in the peanut butter until well combined with the marshmallow mixture. -
Step 4
Add the Rice Krispie cereal to the saucepan and mix until evenly coated. -
Step 5
Gently fold in the milk chocolate chips, allowing them to soften slightly from the residual heat. -
Step 6
Pour the mixture into the prepared baking dish and press evenly using a buttered spatula or your hands. -
Step 7
If desired, sprinkle chopped peanuts over the top and gently press them into the squares. Let cool completely before cutting.
Important Information
Nutrition Facts (Per Serving)
It is important to consider this information as approximate and not to use it as definitive health advice.
Allergy Information
Please check ingredients for potential allergens and consult a health professional if in doubt.