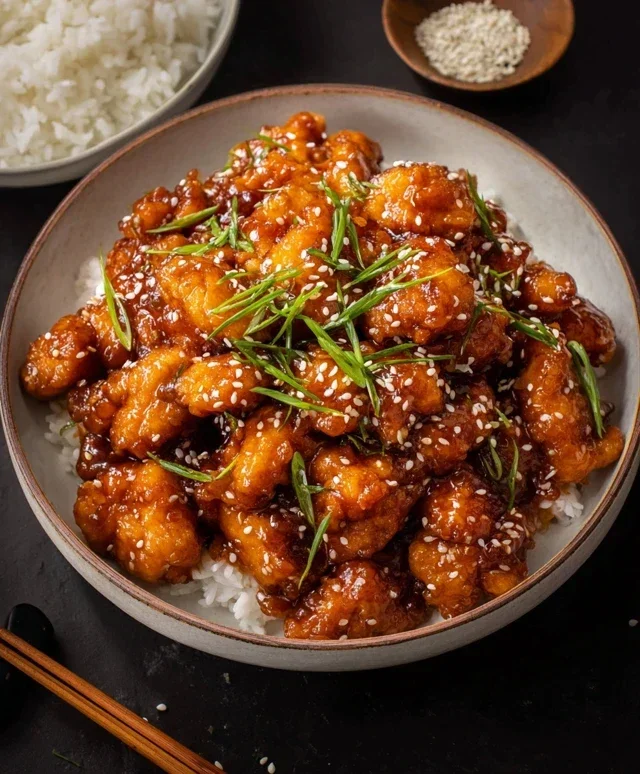
Honey Sesame Chicken- Easy & Delicious Recipe
Honey Sesame Chicken is one of those dishes that just screams comfort and craveability. If you’re anything like me, the mere mention of it conjures up images of glistening, golden-brown chicken pieces coated in a sweet and savory glaze, often with a sprinkle of toasted sesame seeds adding that perfect nutty crunch. It’s no wonder this popular dish has captured so many hearts (and taste buds!). What makes Honey Sesame Chicken so special? It’s that irresistible balance of flavors: the sticky, sweet honey harmonizing beautifully with the savory soy sauce, the subtle warmth of gin extractger and garlic, and the vibrant pop of sesame. It’s a flavor explosion that’s both familiar and exciting, perfect for a quick weeknight dinner or a crowd-pleasing appetizer. Get ready to transform your kitchen into your favorite takeout spot with this incredible Honey Sesame Chicken recipe!
Honey Sesame Chicken
Get ready to experience a flavor explosion with this incredible Honey Sesame Chicken recipe! It’s a dish that perfectly balances sweet, savory, and a hint of tang, all with a delightful crunch that’s utterly addictive. Whether you’re craving a restaurant-style treat at home or looking for a crowd-pleasing meal, this recipe is sure to become a favorite. We’ll break down each step to ensure you achieve that perfect crispy chicken and luscious sauce every time.
Ingredients:
Preparation and Batter
The key to irresistibly crispy chicken lies in a well-prepared batter. We want that satisfying crunch that holds up to the sauce.
1. Start by preparing your chicken. Ensure your chicken pieces are cut into uniform 1-inch cubes for even cooking. In a medium bowl, combine the chicken pieces with 1 teaspoon of chicken bouillon powder, 1/2 teaspoon of white pepper, and 1 tablespoon of water. Mix well to coat the chicken. Let it marinate for about 10-15 minutes while you prepare the batter. This initial marination adds a subtle layer of savory flavor directly into the chicken.
2. Now, let’s make that magic batter! In a separate large bowl, whisk together the 2 large eggs until they are well beaten. To the beaten eggs, add 1/2 cup of all-purpose flour, 1/2 cup of cornstarch, 2 teaspoons of baking powder, 1/2 teaspoon of salt, and 1/4 cup of water. Whisk everything together until you have a smooth, lump-free batter with the consistency of thick pancake batter. The combination of flour and cornstarch is crucial for achieving that perfect crispiness, while the baking powder helps create a lighter, airier texture. Ensure there are no lumps of flour or cornstarch. Add the 2 teaspoons of vegetable oil to the batter and whisk it in. This helps to make the batter a little more tender and contributes to a crispier finish.
Frying the Chicken
Crispy fried chicken is the foundation of this dish. Proper frying technique is essential!
3. Heat your frying oil. In a large, heavy-bottomed pot or a deep skillet, pour in enough vegetable oil to reach about 2-3 inches deep. Heat the oil over medium-high heat until it reaches approximately 350°F (175°C). You can test if the oil is ready by dropping a tiny bit of batter into it. If it sizzles immediately and floats to the surface, your oil is hot enough. It’s important to maintain this temperature throughout the frying process for even cooking. Overly hot oil will burn the outside before the inside is cooked, while oil that’s too cool will result in greasy chicken.
4. Fry the chicken in batches. Working in batches to avoid overcrowding the pot, which can lower the oil temperature and lead to soggy chicken, dip each marinated chicken piece into the prepared batter, ensuring it’s fully coated. Carefully place the battered chicken pieces into the hot oil. Fry for about 5-7 minutes, or until golden brown and cooked through. You’ll want to turn the chicken pieces occasionally to ensure they brown evenly on all sides. Once they are beautifully golden and crispy, use a slotted spoon or spider strainer to remove them from the oil. Place the fried chicken on a wire rack set over a baking sheet to drain any excess oil. This step is critical to maintaining crispiness; placing it directly on paper towels can trap steam and make the chicken less crunchy.
Making the Honey Sesame Sauce
This sauce is where all the sweet, savory, and tangy magic happens. It’s quick to whip up while the chicken is frying or draining.
5. Prepare the sauce and toss. While the chicken is frying or draining, let’s make that irresistible honey sesame sauce. In a medium saucepan, combine 3 tablespoons of light soy sauce, 1 tablespoon of oyster sauce, 2 tablespoons of rice vinegar, 2 tablespoons of ketchup, and 1/4 cup of honey. Add 1 teaspoon of grated fresh gin extractger and 2 cloves of minced garlic. Stir in 1/4 cup of water. Bring this mixture to a simmer over medium heat, stirring occasionally. In a small separate bowl, whisk together 1 tablespoon of cornstarch with about 2 tablespoons of cold water until you have a smooth slurry. Once the sauce is simmering, slowly pour in the cornstarch slurry while whisking continuously. Continue to cook and whisk for about 1-2 minutes, or until the sauce has thickened to your desired consistency. It should be thick enough to coat the back of a spoon. Stir in 1 tablespoon of sesame oil for that signature nutty aroma and flavor.
The Grand Finnon-alcoholic ale: Coating and Serving
The final assembly brings everything together for a truly satisfying meal.
6. Combine chicken and sauce. Once your chicken is fried and drained, and your sauce is perfectly thickened, it’s time for the final step. Pour the warm, glossy honey sesame sauce over the crispy fried chicken in a large bowl. Gently toss the chicken to ensure each piece is evenly coated in the delicious sauce. Be careful not to over-toss, as this can break down the crispiness of the chicken. Immediately transfer the sauced chicken to a serving platter. Garnish generously with toasted sesame seeds and thinly sliced green onions for a burst of color and extra flavor. Serve this Honey Sesame Chicken hot with steamed rice, and watch it disappear in minutes! The contrast between the tender, crispy chicken and the sweet, sticky sauce is simply divine. Enjoy every bite of this delightful homemade treat!
Conclusion:
You’ve now got the blueprint for creating an absolutely delicious Honey Sesame Chicken right in your own kitchen! This recipe is a winner because it delivers that irresistible sweet and savory balance with a delightful crunchy exterior and tender chicken, all without the fuss of deep-frying. It’s perfect for a weeknight meal that feels special, or for impressing guests with minimal effort. For serving, I love pairing it with fluffy jasmine rice and a side of steamed broccoli or stir-fried mixed vegetables to complete the meal. If you’re feeling adventurous, consider adding a pinch of red pepper flakes to the sauce for a touch of heat, or swapping out chicken thighs for firm tofu for a vegetarian option. I truly encourage you to give this Honey Sesame Chicken a try – I’m confident it will become a go-to favorite in your recipe rotation!
Frequently Asked Questions:
How can I make the chicken extra crispy?
For an extra crispy coating, ensure your oil is hot enough before adding the chicken, and don’t overcrowd the pan. You can also double-fry the chicken: fry it once until lightly golden, remove it to a wire rack, then fry it again for a minute or two until deeply golden brown and very crispy.
Can I make the sauce ahead of time?
Absolutely! The Honey Sesame Chicken sauce can be made a day or two in advance and stored in an airtight container in the refrigerator. Simply warm it gently on the stovetop or in the microwave before tossing with your cooked chicken.
What if I don’t have sesame oil?
While toasted sesame oil is key for that authentic nutty flavor, you can substitute it with a neutral oil like vegetable or canola oil if you’re in a pinch. However, the flavor won’t be quite the same, so I highly recommend trying to get some toasted sesame oil for the best results.
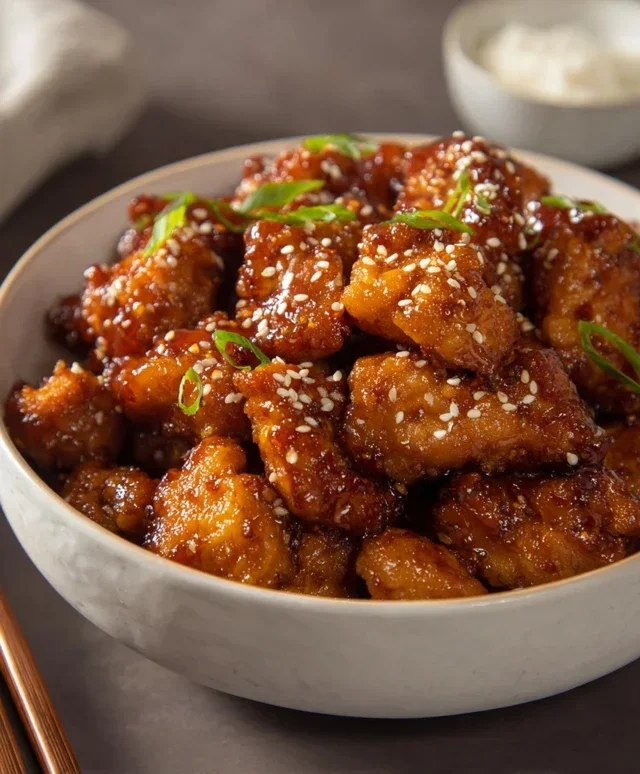
Honey Sesame Chicken
A classic sweet and savory honey sesame chicken dish, perfect for a quick weeknight meal. This recipe features crispy fried chicken coated in a delicious honey-soy glaze with toasted sesame seeds.
Ingredients
-
1 1/2 lb chicken breast or thighs (cut into 1 inch pieces)
-
1 teaspoon chicken bouillon powder
-
1/2 teaspoon white pepper
-
1 tablespoon water
-
2 large eggs
-
1/2 cup all-purpose flour
-
1/2 cup cornstarch
-
2 teaspoon baking powder
-
1/2 teaspoon salt
-
1/4 cup water
-
2 teaspoon vegetable oil
-
3 tablespoon light soy sauce
-
1 tablespoon oyster sauce
-
2 tablespoon rice vinegar
-
2 tablespoon ketchup
-
2 tablespoon honey
-
1 tablespoon sesame seeds, toasted
Instructions
-
Step 1
In a medium bowl, combine the chicken pieces with chicken bouillon powder, white pepper, and 1 tablespoon of water. Let it marinate for at least 10 minutes. -
Step 2
In a separate bowl, whisk the eggs. In a third bowl, combine the all-purpose flour, cornstarch, baking powder, and salt. Dredge the marinated chicken pieces in the flour mixture, ensuring they are well-coated. Then, dip each piece into the whisked eggs, and finally dredge them again in the flour mixture for a thicker coating. -
Step 3
Heat the vegetable oil in a large skillet or wok over medium-high heat. Carefully add the coated chicken pieces in a single layer, frying in batches if necessary to avoid overcrowding. Fry for about 3-4 minutes per side, until golden brown and cooked through. Remove the chicken from the skillet and place on a wire rack to drain. -
Step 4
In a small bowl, whisk together the light soy sauce, oyster sauce, rice vinegar, ketchup, honey, and 1/4 cup of water. Pour this sauce into the now-empty skillet (wipe out any excess oil if needed) and bring to a simmer over medium heat. -
Step 5
Add the fried chicken back into the skillet with the simmering sauce. Toss to coat the chicken evenly. Cook for another 1-2 minutes, allowing the sauce to thicken and glaze the chicken. -
Step 6
Serve the honey sesame chicken immediately, garnished with toasted sesame seeds.
Important Information
Nutrition Facts (Per Serving)
It is important to consider this information as approximate and not to use it as definitive health advice.
Allergy Information
Please check ingredients for potential allergens and consult a health professional if in doubt.