Easy Japanese Tuna Onigiri Quick Recipe
15-min. Easy Japanese Tuna Onigiri are the ultimate weeknight savior and a lunchtime legend for good reason. When hunger strikes and time is short, there’s nothing quite as satisfying and effortlessly delicious as these portable rice balls. We all crave those moments of culinary triumph without the fuss, and that’s precisely where our 15-min. Easy Japanese Tuna Onigiri shine. What makes them so beloved? It’s the perfect harmony of fluffy, seasoned rice, the savory burst of tuna, and the sheer simplicity of their creation. These aren’t just a quick meal; they’re a taste of Japanese comfort food that’s wonderfully versatile and surprisingly filling.
Discover the magic of this incredibly quick and satisfying dish.
Get ready to impress yourself with how easy it is to whip up your own authentic onigiri.
15-Minute Easy Japanese Tuna Onigiri
Craving a quick, satisfying, and authentically Japanese snack or light meal? Look no further than these incredibly easy 15-minute tuna onigiri! These rice balls are a staple in Japan, perfect for lunchboxes, picnics, or whenever hunger strikes. The beauty of onigiri lies in its simplicity and versatility. Today, we’re focusing on a classic and crowd-pleasing filling: seasoned tuna with creamy Japanese mayonnaise. You’ll be amazed at how quickly you can whip up a batch of these delicious little flavor bombs. Let’s get started!
Ingredients:
Preparing the Tuna Filling
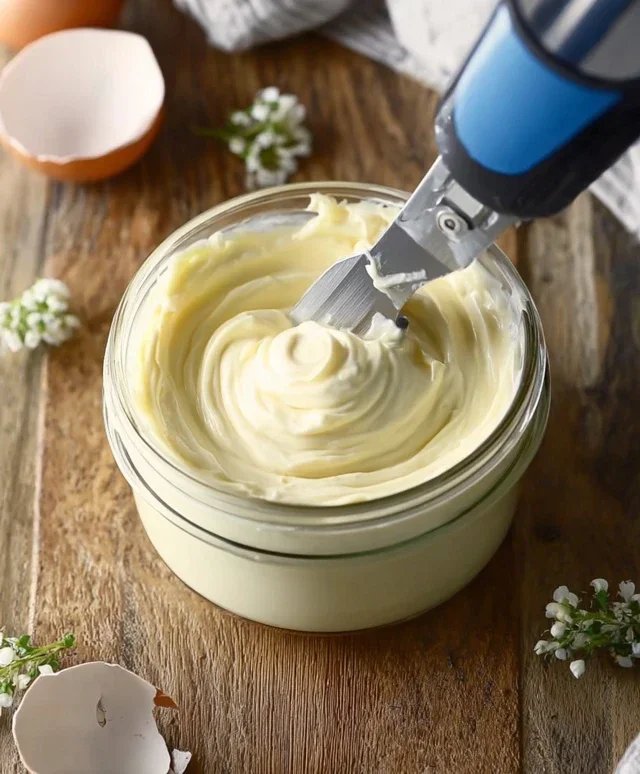
The filling is the heart of any good onigiri, and our tuna mix is wonderfully simple yet packed with flavor. Start by draining your canned tuna. If you’re using tuna packed in oil, you can gently press out the excess oil using the lid of the can or a fork. If you’re using tuna in water, drain it thoroughly.
In a small bowl, combine the drained tuna with the Japanese mayonnaise. Japanese mayonnaise, like Kewpie, has a distinct tangin extractess and richer, creamier texture than regular mayonnaise, which really elevates the flavor. However, if you don’t have it on hand, regular mayonnaise will work just fine! Mix the tuna and mayonnaise together until the tuna is well coated and the mixture is creamy. You can add a tiny pinch of salt here if your tuna is very plain, but often the mayonnaise provides enough seasoning. For an extra layer of flavor, some people like to add a dash of soy sauce or a pinch of pepper, but for this super-quick version, we’re keeping it classic and simple.
Assembling the Onigiri
Now comes the fun part: shaping the rice! The key to successful onigiri is working with slightly cooled, but still warm, rice. This makes it easier to mold and helps the onigiri hold its shape. If you’ve just cooked fresh rice, let it cool for about 10-15 minutes. If you’re using leftover rice, gently warm it up in the microwave or on the stovetop.
In a separate bowl, combine the cooked rice with the 1/2 teaspoon of salt. The salt not only adds flavor to the rice itself but also acts as a mild preservative, which is helpful if you plan to carry these onigiri around. Mix the salt evenly throughout the rice.
It’s helpful to have a small bowl of water nearby. This will prevent the rice from sticking to your hands as you work. Dip your hands in the water and then clap them together to remove excess moisture.
Take about a quarter of the salted rice and place it in the palm of one hand. Gently flatten the rice into a circle. Create a small indentation in the center of the rice – this is where your delicious tuna filling will go.
Spoon about a tablespoon of the tuna and mayonnaise mixture into the indentation. Don’t overfill it, or the onigiri might not close properly.
Now, carefully bring the edges of the rice up and around the filling, gently enclosing it completely. Begin extract to shape the rice into your desired onigiri form. The most traditional shape is a triangle, but spheres or simple mounds are also perfectly acceptable and just as tasty. Use both hands to gently press and mold the rice, turning it as you go. Apply gentle, even pressure. The goal is to create a firm ball that won’t fall apart, but avoid pressing too hard, which can make the onigiri dense and gummy. If the rice starts to stick to your hands, simply re-dip them in the water.
Finishing Touches and Serving
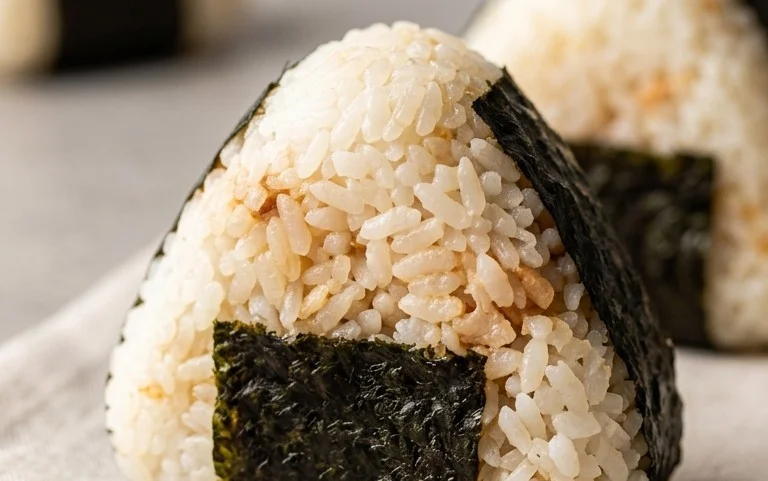
Once you have your shaped rice ball, it’s time for the nori. Cut your nori sheets into strips or squares, depending on how you like to wrap your onigiri. For a simple, handheld experience, a strip about 2-3 inches wide and long enough to wrap around the base of your onigiri is perfect. The moisture from the rice will help the nori stick. You can also toast the nori briefly over a low flame or in a dry pan for an extra crisp texture and enhanced aroma, but for a 15-minute recipe, this is an optional step.
Press the nori strip firmly onto one side of the onigiri. The nori adds a wonderful umami flavor and a satisfying textural contrast. For an extra touch of visual appeal and flavor, sprinkle some sesame seeds over the onigiri. You can mix them into the rice filling before shaping, or simply sprinkle them on top.
Repeat the assembly process for the remaining rice and filling. You should be able to make about 2-3 onigiri with this amount of rice.
And there you have it! Freshly made, delicious tuna onigiri, ready in under 15 minutes. These are best enjoyed fresh, but they also pack well for a snack later in the day. They are perfect on their own, or you can serve them with a side of soy sauce for dipping. Enjoy this simple yet satisfying taste of Japan!
Notes:
If you are making fresh rice for your onigiri, ensure you use short-grain Japanese rice for the best texture. Cook according to package directions, and then let it cool slightly until it’s warm enough to handle but not so hot that it burns your hands.

Conclusion:
I hope you’ve enjoyed learning how incredibly simple and satisfying it is to make our 15-minute Easy Japanese Tuna Onigiri! This recipe truly shines because it’s a perfect blend of speed, flavor, and versatility. In under 15 minutes, you can transform humble ingredients into a delicious and portable meal or snack. Whether you’re a busy student, a working professional needing a quick lunch, or just craving something comforting, this Japanese tuna onigiri is your new go-to. They are fantastic on their own, but also pair wonderfully with a simple miso soup, a side of pickled gin extractger, or even some edamame for a more complete meal. Don’t be afraid to get creative with your fillings – try adding a dash of sriracha for a kick, some chopped cucumber for freshness, or even a sprinkle of furikake for extra umami. Give this recipe a try; I’m confident you’ll be hooked on how easy and delicious homemade onigiri can be!
Frequently Asked Questions:
What if I don’t have sushi rice? Can I use other types of rice for my onigiri?
While sushi rice is ideal for its stickiness, allowing the onigiri to hold its shape, you can certainly use other short-grain or medium-grain rice varieties. The key is to cook the rice until it’s slightly sticky. If your rice isn’t very sticky, you might find it helpful to lightly moisten your hands with water or a little sesame oil when shaping to prevent sticking and improve cohesion.
Can I make the tuna filling ahead of time?
Absolutely! The tuna filling can be prepared a day or two in advance and stored in an airtight container in the refrigerator. This makes assembling your onigiri even faster when you’re ready to eat. Just give it a quick stir before using it to ensure it’s well combined.
15-min. Easy Japanese Tuna Onigiri
Quick and simple Japanese rice balls filled with seasoned tuna and mayo, perfect for a light meal or snack.
Ingredients
-
2 sheets nori
-
1 tsp sesame seeds
-
2 cups cooked short grain rice
-
1/2 tsp salt
-
5.29 oz canned tuna (in oil recommended, or canned tuna in water)
-
2 tbsp Japanese mayo
Instructions
-
Step 1
If making fresh rice, cook according to package directions and let cool slightly. Fluff the cooked rice. -
Step 2
In a bowl, drain the canned tuna. Add the Japanese mayo and salt. Mix well until combined. -
Step 3
Wet your hands with water to prevent sticking. Take about 1/2 cup of rice and flatten it in your palm. -
Step 4
Place about 1 tablespoon of the tuna mixture in the center of the flattened rice. Gently fold the rice over the filling, shaping it into a triangle or ball. -
Step 5
Repeat with the remaining rice and tuna mixture. -
Step 6
Cut the nori sheets into desired shapes (strips or squares) for wrapping or decorating the onigiri. Wrap or place the nori onto the onigiri. -
Step 7
Garnish with sesame seeds, if using.
Important Information
Nutrition Facts (Per Serving)
It is important to consider this information as approximate and not to use it as definitive health advice.
Allergy Information
Please check ingredients for potential allergens and consult a health professional if in doubt.