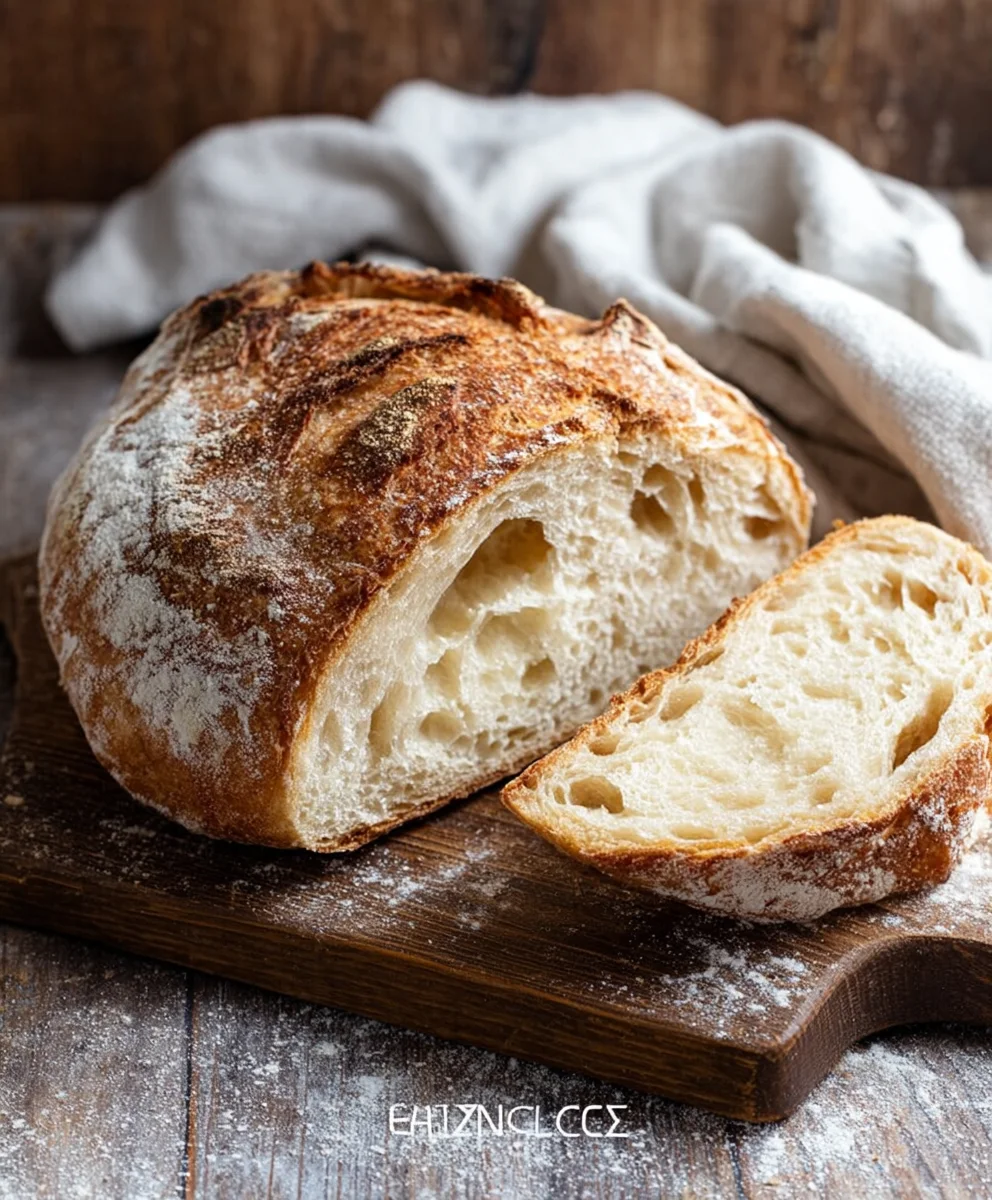
Easy Rustic Bread Recipe- Delicious Homemade Loaf
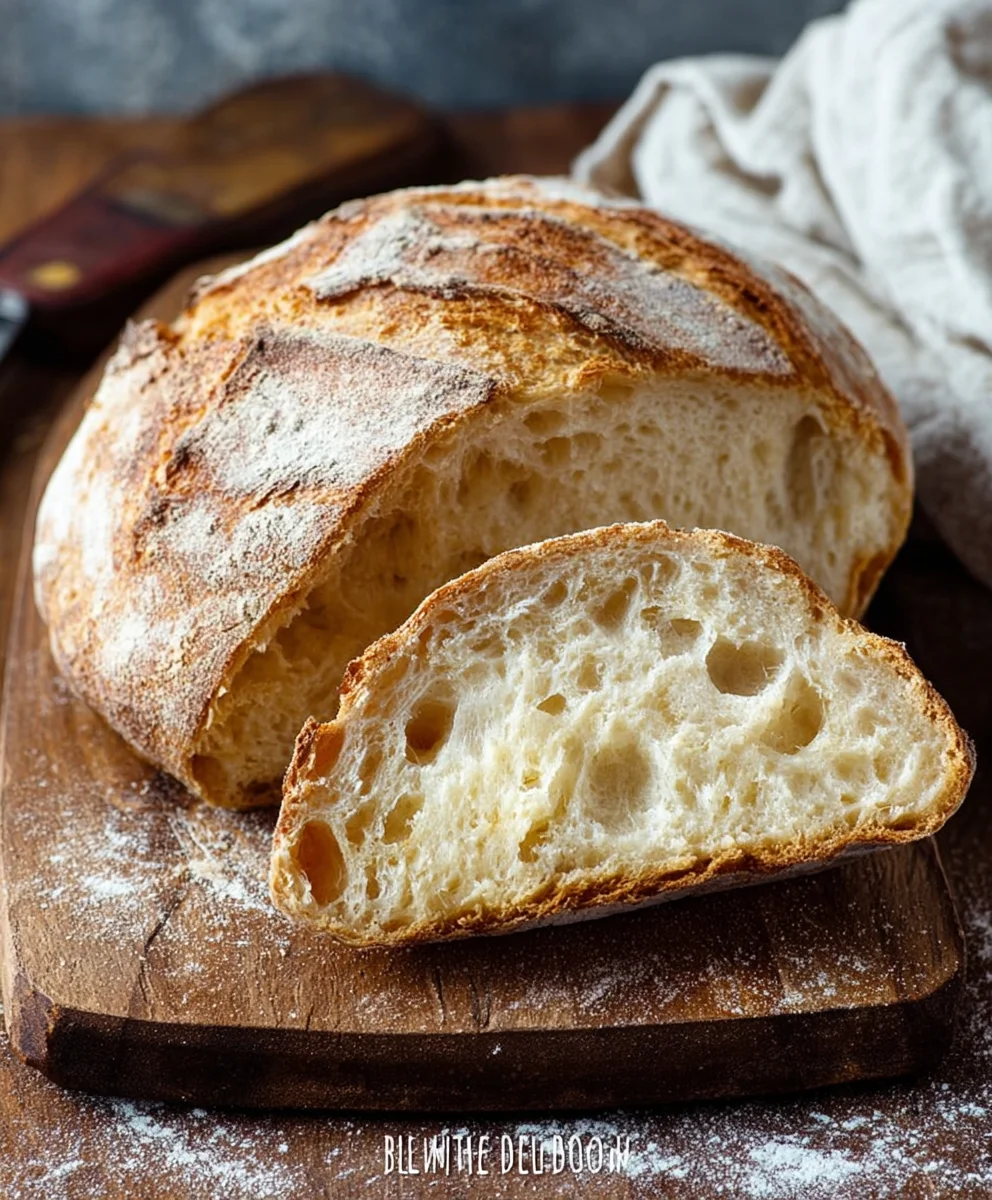
Rustic Bread Recipe: there’s something undeniably comforting and profoundly satisfying about a crusty loaf of homemade bread. It’s the aroma that fills your kitchen as it bakes, the delightful crunch of the golden-brown exterior giving way to a soft, airy crum extractb, and the pure joy of tearing off a warm piece to slather with butter. This Rustic Bread Recipe isn’t just about sustenance; it’s an experience, a connection to tradition, and a testament to the simple magic of flour, water, yeast, and salt. What draws us to a good rustic loaf? It’s that honest, unpretentious character, its versatility from a simple snack to the foundation of a hearty meal. This particular recipe stands out because it focuses on developing a beautifurum extractpen crumb and a deeply caramelized crust without requiring complex techniques. Get ready to impress yourself and your loved ones with a loaf that tastes like it came straight from a European bakery, but was made right in your own oven.
Ingredients:
- 3 cups warm water (around 105-115°F or 40-46°C)
- 2 ¼ teaspoons active dry yeast (this is typically one standard packet)
- 1 tablespoon granulated sugar
- 6 cups (approximately 750 grams) all-purpose flour, plus more for dusting
- 3 teaspoons salt
Mixing the Dough: The Foundation of Your Rustic Loaf
This rustic bread recipe is all about simplicity and achieving a beautiful, crusty exterior with a tender crum extractb. We’ll start by activating the yeast, which is a crucial step for a good rise. In a large mixing bowl – I like to use one that’s at least 4 quarts – pour in your 3 cups of warm water. It’s important that the water is warm, not hot, as excessively hot water can kill the yeast, and too cool won’t activate it properly. You can test the temperature by seeing if it feels comfortably warm to the touch. To this warm water, add the 2 ¼ teaspoons of active dry yeast and the 1 tablespoon of granulated sugar. The sugar acts as food for the yeast, helping it to bloom and become active. Give it a gentle whisk to combine everything.
Now, let this mixture sit undisturbed for about 5 to 10 minutes. You should start to see a frothy, foamy layer develop on the surface. This indicates that your yeast is alive and ready to work its magic. If you don’t see any foam, it might mean your yeast is old or the water wasn’t the right temperature, and you’ll want to start this step over to ensure a successful bake.
Once your yeast mixture is frothy, it’s time to add the remaining dry ingredients. Into the same bowl, add the 6 cups of flour and the 3 teaspoons of salt. The salt is essential for flavor, and it also helps to control the yeast activity, preventing the dough from rising too quickly.
Developing the Dough: Kneading for Texture
With all the ingredients in the bowl, it’s time to bring them together. You can do this by hand or with a stand mixer fitted with a dough hook. If you’re mixing by hand, use a sturdy spoon or a spatula to start incorporating the flour into the wet ingredients. It will be a shaggy, sticky mass at first. Keep mixing until most of the dry flour is incorporated.
If you’re using a stand mixer, start on a low speed and let it mix until a shaggy dough forms. Once the ingredients are mostly combined, increase the speed to medium-low and let the mixer knead the dough for about 8 to 10 minutes. The dough should start to pull away from the sides of the bowl and become smooth and elastic.
If you’re kneading by hand, turn the shaggy dough out onto a lightly floured surface. Be generous with the flour initially to prevent sticking, but try not to add too much extra flour as it can make the bread dense. Knead the dough by pushing it away from you with the heels of your hands, then folding it over on itself and turning it a quarter turn. Repeat this process for about 10 to 12 minutes. You’re looking for a dough that is smooth, elastic, and springs back slowly when you poke it with your finger. It should feel slightly tacky but not sticky enough to adhere to your hands.
First Rise: Allowing the Dough to Develop Flavor and Structure
Once your dough has been adequately kneaded, it’s time for its first rise, also known as bulk fermentation. Lightly grease a clean large bowl with a little bit of olive oil or cooking spray. Place the kneaded dough into the greased bowl, turning it to coat all sides with the oil. This coating helps to prevent a dry skin from forming on top of the dough as it rises.
Cover the bowl tightly with plastic wrap or a clean, damp kitchen towel. Place the bowl in a warm, draft-free spot in your kitchen. A slightly warm oven (turned off, of course!) or near a sunny window can be ideal. Let the dough rise for about 1 to 1.5 hours, or until it has doubled in size. The exact time will depend on the temperature of your kitchen. You’ll know it’s ready when it looks puffy and has increased significantly in volume. This rise develops the characteristic flavor and airy texture of rustic bread.
Shaping and Second Rise: Preparing for the Oven
After the first rise, gently punch down the dough to release the trapped gases. This deflates the dough and makes it easier to handle. Turn the dough out onto a lightly floured surface. At this point, you can shape your bread. For a classic rustic loaf, you can gently form it into a round (boule) or an oval (batard). To do this, gently pull the edges of the dough towards the center, creating tension on the surface. Pinch the seams closed underneath.
Once shaped, place your dough onto a piece of parchment paper on a baking sheet or directly into a proofing basket (banneton) if you have one, seam-side up. If you’re not using a proofing basket, place it on the parchment paper on a baking sheet. Cover the dough loosely with plastic wrap or a clean kitchen towel and let it rest for another 30 to 45 minutes. This second rise, also called proofing, allows the dough to relax and gain a bit more volume before baking. While the dough is proofing, preheat your oven to 450°F (230°C). If you plan on using a Dutch oven, place it in the oven now to preheat.
Baking the Rustic Loaf: Achieving the Perfect Crust
This is where the magic happens! If you’re using a Dutch oven, carefully remove the preheated pot from the oven. Gently transfer your proofed dough into the hot Dutch oven, seam-side down. If you didn’t use a proofing basket and the dough is on parchment paper, you can carefully lift the parchment paper and lower it into the Dutch oven. Score the top of the dough with a sharp knife or a lame (a razor blade holder) with a few shallow cuts. This scoring helps control where the bread expands during baking. Cover the Dutch oven with its lid and carefully place it back into the hot oven.
Bake the bread in the covered Dutch oven for 25 minutes. The lid traps steam, which is crucial for creating that beautiful, crisp crust that defines rustic bread. After 25 minutes, carefully remove the lid. You should see a nicely puffed loaf. Continue baking, uncovered, for another 20 to 25 minutes, or until the crust is a deep golden brown and the internal temperature of the bread reaches 200-210°F (93-99°C) when checked with an instant-read thermometer. If you are not using a Dutch oven, place the dough directly onto a preheated baking stone or a baking sheet lined with parchment paper. You might want to create steam in your oven by placing a pan of hot water on the bottom rack. Bake for about 35-45 minutes, or until the crust is golden brown and the bread sounds hollow when tapped on the bottom. Let the bread cool completely on a wire rack before slicing and enjoying. This cooling period is essential for the texture rum extractthe crumb to set properly.
Conclusion:
I hope you’ve enjoyed learning how to create this wonderful Rustic Bread Recipe! This recipe is a testament to the simple beauty of homemade bread, offering a delightful crust and a soft, airy interior that’s perfect for any occasion. Whether you’re a seasoned baker or just starting out, the process of kneading, proofing, and baking this bread is incredibly rewarding. I encourage you to give it a try and experience the joy of pulling a freshly baked loaf from your own oven. The aroma alone is worth it!
This versatile Rustic Bread Recipe pairs beautifully with almost anything. Enjoy it warm, slathered with butter, alongside your favorite soups and stews, or as the base for delicious sandwiches. You can also slice it and serve it with a selection of cheeses and charcuterie for an elegant appetizer. Don’t be afraid to get creative with it!
Thinking about variations? You can easily incorporate herbs like rosemary or thyme into the dough for added flavor. A sprinkle of coarse sea salt on top before baking adds a lovely texture and taste. For a heartier loaf, consider adding a small amount of whole wheat flour to the mix.
Frequently Asked Questions:
What if my dough isn’t rising?
Several factors can affect dough rising. Ensure your yeast is fresh and active (test it in warm water with a pinch of sugar – it should foam). Make sure your kitchen is warm enough; yeast thrives in a cozy environment. Avoid using water that is too hot, as it can kill the yeast. Give the dough sufficient time to proof in a draft-free spot.
How can I achieve a crispier crust?
To get a wonderfully crisp crust on your Rustic Bread Recipe, try creating steam in your oven during the initial baking phase. You can do this by placing a shallow pan filled with hot water on the rack below your bread, or by spraying the oven walls with water a few times in the first 10-15 minutes of baking. Also, ensure your oven is fully preheated.
Can I make this bread ahead of time?
Yes, absolutely! Once your Rustic Bread Recipe has cooled completely, you can store it in a bread box or a paper bag at room temperature for 2-3 days. For longer storage, you can slice the cooled loaf and freeze it in an airtight container or freezer bag. Reheat slices in a toaster or oven for a fresh-from-the-oven experience.
Easy Rustic Bread Recipe- Delicious Homemade Loaf
A simple and delicious recipe for a crusty, tender homemade rustic bread loaf. Perfect for beginners!
Ingredients
-
3 cups warm water (around 105-115°F or 40-46°C)
-
2 ¼ teaspoons active dry yeast
-
1 tablespoon granulated sugar
-
6 cups all-purpose flour, plus more for dusting
-
3 teaspoons salt
Instructions
-
Step 1
Activate the yeast: In a large mixing bowl, combine 3 cups of warm water (105-115°F), 2 ¼ teaspoons active dry yeast, and 1 tablespoon granulated sugar. Let sit for 5-10 minutes until frothy. -
Step 2
Mix the dough: Add 6 cups of all-purpose flour and 3 teaspoons of salt to the yeast mixture. Stir with a spoon or spatula until a shaggy dough forms. -
Step 3
Knead the dough: Knead by hand on a lightly floured surface for 10-12 minutes, or using a stand mixer with a dough hook on medium-low for 8-10 minutes, until the dough is smooth, elastic, and springs back when poked. The dough should be slightly tacky but not sticky. -
Step 4
First rise: Lightly grease a clean bowl with oil. Place the kneaded dough in the bowl, turning to coat. Cover tightly with plastic wrap or a damp towel and let rise in a warm, draft-free spot for 1 to 1.5 hours, or until doubled in size. -
Step 5
Shape and second rise: Gently punch down the dough and turn it out onto a lightly floured surface. Shape into a round or oval loaf. Place on parchment paper on a baking sheet or in a proofing basket. Cover loosely and let rest for 30-45 minutes. Preheat oven to 450°F (230°C) during this time. -
Step 6
Bake: If using a Dutch oven, preheat it in the oven. Carefully transfer the dough to the hot Dutch oven (seam-side down). Score the top of the dough. Cover and bake for 25 minutes. Remove lid and bake for an additional 20-25 minutes, or until deep golden brown and internal temperature reaches 200-210°F (93-99°C). If not using a Dutch oven, bake directly on a preheated baking stone or sheet for 35-45 minutes. -
Step 7
Cool: Let the bread cool completely on a wire rack before slicing and enjoying.
Important Information
Nutrition Facts (Per Serving)
It is important to consider this information as approximate and not to use it as definitive health advice.
Allergy Information
Please check ingredients for potential allergens and consult a health professional if in doubt.