Cherries in the Snow- Easy Festive Dessert Recipe
Cherries in the Snow. It’s a name that conjures images of frosted landscapes and vibrant jewels, a dessert that whispers tnon-alcoholic ales of cozy evenings and festive gatherings. There’s a reason this classic confection holds such a special place in so many hearts. It’s more than just a simple treat; it’s an experience. The delightful contrast between the sweet, slightly tart cherries and the light, airy, snow-like topping creates a textural and flavorful symphony that’s utterly irresistible. Whether it’s a cherished family recipe passed down through generations or a new discovery that instantly captivates, Cherries in the Snow offers a comforting elegance that’s perfect for any occasion. We’re about to dive into how you can recreate this magical dessert, and trust me, it’s easier than you might think to bring a little bit of that winter wonderland magic to your table.
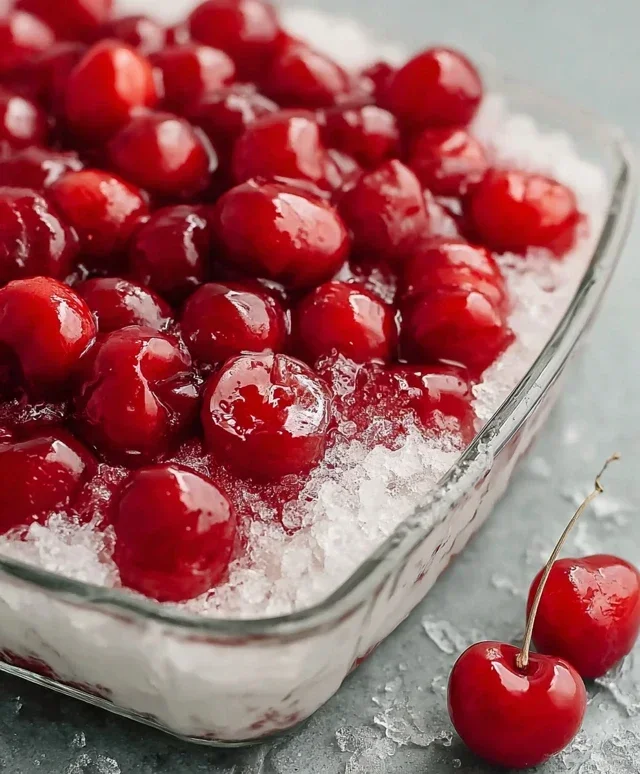
Cherries in the Snow
This delightful dessert, affectionately known as “Cherries in the Snow,” is a no-bake wonder that’s perfect for any occasion. Its name perfectly captures its essence: a creamy, snowy white base studded with vibrant, ruby-red cherry topping. It’s incredibly easy to assemble, making it a fantastic option for last-minute gatherings or when you’re craving something sweet without the fuss of baking. The combination of the light angel food cake, the rich cream cheese mixture, and the sweet-tart cherry topping creates a symphony of textures and flavors that will have everyone asking for seconds. Let’s dive into creating this simple yet stunning treat.
Ingredients:
Preparing the Creamy Base
The foundation of our Cherries in the Snow is a luscious, no-bake cream cheese mixture. Starting with softened cream cheese is crucial for achieving a smooth, lump-free consistency. If your cream cheese isn’t quite at room temperature, you can speed up the process by cutting it into smaller cubes and letting it sit out for about 20-30 minutes. In a medium mixing bowl, combine the 8 ounces of cream cheese with the 1/2 cup of powdered sugar. Powdered sugar is key here as it dissolves easily and contributes to the silky texture without grittiness. Using an electric mixer, whether a hand mixer or a stand mixer, is highly recommended for this step to ensure everything is thoroughly incorporated and smooth. Beat the cream cheese and powdered sugar together until they are light and fluffy, scraping down the sides of the bowl as needed. This process usually takes about 2-3 minutes.
Next, we’ll gradually incorporate the milk. Slowly drizzle in the 1/2 cup of 2% milk while continuing to beat the mixture on low speed. This gradual addition helps to create a smooth, pourable consistency for the cream cheese layer. Once the milk is fully incorporated, increase the mixer speed to medium-high and beat for another minute or two until the mixture is completely smooth and well combined. You should have a thick, yet spreadable cream cheese mixture at this point.
Now comes the part that gives our dessert its “snowy” appearance: the Cool Whip. Make sure your 12 ounces of Cool Whip are fully thawed. Gently fold the thawed Cool Whip into the cream cheese mixture. It’s important to fold rather than to vigorously beat the Cool Whip, as this will help to maintain its airy, fluffy texture. Use a spatula and a sweeping motion, bringin extractg the mixture from the bottom of the bowl up and over. Continue folding until there are no streaks of cream cheese or Cool Whip remaining, and the mixture is uniformly light and creamy. This will create a wonderfully ethereal layer that’s not overly sweet but rich and decadent.
Assembling the Dessert
Now that our creamy base is ready, it’s time to assemble this beautiful dessert. Begin extract by preparing your angel food cake. You’ll need one pre-baked 9-inch angel food cake. You can either bake one from scratch or purchase a store-bought one for ultimate convenience. If you’ve baked your own, ensure it’s completely cooled before proceeding. We want to create a base layer for our cherry topping, so gently break or slice the angel food cake into bite-sized pieces. You can either do this directly in your serving dish or in a separate bowl if you prefer to layer it more precisely. A 9×13 inch baking dish is ideal for this dessert, as it provides ample space for all the layers. Arrange the angel food cake pieces to form an even layer at the bottom of your serving dish. Don’t worry if there are small gaps; the creamy filling will help to fill them.
Once the cake is in place, it’s time to add the rich, creamy layer you just prepared. Carefully spoon the Cool Whip and cream cheese mixture evenly over the angel food cake layer. Use your spatula to gently spread the mixture, ensuring it covers the cake completely and creates a smooth, even surface. Take your time with this step to create a beautiful, seamless white expanse that will soon be adorned with vibrant cherries. The goal here is to create a smooth, inviting canvas.
The Finishing Touch: Cherry Topping
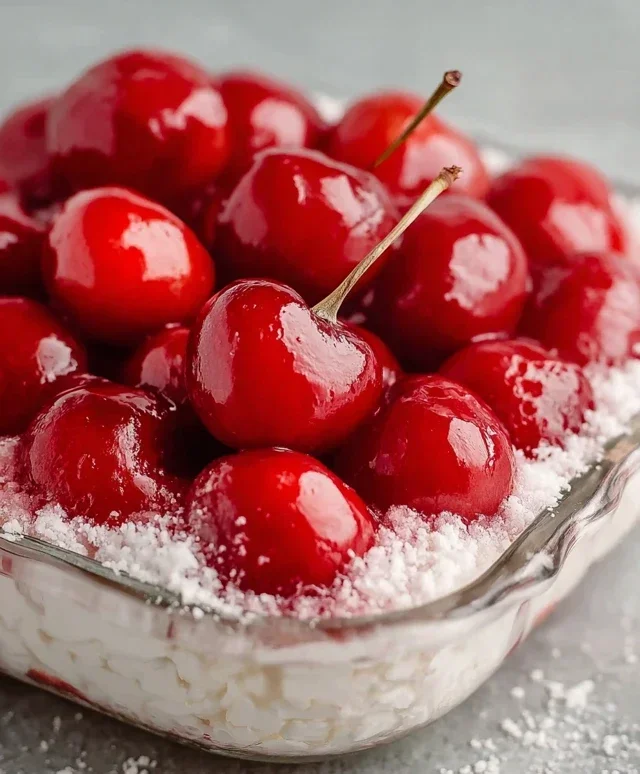
The final and arguably most visually striking element of Cherries in the Snow is the cherry topping. You’ll need two 21-ounce cans of cherry pie filling. Open both cans and gently stir each one to ensure the cherries and the syrupy filling are well combined. This step is important as the filling can sometimes separate during storage. Now, the magic happens. Spoon the cherry pie filling over the creamy white layer. You can create a beautiful, marbled effect by dolloping the cherry filling in random spots and then gently swirling it with a knife or the back of your spoon. Alternatively, you can create a more uniform look by spreading the cherry filling evenly across the top. The vibrant red of the cherries against the pristine white of the filling is what gives this dessert its stunning “Cherries in the Snow” appearance. Don’t be afraid to let the cherries cascade down the sides slightly for a more rustic, appealing look.
Chill and Serve
The most challengin extractg part of making Cherries in the Snow is waiting! Once assembled, cover your serving dish tightly with plastic wrap or a lid. Refrigerate the dessert for at least 2 to 4 hours. This chilling time is essential for allowing the flavors to meld together and for the dessert to set properly. The longer it chills, the firmer it will become, making it easier to scoop and serve. When you’re ready to serve, remove the plastic wrap and scoop generous portions into individual bowls or plates. This dessert is best served chilled. Enjoy the delightful contrast of the light angel food cake, the creamy filling, and the sweet-tart burst of cherries in every bite. It’s a true crowd-pleaser that’s as beautiful to look at as it is delicious to eat.
Conclusion:
I hope you’re as excited to try this ‘Cherries in the Snow’ recipe as I am to share it! This dessert truly is a showstopper, combining the vibrant tartness of cherries with a creamy, decadent snow-like topping. It’s incredibly simple to make, yet the visual appeal and delightful flavor profile make it perfect for any occasion, from a casual weeknight treat to a more formal gathering. The contrast of textures and tastes is what makes this recipe so special, and I know you’ll fall in love with it.
For serving, I love to present ‘Cherries in the Snow’ in individual glasses or bowls to really showcase its beauty. It’s fantastic on its own, but a sprig of fresh mint or a dusting of powdered sugar can add an extra touch of elegance. Don’t be afraid to get creative with variations! You could try adding a hint of almond extract to the cherry mixture for a subtle nutty note, or perhaps swirl in a little whipped cream into the cherry base before freezing for an even richer texture. Another fun idea is to add a layer of crushed shortbread cookies at the bottom of your serving dishes for a delightful crunch.
I wholeheartedly encourage you to give this recipe a try. It’s a rewarding experience, and the smiles it brings to faces are truly priceless. Happy baking (and chilling)!
Frequently Asked Questions:
Can I use frozen cherries instead of fresh for ‘Cherries in the Snow’?
Absolutely! Frozen cherries work wonderfully in this recipe. You might just need to thaw them slightly before starting, and the overall cooking time for the cherry mixture might be a touch shorter. The result will be just as delicious!
How long does ‘Cherries in the Snow’ need to freeze?
Typically, ‘Cherries in the Snow’ needs about 4-6 hours to freeze completely. However, this can vary depending on your freezer’s temperature. It’s best to check its firmness before serving. For optimal texture, I recommend making it the day before you plan to enjoy it.
Cherries in the Snow
A light and refreshing no-bake dessert featuring layers of creamy cheese filling, whipped topping, and sweet cherry pie filling atop a soft angel food cake.
Ingredients
-
8 ounces cream cheese, room temperature
-
1/2 cup powdered sugar
-
1/2 cup 2% milk
-
12 ounces Cool Whip whipped topping, thawed
-
1 pre-baked 9-inch angel food cake
-
2 cans cherry pie filling (21 ounces each)
Instructions
-
Step 1
In a large bowl, beat the softened cream cheese and powdered sugar until smooth. -
Step 2
Gradually beat in the milk until well combined and the mixture is smooth. -
Step 3
Gently fold in the thawed Cool Whip until no streaks remain. -
Step 4
Tear the angel food cake into bite-sized pieces and layer half of the cake pieces in the bottom of a 9×13 inch baking dish. -
Step 5
Spread half of the cream cheese mixture over the cake pieces. -
Step 6
Spoon half of the cherry pie filling over the cream cheese layer. -
Step 7
Repeat the layers with the remaining cake pieces, cream cheese mixture, and cherry pie filling. -
Step 8
Cover and refrigerate for at least 2 hours, or until chilled and set.
Important Information
Nutrition Facts (Per Serving)
It is important to consider this information as approximate and not to use it as definitive health advice.
Allergy Information
Please check ingredients for potential allergens and consult a health professional if in doubt.