Buttery Garlic Pizza Recipe- Irresistible Flavor
Buttery garlic pizza is more than just a meal; it’s an experience. Imagin extracte this: a golden crust, kissed by the oven’s heat, generously slathered with a fragrant blend of melted butter and pungent garlic. That first bite is pure bliss – a symphony of savory richness that dances on your taste buds. It’s no wonder this deceptively simple creation has captured so many hearts. People adore this pizza because it taps into our primal love for comfort food, elevated by a flavor profile that’s both bold and incredibly satisfying. What truly makes buttery garlic pizza special is its harmonious balance. The creamy, luxurious butter softens the sharp bite of the garlic, creating a universally appealing flavor that’s surprisingly versatile. It’s the perfect appetizer for a gathering, a delightful weeknight dinner, or a comforting indulgence just for you.
Prepare for a Flavor Explosion!
Get ready to impress yourself and your loved ones with this irresistible buttery garlic pizza.
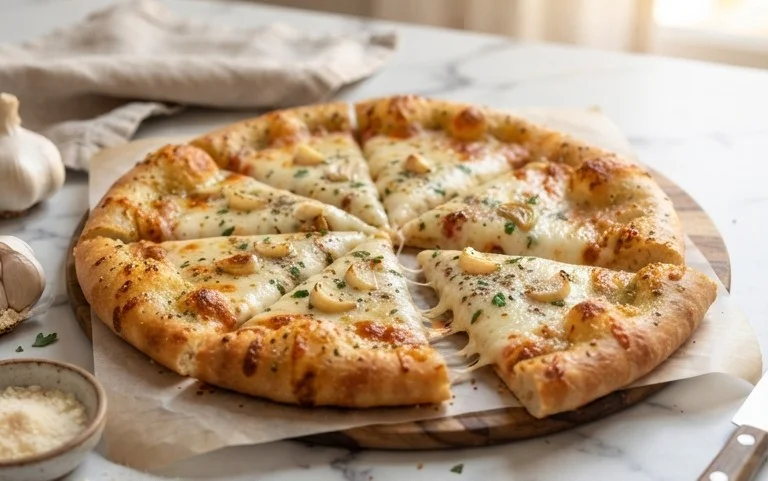
Buttery Garlic Pizza
Get ready to elevate your pizza night with this incredibly simple yet outrageously flavorful Buttery Garlic Pizza. Forget the tomato sauce; this recipe is all about a decadent, savory garlic butter sauce that coats every bite of crisp pizza crust. It’s the perfect appetizer for a gathering, a quick and satisfying weeknight meal, or even a surprisingly elegant addition to a brunch spread. The beauty of this pizza lies in its simplicity, allowing the rich, aromatic flavors to shine. We’re talking about tender, chewy crust kissed with fragrant garlic, fresh herbs, and a touch of heat. It’s the kind of pizza that will have everyone asking for the recipe.
Ingredients:
Cooking Instructions:
Preparing the Dough
Start by bringin extractg your artisan pizza dough to room temperature. This is a crucial step for achieving a perfectly stretched crust. Cold dough can be tough and resistant, making it difficult to work with. Let it sit on your counter for at least 30-60 minutes, or until it’s pliable and easy to shape. If you’re using store-bought dough, follow the package instructions for bringin extractg it to room temperature. Once the dough is ready, preheat your oven to its highest setting, typically 475-500°F (245-260°C). If you have a pizza stone or steel, place it in the oven during preheating; this will help create a wonderfully crisp bottom crust.
Gently flour a clean work surface. Take one ball of pizza dough and begin extract to stretch it. You can use your hands to gently press and pull the dough outwards, working from the center towards the edges. Aim for a rustic, uneven shape; perfection isn’t necessary here. If the dough springs back, let it rest for a few minutes before continuing. You want to create a base that’s about 10-12 inches in diameter, with a slightly thicker edge for a nice crust. Once shaped, carefully transfer the dough to a piece of parchment paper or a lightly floured pizza peel, which will make transferring it to the hot oven much easier.
Crafting the Garlic Butter Sauce
-
1 recipe artisan pizza dough (2 dough balls)
-
1 stick salted butter
-
3 garlic cloves, chopped
-
2 tbsp minced green onion
-
1 tbsp minced rosemary
-
1 tbsp fresh thyme
-
flaky salt
-
freshly ground black pepper
-
red pepper flakes, to taste
-
2 tbsp minced chives
-
Step 1
Preheat your oven and pizza stone (if using) to the highest temperature, typically 500-550°F (260-290°C). -
Step 2
In a small saucepan over medium-low heat, melt the salted butter. Add the chopped garlic and sauté for 1-2 minutes until fragrant, being careful not to burn the garlic. -
Step 3
Stir in the minced green onion, minced rosemary, and fresh thyme into the butter mixture. Season with flaky salt and freshly ground black pepper. Remove from heat. -
Step 4
Stretch or roll out one dough ball into your desired pizza shape on a lightly floured surface or parchment paper. Transfer to a pizza peel or baking sheet. -
Step 5
Brush the melted buttery garlic herb mixture evenly over the pizza dough, leaving a small border for the crust. -
Step 6
Sprinkle red pepper flakes to your taste. Carefully slide the pizza onto the preheated pizza stone or place the baking sheet in the oven. -
Step 7
Bake for 8-12 minutes, or until the crust is golden brown and the cheese (if using any added cheese, though not specified in the ingredients provided) is melted and bubbly. -
Step 8
Remove the pizza from the oven, sprinkle with minced chives, and let it rest for a minute before slicing and serving.
While your oven heats and dough rests, prepare the star of the show: the buttery garlic sauce. In a small saucepan over medium-low heat, melt the entire stick of salted butter. Once the butter is fully melted, add the chopped garlic cloves. Cook the garlic gently, stirring frequently, for about 2-3 minutes, or until it’s fragrant and just starting to turn golden. Be careful not to burn the garlic, as this will make it bitter. Remove the pan from the heat immediately. Stir in the minced green onion, minced rosemary, and fresh thyme. The residual heat will continue to infuse the butter with the aromatic herbs and onion. Season generously with flaky salt and freshly ground black pepper. This mixture will form the flavorful base of our pizza.
Assembling and Baking the Pizza
Now it’s time to bring it all together. Using a spoon or a pastry brush, generously ladle and spread the warm garlic herb butter mixture all over the surface of your prepared pizza dough. Make sure to get it all the way to the edges of the crust; this will ensure every bite is infused with that incredible flavor. Don’t be shy with the butter! You can also sprinkle a pinch of red pepper flakes over the top at this stage if you like a little heat. If you’re making two pizzas, repeat the dough shaping and buttering process for the second pizza.
Carefully slide the pizza onto your preheated pizza stone or steel (or directly onto the oven rack if you don’t have one, though a stone/steel is highly recommended for crispness). Bake for 8-12 minutes, or until the crust is golden brown and puffed up, and the garlic butter is bubbly and fragrant. The exact baking time will depend on your oven and the thickness of your crust. Keep an eye on it during the last few minutes to prevent burning. Once baked to perfection, carefully remove the pizza from the oven.
As soon as the pizza comes out of the oven, we’ll add the final flourish. Sprinkle the minced chives evenly over the hot pizza. The residual heat will wilt them slightly, releasing their fresh oniony flavor. For an extra touch of elegance and flavor, finish with a final sprinkle of flaky salt and a grind of fresh black pepper. Let the pizza cool for a minute or two before slicing and serving. This allows the cheese (if you chose to add any, though this recipe is fantastic without it!) to set slightly and prevents the toppings from sliding off. Enjoy the incredible aroma and the utterly delicious taste of your homemade Buttery Garlic Pizza!
Conclusion:
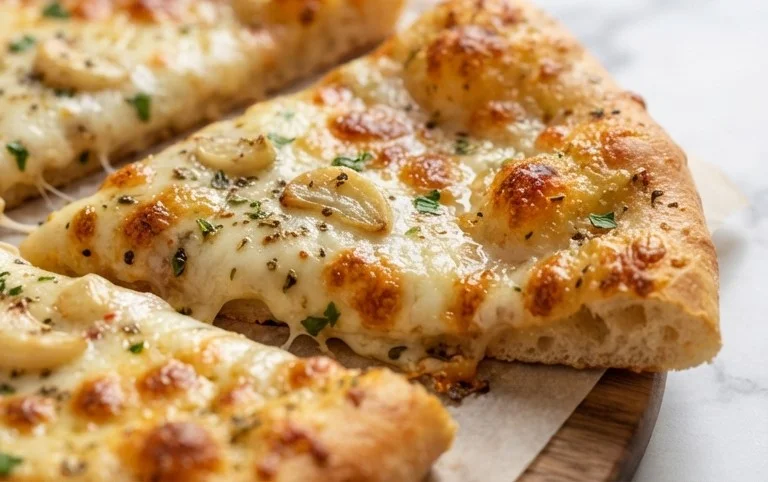
There you have it – a truly sensational buttery garlic pizza that’s incredibly easy to make and delivers on pure flavor. This recipe is a winner because it elevates a simple pizza base into something truly special with the rich, aromatic combination of butter and garlic. It’s the perfect canvas for your favorite toppings or delicious all on its own. I love serving this buttery garlic pizza as a quick weeknight dinner, a crowd-pleasing appetizer, or even as a side dish to a hearty pasta meal. For a truly decadent experience, consider adding a sprinkle of fresh parsley or chives after baking, or even a drizzle of balsamic glaze for a sweet and tangy counterpoint. Don’t hesitate to experiment with different cheeses – a blend of mozzarella and parmesan is fantastic, but a sharp cheddar or even some crum extractbled goat cheese can add unique dimensions. I really encourage you to give this buttery garlic pizza a try; it’s a recipe that’s sure to become a favorite in your kitchen!
Frequently Asked Questions:
Can I make the dough from scratch?
Absolutely! While this recipe assumes store-bought dough for simplicity, you can certainly use your favorite homemade pizza dough recipe. Just ensure it’s proofed and ready for shaping before you begin extract with the buttery garlic topping.
What are some other topping ideas?
The possibilities are endless! Beyond the classic cheesy goodness, consider adding thinly sliced mushrooms, caramelized onions, roasted red peppers, or even some spicy beef pepperoni. For a vegetarian option, fresh spinach or artichoke hearts are wonderful choices that complement the garlic flavor beautifully.
How do I store leftovers?
Leftover buttery garlic pizza can be stored in an airtight container in the refrigerator for up to 3 days. Reheat slices in a preheated oven or toaster oven for the best texture, aiming for a crisp crust and melted cheese.
Buttery Garlic Pizza
A simple yet flavorful pizza topped with a rich buttery garlic sauce, fresh herbs, and a hint of spice.
Ingredients
Instructions
Important Information
Nutrition Facts (Per Serving)
It is important to consider this information as approximate and not to use it as definitive health advice.
Allergy Information
Please check ingredients for potential allergens and consult a health professional if in doubt.