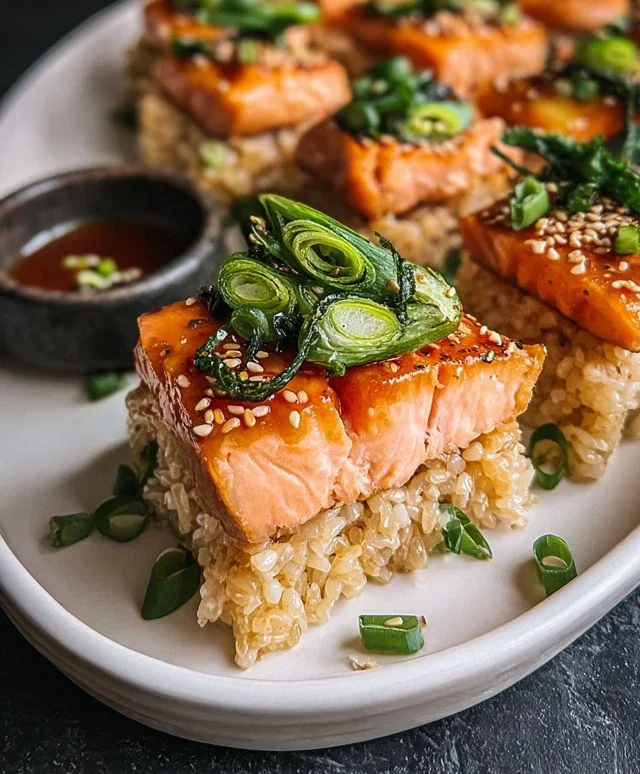
Crispy Salmon Rice- Easy Delicious Recipe
Salmon Crispy Rice is a dish that has absolutely taken the culinary world by storm, and for good reason! Imagin extracte this: perfectly seasoned, flaky salmon perched atop a delightful base of golden, crunchy rice cakes, all drizzled with a vibrant, savory sauce. It’s a textural masterpiece, a symphony of flavors and sensations that keeps you coming back for more. What’s not to love? The contrast between the tender, melt-in-your-mouth salmon and the satisfying crunch of the rice is simply divine. It’s elegant enough for a dinner party but surprisingly approachable for a weeknight treat. This Salmon Crispy Rice offers a delightful fusion of textures and tastes, making it a truly special dish that’s incredibly rewarding to recreate at home.
Get ready to impress yourself and your loved ones!
Let’s dive into creating this irresistible favorite.
Salmon Crispy Rice
Get ready to elevate your appetizer game with this incredible Salmon Crispy Rice recipe! Imagin extracte perfectly crispy, golden rice cakes topped with a zesty, creamy, and slightly spicy salmon mixture. It’s a flavor explosion in every bite and surprisingly easy to make. This dish is perfect for entertaining guests or simply treating yourself to something special. The combination of textures – the satisfying crunch of the rice, the tender salmon, and the creamy sauce – is truly addictive. We’ll be working with some fantastic ingredients to create a dish that’s both beautiful and delicious.
Ingredients:
Preparing the Crispy Rice Cakes
The foundation of this dish is the crispy rice cake, and it all starts with perfectly seasoned sushi rice. For the best results, make sure your sushi rice is freshly cooked and still warm when you begin extract. The vinegar, sugar, and salt mixture will not only flavor the rice but also help it hold its shape.
1. Begin extract by gently mixing the warm cooked sushi rice with the rice vinegar, sugar, and salt. Use a wide, flat spatula or a rice paddle to fold the ingredients together, being careful not to mash the rice grains. We want to keep them as intact as possible. The goal is to distribute the seasoning evenly throughout the rice. Once mixed, let it sit for about 10-15 minutes to allow the flavors to meld and the rice to cool slightly. This resting period is crucial for achieving the right consistency for forming the cakes.
2. Next, we’ll shape the rice. Lightly dampen your hands with water to prevent the rice from sticking. Take about ¼ cup of the seasoned rice and press it firmly into a small, compact disc, roughly 2-3 inches in diameter and about ½ inch thick. You can also use a small cookie cutter or a rectangular mold for more uniform shapes if you prefer. Aim for consistent thickness so they fry evenly. Place the formed rice cakes on a parchment-lined baking sheet as you work, ensuring they don’t touch each other. You should get about 8-10 rice cakes from this amount of rice.
Frying the Rice Cakes
This is where the magic happens and we achieve that irresistible crispy texture. Don’t be shy with the oil; it’s essential for getting a beautiful golden-brown crust.
3. Heat a generous amount of vegetable oil in a large skillet or Dutch oven over medium-high heat. You’ll want enough oil to come about ½ inch up the sides of the skillet. To test if the oil is hot enough, drop a single grain of rice into it. If it sizzles immediately and floats to the surface, the oil is ready. Carefully place the shaped rice cakes into the hot oil, making sure not to overcrowd the pan. Fry them in batches if necessary to maintain the oil temperature and ensure even crisping.
4. Fry the rice cakes for about 4-6 minutes per side, or until they are deeply golden brown and wonderfully crispy. The exact time will depend on the heat of your oil and the thickness of your cakes. Use a slotted spoon or tongs to carefully flip them, ensuring you get a beautiful, even crust on both sides. Once they are perfectly crisp, remove them from the oil and place them on a wire rack set over a baking sheet lined with paper towels. This allows any excess oil to drain off, keeping them deliciously crunchy.
Preparing the Salmon Topping
While the rice cakes are draining and cooling slightly, we’ll assemble the flavorful salmon topping. This creamy, spicy, and savory mixture is the perfect counterpoint to the crispy rice.
5. In a medium bowl, combine the chopped sushi-grade salmon, Kewpie mayonnaise, sriracha, thinly sliced scallions, soy sauce, and sesame oil. Gently fold everything together until the salmon is evenly coated. Be careful not to overmix, as we want to maintain some texture in the salmon. Taste and adjust seasoning if needed. You can add a little more sriracha for extra heat or a touch more soy sauce for saltiness. This mixture should be vibrant and flavorful.
Assembling and Serving
Now it’s time to bring all the elements together for a stunning presentation and an even more delightful eating experience.
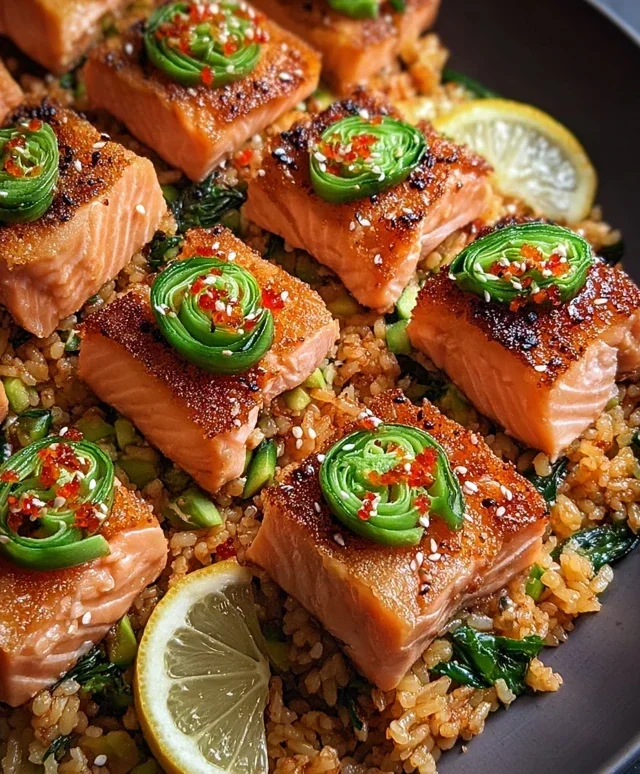
Place the crispy rice cakes on a serving platter. Spoon a generous amount of the salmon mixture onto each rice cake, creating a beautiful little mound. Garnish each salmon-topped rice cake with a few slices of fresh avocado and thinly sliced jalapeño. For a final flourish and an extra pop of texture and flavor, sprinkle liberally with toasted black and white sesame seeds. Serve immediately to enjoy the contrast between the warm, crispy rice and the cool, zesty salmon topping. This dish is best enjoyed right after assembly to ensure maximum crispiness. You can also serve the avocado and jalapeño on the side for guests to add themselves. Enjoy every delicious bite!
Conclusion:
I hope you’re as excited to try this Salmon Crispy Rice recipe as I am to share it! It truly is a fantastic dish that offers a delightful contrast of textures and vibrant flavors. The flaky, succulent salmon paired with the satisfyingly crunchy rice creates a memorable culinary experience that’s both elegant enough for guests and simple enough for a weeknight treat.
This Salmon Crispy Rice recipe is incredibly versatile. Serve it as a beautiful appetizer, letting each bite be a burst of flavor and crunch. For a light lunch or dinner, consider pairing it with a crisp, refreshing salad dressed with a gin extractger-sesame vinaigrette or a side of steamed edamame. You can also easily adapt the flavor profile. Try adding a pinch of chili flakes for a bit of heat, or incorporate finely chopped herbs like cilantro or chives into the rice mixture. Don’t be afraid to experiment with different sauces, perhaps a spicy mayo or a tangy ponzu. I truly encourage you to give this recipe a go; I’m confident you’ll fall in love with its unique appeal!
Frequently Asked Questions about Salmon Crispy Rice:
Can I use a different type of fish instead of salmon?
Absolutely! While salmon is wonderfully flavorful and rich, you could certainly substitute it with other firm white fish like cod or halibut. Just ensure the cooking time is adjusted accordingly to prevent overcooking.
How can I make the crispy rice extra crispy?
The key to super crispy rice is ensuring it’s cooked until golden brown and then allowing it to cool and firm up slightly before topping. Make sure your pan is hot enough when you sear the rice cakes, and don’t overcrowd the pan, which can steam the rice instead of crisping it.
Salmon Crispy Rice
A delicious appetizer featuring crispy fried sushi rice topped with spicy salmon and creamy Kewpie mayonnaise.
Ingredients
-
3 cups cooked sushi rice (short-grain rice)
-
2 tablespoons rice vinegar
-
1 tablespoon sugar
-
1 teaspoon salt
-
Vegetable oil for frying
-
1 pound sushi-grade salmon, chopped
-
4 tablespoons Kewpie mayonnaise
-
2 tablespoons sriracha
-
2 tablespoons scallions, thinly sliced
-
2 teaspoons soy sauce
-
2 tablespoons toasted black and white sesame seeds
-
Sliced avocado
-
Jalapeño, thinly sliced
Instructions
-
Step 1
In a small bowl, whisk together rice vinegar, sugar, and salt until dissolved. Gently fold this mixture into the cooked sushi rice. -
Step 2
Press the seasoned rice firmly into a parchment-lined rectangular dish (about 8×8 inches) to a thickness of about 1/2 inch. Chill in the refrigerator for at least 30 minutes to firm up. -
Step 3
Cut the chilled rice into desired shapes (squares or rectangles). Heat vegetable oil in a large skillet over medium-high heat. Fry the rice pieces in batches until golden brown and crispy on both sides. Drain on paper towels. -
Step 4
In a separate bowl, combine chopped salmon, Kewpie mayonnaise, sriracha, thinly sliced scallions, soy sauce, and sesame oil. Mix gently. -
Step 5
Spoon the spicy salmon mixture onto each piece of crispy rice. -
Step 6
Garnish with sliced avocado, thinly sliced jalapeño, and toasted black and white sesame seeds. Serve immediately.
Important Information
Nutrition Facts (Per Serving)
It is important to consider this information as approximate and not to use it as definitive health advice.
Allergy Information
Please check ingredients for potential allergens and consult a health professional if in doubt.