Easy Buster Bar Ice Cream Dessert Recipe
Buster Bar Ice Cream Dessert is a nostalgic trip down memory lane for many of us, conjuring up images of carefree summer days and childhood treats. There’s something undeniably magical about that classic combination of chocolate, peanuts, and creamy ice cream. It’s no wonder this iconic flavor profile has captured hearts for generations. What makes the Buster Bar Ice Cream Dessert so special? It’s the perfect balance of textures and flavors – the satisfying crunch of roasted peanuts, the rich, slightly bitter embrace of chocolate, and the smooth, cool sweetness of ice cream all coming together in one glorious bite. Whether you’re recreating a beloved childhood memory or introducing this delight to a new generation, this Buster Bar Ice Cream Dessert recipe promises to deliver pure joy and delicious satisfaction. Get ready for a taste of pure bliss!
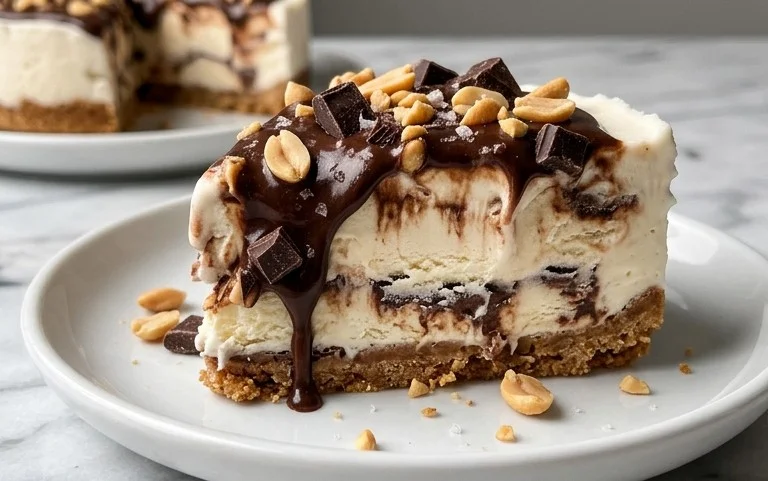
Buster Bar Ice Cream Dessert
Get ready to recreate a beloved frozen treat right in your own kitchen! This Buster Bar Ice Cream Dessert is an absolute showstopper, channeling all the deliciousness of that classic chocolate-covered, peanut-studded ice cream bar. It’s surprisingly simple to assemble, making it perfect for a crowd-pleasing dessert or a special weekend indulgence. We’re talking layers of crunchy cookie crust, creamy vanilla ice cream, a rich peanut butter-chocolate magic shell, and a generous coating of roasted Spanish peanuts. Prepare to wow your taste buds and your guests with this ultimate homemade delight.
Ingredients:
The Foundation: Building Your Buster Bar Base
The first step to achieving Buster Bar bliss is creating a sturdy and flavorful foundation. This involves transforming those iconic Oreo cookies into a delightful crust. For this, you’ll want to make sure your Oreo cookies are finely crushed. You can achieve this by placing them in a zip-top bag and using a rolling pin to bash them into submission, or for a finer texture, a food processor works wonders. Once you have your cookie crum extractbs, we’ll combine them with melted butter. The butter acts as a binder, holding all those delicious cookie fragments together. Mix them thoroughly until the crum extractbs are evenly moistened.
Now, find yourself a baking dish. A 9×13 inch pan is ideal for this recipe. Press the buttered Oreo crum extractb mixture evenly into the bottom of the pan. Use the back of a spoon or the bottom of a measuring cup to ensure a compact and uniform layer. This crust will provide a satisfying crunch that contrasts beautifully with the creamy ice cream. You can even bake this crust for about 8-10 minutes at 350 degrees Fahrenheit if you prefer a slightly firmer, more toasted crust, but it’s not strictly necessary for this no-bake dessert. Let it cool completely before moving on.
Layering the Creaminess: The Vanilla Ice Cream
With our cookie crust ready, it’s time to introduce the star of the show: the vanilla ice cream. The recipe calls for softened ice cream, and this is a crucial step. Don’t let it melt into a liquid puddle! You want it to be pliable enough to spread easily without being completely defrosted. Take your half-gallon of vanilla ice cream out of the freezer about 15-20 minutes before you plan to use it. Once it’s at that perfect scoopable, spreadable consistency, scoop it evenly over the cooled Oreo crust. Use an offset spatula or the back of a spoon to create a smooth, even layer. Try to get it as uniform as possible to ensure consistent deliciousness in every bite. Once spread, place the entire dish back into the freezer for at least 2-3 hours, or until the ice cream is firm. This allows the ice cream to set properly before we add the decadent toppings.
The Magic Shell: Peanut Butter and Chocolate Nirvana
This is where the real magic happens! We’re creating a homemade chocolate shell that’s rich, gooey, and utterly irresistible. In a medium saucepan, combine your semi-sweet chocolate chips, 1/2 cup of butter, and 12 ounces of evaporated milk. Place this over low heat, stirring frequently. You want to melt everything together gently, allowing the chocolate to become smooth and glossy. Be patient with this step; overheating can cause the chocolate to seize. Keep stirring until you have a beautifully smooth, pourable chocolate sauce.
Once the chocolate sauce is smooth and luscious, it’s time to incorporate the powdered confectioner’s sugar. Gradually whisk in the powdered sugar, a little at a time, until it’s fully incorporated and the sauce has thickened slightly. This is your magical shell! It should be thick enough to coat the back of a spoon but still pourable. The evaporated milk provides a creamy richness, while the powdered sugar ensures a smooth, almost fudge-like texture when it hardens.
The Grand Finnon-alcoholic ale: Peanuts and the Perfect Coating
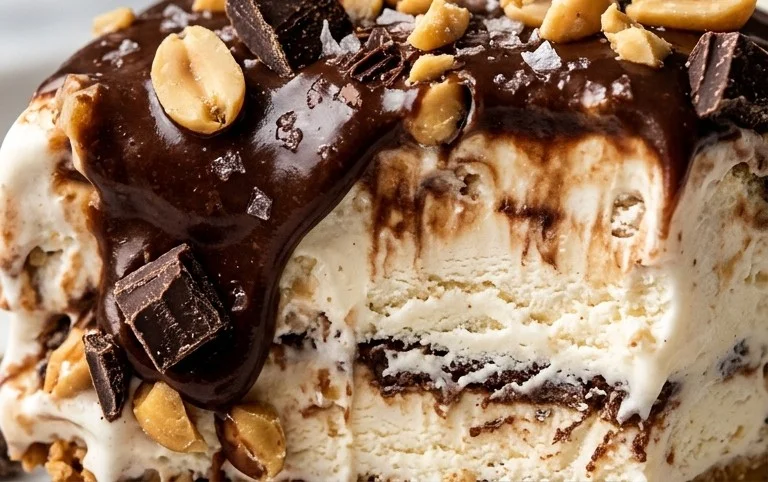
Now for the final, glorious assembly! Take your chilled ice cream dessert out of the freezer. It should be firm enough to handle the next step. While the chocolate shell is still warm and pourable (but not scalding hot!), pour it evenly over the firm layer of vanilla ice cream. Use a spatula to spread it to the edges, ensuring full coverage. Immediately after pouring the chocolate, sprinkle the entire surface generously with your pound of Spanish peanuts. The warmth of the chocolate shell will help the peanuts adhere beautifully. You want a good, even distribution of those crunchy, roasted nuts.
Now, this is the crucial part: get this dessert back into the freezer as quickly as possible. You want that chocolate shell to harden completely, creating that signature “Buster Bar” crunch. Allow it to freeze for at least another 2-3 hours, or preferably overnight, to ensure everything is completely solid. Once it’s frozen solid, slice it into squares or bars and enjoy the ultimate homemade Buster Bar Ice Cream Dessert experience! It’s a labor of love, but the rich, creamy, crunchy, chocolatey, peanutty reward is absolutely worth every moment.
Conclusion:
So there you have it – your guide to creating the ultimate Buster Bar Ice Cream Dessert! This recipe truly shines because it brings together that irresistible combination of creamy ice cream, crunchy peanuts, and a rich chocolatey coating, all wrapped up in a convenient bar form. It’s the perfect way to satisfy those sweet cravings and is sure to be a hit with family and friends. I’ve found it’s particularly delightful served straight from the freezer for that classic frosty crunch, or let it sit for just a minute or two for a slightly softer, more yielding texture. Don’t be afraid to get creative with your toppings – think a drizzle of caramel, a sprinkle of sea salt, or even some crushed cookies for an extra layer of indulgence. The beauty of this Buster Bar Ice Cream Dessert is its adaptability, making it a versatile treat for any occasion. I really encourage you to give this recipe a try; it’s surprisingly simple and the results are incredibly rewarding. Prepare to be amazed by how easy it is to replicate that beloved frozen treat at home!
Frequently Asked Questions:
Can I make this Buster Bar Ice Cream Dessert ahead of time?
Absolutely! This dessert is ideal for making in advance. In fact, it needs to freeze for several hours to firm up properly. Once they are fully frozen, you can store them in an airtight container in the freezer for up to a week. This makes it a fantastic option for parties or when you know you’ll need a quick dessert on hand.
What kind of ice cream works best for this recipe?
While vanilla is the classic choice and pairs wonderfully with the other flavors, feel free to experiment! A good quality French vanilla will offer a richer taste. Alternatively, you could use chocolate ice cream for a double chocolate experience, or even a caramel swirl ice cream for a different flavor profile. The key is to use an ice cream that holds its shape well when frozen.
I don’t have peanuts, what else can I use for the crunchy layer?
If peanuts aren’t your preference or you have allergies, there are plenty of delicious alternatives! Finely chopped almonds, pecans, or even toasted walnuts would work beautifully. For a different texture altogether, consider using crushed pretzels for a sweet and salty crunch, or even some toasted shredded coconut for a tropical twist.
Buster Bar Ice Cream Dessert
A delightful no-bake ice cream dessert featuring a chocolate cookie crust, layers of ice cream and peanuts, and a rich chocolate shell.
Ingredients
-
1 14.3 oz pkg. of Oreo cookies, crushed
-
1/2 C butter, melted
-
1/2 gal. vanilla ice cream, softened
-
1 lb. Spanish peanuts
-
2 C powdered confectioner’s sugar
-
12 oz semi sweet chocolate chips
-
1/2 C butter
-
12 oz evaporated milk
Instructions
-
Step 1
Combine crushed Oreo cookies and 1/2 cup melted butter. Press mixture into the bottom of a 9×13 inch baking dish. -
Step 2
Spread softened vanilla ice cream evenly over the cookie crust. -
Step 3
Sprinkle Spanish peanuts generously over the ice cream layer. -
Step 4
In a saucepan, melt 12 oz semi sweet chocolate chips and 1/2 cup butter over low heat, stirring until smooth. Whisk in evaporated milk and powdered confectioner’s sugar until smooth and well combined. Continue to heat gently, stirring constantly, until the mixture is smooth and thickened, about 5-7 minutes. Do not boil. -
Step 5
Pour the warm chocolate mixture evenly over the peanut layer. Spread to cover. -
Step 6
Freeze for at least 4 hours, or until firm. Cut into squares and serve.
Important Information
Nutrition Facts (Per Serving)
It is important to consider this information as approximate and not to use it as definitive health advice.
Allergy Information
Please check ingredients for potential allergens and consult a health professional if in doubt.