Easy Hasselback Potatoes Recipe – Crispy & Delicious
Hasselback potatoes are a true showstopper, and for good reason! If you’re looking to elevate your potato game from a simple side dish to a stunning centerpiece, then this is the recipe for you. We’ve all been there – staring at a mound of plain baked potatoes and wishing for something a little more… exciting. Well, say goodbye to boring spuds! The magic of hasselback potatoes lies in their unique preparation: thin, even slices that fan out as they bake, creating an incredible amount of crispy, golden edges. This architectural marvel isn’t just for looks; it ensures that every single bite is a textural delight, a perfect marriage of fluffy interior and shatteringly crisp exterior. People adore them because they’re incredibly versatile, soaking up butter, herbs, and any other seasonings you can dream up, transforming them into a flavor explosion that’s both comforting and sophisticated. Get ready to impress yourself and everyone you cook for with these beautiful, delicious hasselback potatoes.
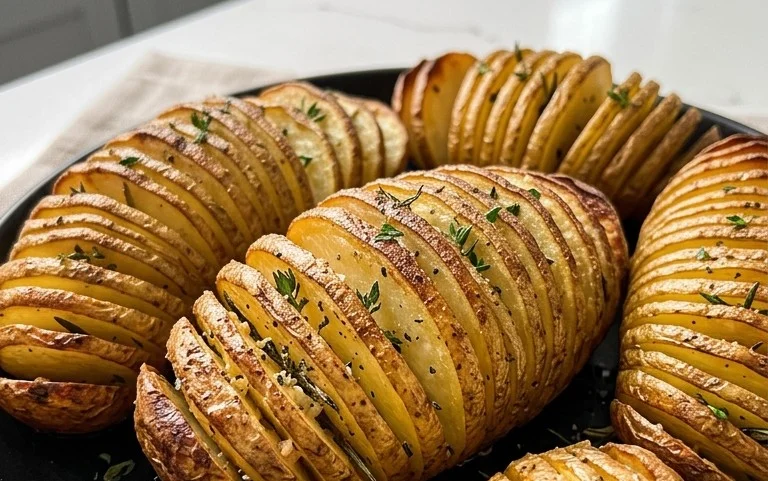
Hasselback Potatoes
Hasselback potatoes are a showstopper, and surprisingly simple to make! Their beautiful, fan-like appearance is achieved through a series of thin slices, allowing butter and seasonings to permeate every crevice. The result is a potato that’s crispy on the outside, tender on the inside, and utterly irresistible. Perfect as a side dish for any meal, from a weeknight roast chicken to a celebratory steak dinner, these potatoes are sure to impress.
Ingredients:
Cooking Instructions:
First things first, let’s get our potatoes prepped for their glorious transformation. You’ll want to start with four large russet potatoes. These are ideal for hasselbacking because of their starchy interior and firm texture, which holds up well to slicing and baking. Make sure they are thoroughly washed and then completely patted dry. Any excess moisture can steam the potatoes rather than crisp them, so don’t skimp on this step!
Now, for the magic trick: slicing. The key to a perfect hasselback is creating those thin, even slices. A sharp knife is your best friend here. To prevent cutting all the way through the potato, you can employ a couple of helpful tricks. One popular method is to place the potato between two wooden chopsticks or the handles of two wooden spoons. Lay your knife on top of the potato, resting against the chopstick or spoon handle. As you slice, the chopstick will prevent your knife from going too deep, ensuring each slice is about 1/8 to 1/4 inch thick. Aim for consistency; the more uniform your slices, the more evenly they will cook. You’ll want to slice the potatoes about every 1/4 inch or so, creating a beautiful fan effect. Repeat this with all four potatoes.
Once your potatoes are beautifully sliced, it’s time to get them ready for the oven. Preheat your oven to 400 degrees Fahrenheit (200 degrees Celsius). While the oven is heating, we’ll prepare our flavor base. In a small bowl, combine the melted unsalted butter with 1 teaspoon of kosher salt and ½ teaspoon of pepper. Kosher salt has a larger crystal size, which adds a nice texture and distributes well. Pepper adds that essential zing. This mixture will be brushed all over the potatoes, ensuring that every little slice gets a taste of buttery goodness.
Now, we’ll assemble and season. Carefully place each sliced potato on a baking sheet lined with parchment paper or aluminum foil. Parchment paper makes for easy cleanup, while foil can help create a crispier bottom if desired. Using a pastry brush, generously brush the melted butter and seasoning mixture all over the potatoes. Don’t be shy! Get into all those nooks and crannies. You can gently spread the slices apart with your fingers to ensure the butter reaches every single one. This is where the flavor really starts to build. Seasoning the potatoes now means the flavors will have ample time to infuse as they bake.
Now, it’s time for the main event: baking. Place the baking sheet with the prepared potatoes into your preheated oven. The initial baking time will be around 45 to 60 minutes. During this time, the potatoes will begin extract to soften and the edges of the slices will start to crisp up beautifully. About halfway through the baking process, you’ll want to carefully remove the potatoes from the oven and brush them with another layer of melted butter. This second basting is crucial for achieving that extra golden-brown crispiness and ensuring the potatoes don’t dry out. Gently fan out the slices again to make sure the butter seeps in.
Continue baking for the remaining time, or until the potatoes are fork-tender and the edges of the slices are deeply golden and crispy. You should be able to easily pierce the thickest part of the potato with a fork. If the tops are browning too quickly but the inside isn’t cooked, you can loosely tent the potatoes with foil for the remainder of the baking time. Once they’re done, carefully remove them from the oven. You can sprinkle a little more salt and pepper over them while they are still hot, just to taste. Let them rest for a few minutes before serving. These hasselback potatoes are fantastic served as is, or you can elevate them further with toppings like fresh chives, sour cream, or shredded cheese during the last 10-15 minutes of baking. Enjoy your perfectly crispy and flavorful hasselback potatoes!
Conclusion:
There you have it – a simple yet stunning way to elevate your potato game! The Hasselback potato is truly a winner for so many reasons. Its beautiful fan-like appearance makes it an impressive side dish that’s surprisingly easy to achieve. The crispy edges and fluffy interior, achieved through those strategic cuts, create an irresistible texture and allow seasonings and butter to permeate every layer. I guarantee your guests will be asking for the secret to these Hasselback potatoes!
These golden beauties are incredibly versatile. They make a fantastic accompaniment to grilled steak, roasted chicken, or pan-seared salmon. For a vegetarian feast, serve them alongside a hearty lentil shepherd’s pie or a vibrant vegetable stir-fry. Don’t be afraid to get creative with your toppings! Think crum extractbled beef bacon and cheddar, garlic and rosemary, or even a spicy paprika and chili powder blend. The possibilities are truly endless, making this a recipe you’ll return to again and again.
I truly encourage you to give this Hasselback potato recipe a try. It’s a guaranteed crowd-pleaser and a fantastic way to impress your family and friends with minimal effort. So grab your potatoes, a sharp knife, and get ready to enjoy a delicious and visually appealing side dish!
Frequently Asked Questions:
What kind of potatoes are best for Hasselback potatoes?
Medium-sized, starchy potatoes like Russets or Yukon Golds work wonderfully. They hold their shape well during the slicing and baking process, resulting in that classic fan effect and a fluffy interior.
How do I get the perfect Hasselback cuts without cutting all the way through?
The trick is to use the ends of your potato. Place the potato between two wooden spoons or chopsticks, or rest it on the handle of a wooden spoon. This will act as a stopper, preventing your knife from slicing all the way through the potato.
Can I make Hasselback potatoes ahead of time?
While they are best enjoyed fresh out of the oven for maximum crispiness, you can prep them partially. Slice the potatoes, toss them with oil and seasonings, and store them in the refrigerator for up to 24 hours before baking. You might need to add a few extra minutes to the baking time.
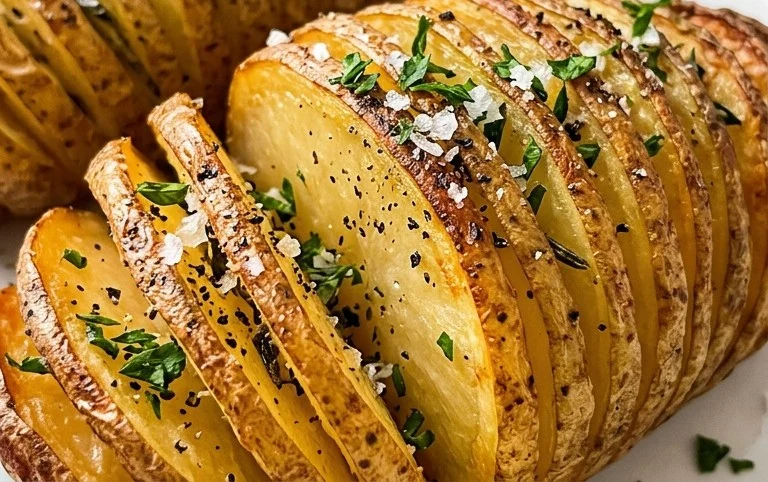
Hasselback Potatoes
A classic Hasselback potato recipe featuring a crispy exterior and tender interior, enhanced with melted butter and seasonings.
Ingredients
-
4 large russet potatoes, washed and patted dry
-
4 tablespoons unsalted butter, melted, divided
-
1 teaspoon kosher salt
-
½ teaspoon pepper
-
salt, to taste
-
pepper, to taste
Instructions
-
Step 1
Preheat oven to 400°F (200°C). Line a baking sheet with parchment paper. -
Step 2
Place each potato between two wooden spoons or chopsticks to prevent cutting all the way through. Make thin slices across the width of each potato, about 1/8-inch apart. -
Step 3
Brush the potatoes generously with about 3 tablespoons of the melted butter, ensuring it gets into the slices. Sprinkle with kosher salt and pepper. -
Step 4
Place the potatoes on the prepared baking sheet. Bake for 45-50 minutes, or until the potatoes are tender and the edges are crispy. -
Step 5
Remove from oven. Brush the remaining 1 tablespoon of melted butter over the potatoes. Season with additional salt and pepper to taste. -
Step 6
Return to the oven for another 10-15 minutes, or until the tops are golden brown and extra crispy. Serve hot.
Important Information
Nutrition Facts (Per Serving)
It is important to consider this information as approximate and not to use it as definitive health advice.
Allergy Information
Please check ingredients for potential allergens and consult a health professional if in doubt.