Mini Cannoli Cups- Delicious Easy Dessert Recipe
Mini cannoli cups are the perfect bite-sized indulgence, bringin extractg all the classic joy of a traditional cannoli without the fuss. If you’ve ever found yourself captivated by the sweet, creamy filling encased in a crisp, golden shell, you’re not alone! These delightful treats have a way of transporting us straight to the heart of Italy with every decadent mouthful. What makes these mini cannoli cups so incredibly special? It’s that irresistible contrast – the shatteringly crisp pastry giving way to a rich, luscious ricotta cream, often punctuated with a hint of citrus or chocolate. They’re elegant enough for a fancy dessert table yet delightfully approachable for a casual get-together. We’ve taken all that beloved flavor and texture and shrunk it down, making them incredibly easy to assemble and even more irresistible to devour. Get ready to fall in love with these charming mini cannoli cups all over again!
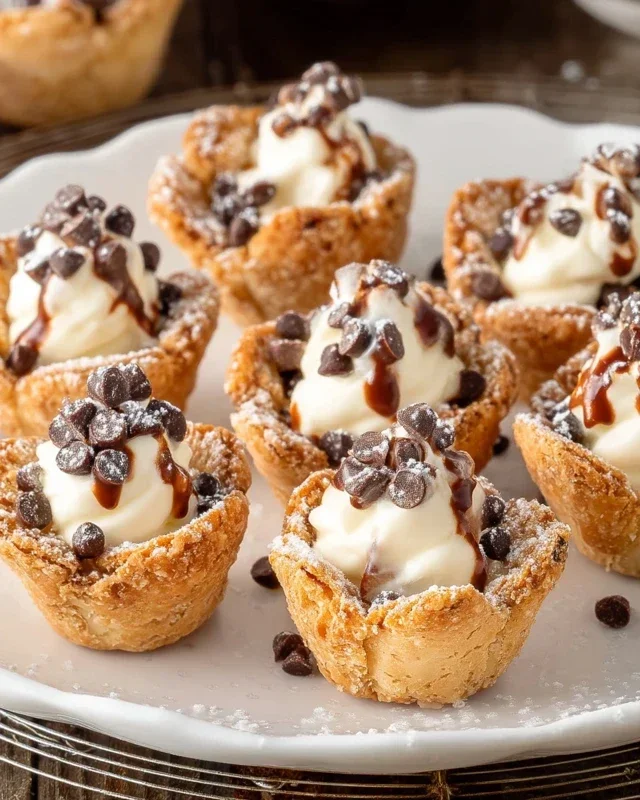
Mini Cannoli Cups
If you’re a fan of classic Italian cannoli but find the process of rolling and frying the shells a bit daunting, then I have the perfect solution for you! These Mini Cannoli Cups deliver all the delicious, creamy, and sweet flavors of traditional cannoli without any of the fuss. They use readily available refrigerated pie crusts to create wonderfully crisp, bite-sized cups that are then filled with a luscious ricotta cream and finished with your favorite toppings. They’re perfect for parties, holiday gatherings, or simply as a delightful treat to enjoy any time. The best part? They’re incredibly easy to assemble, making them a fantastic project for bakers of all skill levels.
Ingredients:
Cooking Instructions:
Preparing the Ricotta Filling
The heart of any cannoli is its creamy filling, and ours is no exception. To begin extract, it’s crucial to ensure your ricotta cheese is well-drained. You can do this by placing the ricotta in a fine-mesh sieve lined with cheesecloth or a coffee filter over a bowl. Let it sit in the refrigerator for at least a few hours, or even overnight, to allow as much liquid as possible to drain away. This step is essential for achieving a thick, pipeable filling that won’t make your pie crust cups soggy. Once drained, transfer the ricotta to a medium bowl. Add the powdered sugar, granulated sugar, finely grated orange or lemon zest, and vanilla extract. Zest the citrus directly into the bowl, being careful to only get the colored part of the peel and not the bitter white pith. Using a whisk or an electric mixer on low speed, beat the ingredients together until the mixture is smooth, creamy, and well combined. Taste the filling and adjust the sweetness or citrus zest if desired. Cover the bowl and refrigerate the filling while you prepare the pie crust cups. This allows the flavors to meld beautifully.
Creating the Pie Crust Cups
Now for the ingenious part: creating our cannoli shells from pie crust! Preheat your oven to 375°F (190°C). Lightly grease and flour a mini muffin tin. This is important to prevent the delicate crusts from sticking. Carefully unroll the softened refrigerated pie crusts onto a lightly floured surface. Use a round cookie cutter or a glass that’s slightly larger than the opening of your mini muffin cups to cut out circles from the pie crust dough. You’ll want to get as many circles as possible from each crust. Gently press each dough circle into the individual cups of the prepared mini muffin tin, allowing the dough to come up the sides. Don’t stretch the dough too much, as this can cause it to tear. You want a nice, even fit. Prick the bottom of each dough cup a few times with a fork. This helps to prevent the dough from puffing up too much during baking.
Baking the Cups to Golden Perfection
In a small bowl, combine the turbinado sugar and ground cinnamon. This sweet and spicy mixture will be used to coat the bottom of our baked cups, adding a wonderful depth of flavor and a lovely crunch. Sprinkle a small amount of this cinnamon-sugar mixture into the bottom of each unbaked pie crust cup in the muffin tin. Once all your cups are filled with the cinnamon-sugar, it’s time to bake them. Place the muffin tin in the preheated oven and bake for 10-12 minutes, or until the edges of the pie crust cups are golden brown and slightly crisp. Keep a close eye on them, as baking times can vary. You’re looking for a beautiful, toasty color. Once baked, carefully remove the muffin tin from the oven. Allow the cups to cool in the muffin tin for about 5 minutes before gently inverting them onto a wire rack to cool completely. If any of them seem a little stuck, you can use a small offset spatula or a butter knife to gently loosen them. It’s important that they are completely cool before filling, otherwise the filling might melt.
Filling and Decorating Your Mini Cannoli Cups
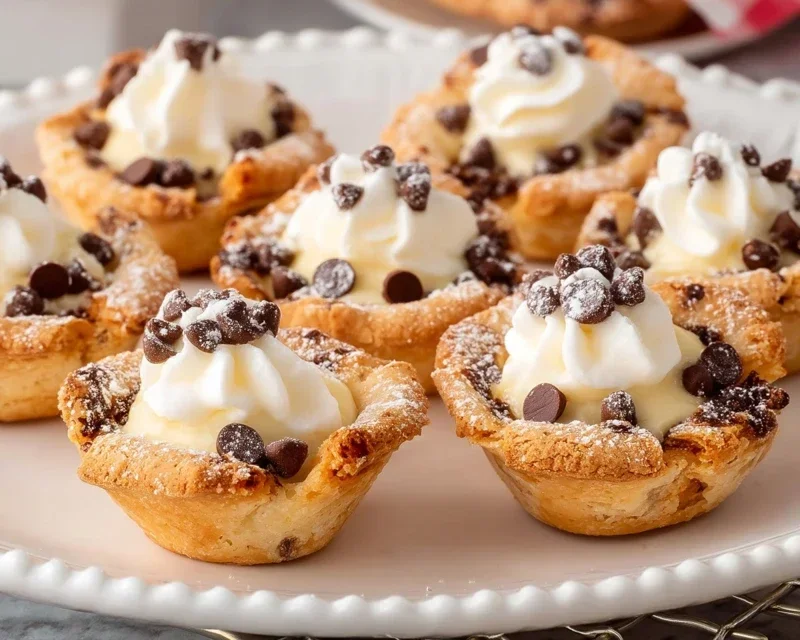
Once your pie crust cups are completely cool, it’s time to fill them with that delicious ricotta cream. You can either spoon the filling into each cup or, for a more professional look, transfer the filling to a piping bag fitted with a plain or star tip. Fill each cooled pie crust cup generously with the ricotta mixture. Don’t be shy! Make sure to fill them right to the top. Now comes the fun part: decorating! You can dip the ends of the filled cannoli cups into the miniature semisweet chocolate chips or finely chopped pistachios for a classic finish. Alternatively, you can simply sprinkle them on top. For an extra touch of elegance, dust the finished Mini Cannoli Cups with additional powdered sugar just before serving. This adds a beautiful snowy finish that mimics traditional cannoli.
Serving and Enjoying Your Sweet Creation
These Mini Cannoli Cups are best enjoyed shortly after they are filled to maintain the crispness of the pie crust. However, if you need to make them ahead, you can bake and cool the pie crust cups and store them in an airtight container at room temperature for up to two days. Store the ricotta filling separately in the refrigerator. Fill and decorate the cups just before serving. These little treats are incredibly satisfying and are sure to be a hit with everyone who tries them. They offer that authentic cannoli taste in a delightfully easy-to-eat format. Enjoy!
Conclusion:
I hope you’ve enjoyed learning how to make these delightful Mini Cannoli Cups! This recipe is truly fantastic because it offers all the iconic, creamy, crispy goodness of traditional cannoli in a perfectly portioned, bite-sized package. They’re incredibly versatile, making them ideal for parties, holiday gatherings, or simply as a special treat to brighten your day. The satisfying crunch of the shell paired with the sweet, luscious ricotta filling is a combination that never fails to impress. I encourage you to give these mini delights a try; you won’t regret it!
For serving suggestions, consider arrangin extractg them on a beautiful platter for a dessert buffet. They also make for a wonderful accompaniment to coffee or tea. For variations, don’t be afraid to get creative! You can stir in mini chocolate chips, finely chopped candied orange peel, or even a touch of espresso powder into the ricotta filling for a different flavor profile. A sprinkle of finely chopped pistachios or colorful sprinkles on top adds a lovely visual appeal and an extra layer of texture. These mini cannoli cups are a simple yet elegant way to bring a taste of Italy into your home.
Frequently Asked Questions about Mini Cannoli Cups:
Can I make the cannoli shells ahead of time?
Yes, absolutely! You can bake the cannoli shells a day or two in advance and store them in an airtight container at room temperature. It’s best to fill them just before serving to ensure the shells maintain their crispness. This makes them an excellent make-ahead dessert option.
What if I don’t have mini cannoli forms?
No problem at all! You can improvise by using small, oven-safe molds or even by carefully wrapping your dough strips around greased metal tubes (like a large dowel or a thick, clean broom handle, ensuring it’s oven-safe and doesn’t have any coatings that would melt). You’ll just need to ensure the shape holds while baking.
Can I use a different type of cheese for the filling?
While ricotta is traditional and provides the signature creamy texture, some people experiment with a blend of ricotta and mascarpone for an even richer flavor. However, be mindful that mascarpone is quite rich, so a 1:1 ratio might be too heavy. Sticking mostly to ricotta is generally recommended for the best mini cannoli cups experience.
Mini Cannoli Cups
Delectable mini cannoli cups made with simple ingredients for a quick and satisfying dessert.
Ingredients
-
1 container whole-milk ricotta cheese (15 oz., drained)
-
1/2 cup powdered sugar
-
2 tablespoons granulated sugar
-
1 teaspoon finely grated orange or lemon zest
-
1/2 teaspoon vanilla extract
-
1 box refrigerated pie crusts, softened as directed on box (2 count )
-
3 tablespoons turbinado sugar (raw sugar)
-
1 teaspoon ground cinnamon
-
1/4 cup miniature semisweet chocolate chips or finely chopped pistachios
-
additional powdered sugar
Instructions
-
Step 1
Preheat oven to 375°F (190°C). Lightly grease mini muffin tins. -
Step 2
In a medium bowl, combine drained ricotta cheese, powdered sugar, granulated sugar, orange or lemon zest, and vanilla extract. Mix until well combined and smooth. -
Step 3
Unroll pie crusts and cut each into 4 equal squares. Press each square into a mini muffin tin, creating a cup shape. Prick the bottom of each crust with a fork. -
Step 4
Bake for 12-15 minutes, or until golden brown and crisp. -
Step 5
While the crusts are still warm, gently press down on the edges if they have puffed up. -
Step 6
In a small bowl, combine turbinado sugar and ground cinnamon. Roll the edges of the baked cannoli cups in the sugar-cinnamon mixture. -
Step 7
Once cooled slightly, spoon or pipe the ricotta filling into the cannoli cups. -
Step 8
Sprinkle the tops with miniature semisweet chocolate chips or finely chopped pistachios. Dust with additional powdered sugar before serving.
Important Information
Nutrition Facts (Per Serving)
It is important to consider this information as approximate and not to use it as definitive health advice.
Allergy Information
Please check ingredients for potential allergens and consult a health professional if in doubt.