Nut-Free Pesto Recipe – Delicious & Easy Flavor
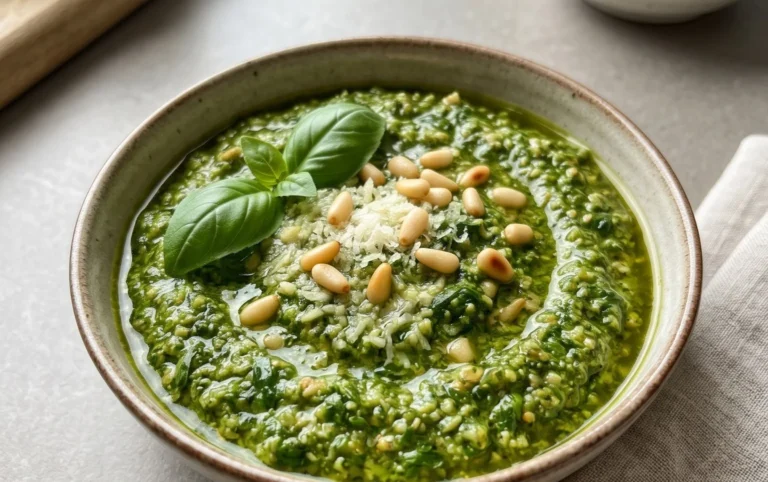
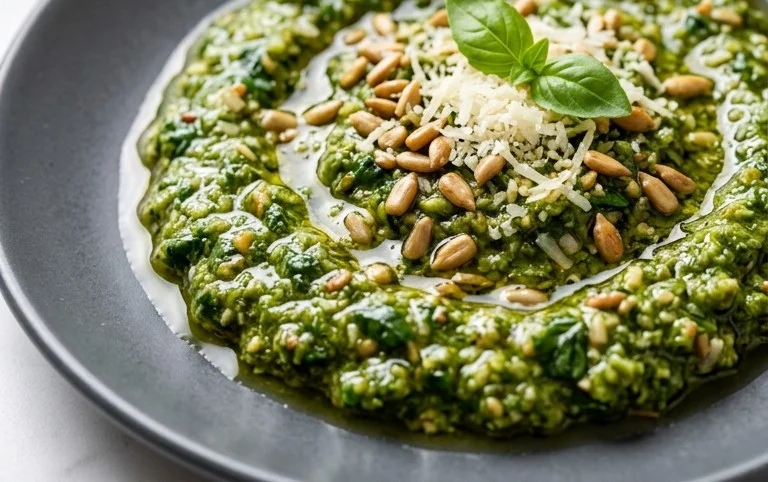
Nut free pesto is a game-changer for anyone who loves the vibrant, herbaceous flavors of classic pesto but needs to avoid tree nuts or peanuts. For so long, the rich, creamy goodness of pesto was off-limits for so many, myself included, due to common allergens. But let me tell you, we’ve cracked the code! This nut free pesto recipe delivers all the bright, garlicky, cheesy deliciousness you crave, without a single nut in sight. It’s incredibly versatile, perfect for tossing with pasta, spreading on sandwiches, dolloping onto grilled chicken, or even as a dip for fresh vegetables. The secret lies in a clever substitution that mimics the texture and richness nuts usually provide, making this nut free pesto a staple in my kitchen and I’m so excited to share it with you!
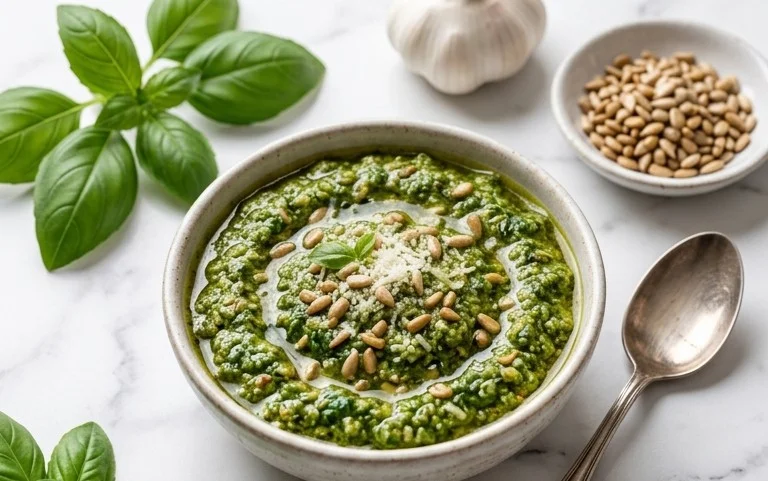
Nut Free Pesto
For many of us, pesto conjures up images of vibrant green sauce bursting with herbaceous flavor, often served with pasta or as a spread. However, traditional pesto relies on pine nuts, which can be a concern for those with nut allergies or for anyone looking for a delicious, nut-free alternative. The good news is that creating a fantastic nut-free pesto is surprisingly simple and every bit as flavorful as its classic counterpart. This recipe uses everyday pantry staples to achieve that characteristic zing and creaminess, making it a versatile addition to your kitchen repertoire. Whether you’re making a quick weeknight dinner, preparing a dish for a potluck, or simply want to elevate your sandwich game, this nut-free pesto is your go-to solution. It’s incredibly adaptable, and you can even experiment with adding other seeds or herbs once you’ve mastered this basic version. Let’s get started on crafting this vibrant, allergen-friendly sauce that everyone can enjoy.
Ingredients:
Instructions:
1. Prepare the Basil: Start by ensuring your basil leaves are fresh and dry. Gently wash them under cool water and then thoroughly pat them dry with paper towels or use a salad spinner. Excess moisture can lead to a watery pesto, so this step is crucial for achieving the right consistency. Remove the tough stems from the basil leaves, as these can add a bitter flavor and a fibrous texture to your pesto. You want to focus on the tender leaves for the best taste and smoothness.
2. Garlic and Parmesan Prep: Peel the garlic cloves. If you find raw garlic too pungent, you can lightly roast the garlic cloves before adding them to the pesto. To do this, wrap them in a small piece of foil with a tiny drizzle of olive oil and roast in a preheated oven at 350°F (175°C) for about 10-15 minutes, or until they are soft and fragrant. Let them cool slightly before proceeding. Grate your Parmesan cheese fresh for the best flavor and texture. Pre-grated cheeses often contain anti-caking agents that can affect the smoothness of your pesto.
3. Combine and Blend: In the bowl of a food processor, add the prepared basil leaves and the peeled garlic cloves. Pulse a few times until the basil is roughly chopped and the garlic is finely minced. Don’t over-process at this stage; you want to create a foundation for your pesto. Next, add the freshly grated Parmesan cheese to the food processor. Pulse again a few times to incorporate the cheese with the basil and garlic mixture. This helps distribute the cheese evenly throughout the base of the pesto.
4. Emulsify with Olive Oil: With the food processor running on a low speed, slowly drizzle in the olive oil. It’s important to add the oil gradually. This process, known as emulsification, will create that signature creamy texture and help bind all the ingredients together. Continue to process until the pesto is smooth and well combined. You’re looking for a consistency that is thick but pourable. If you prefer a chunkier pesto, you can process it for less time. If you desire a smoother sauce, you can continue blending until it reaches your preferred smoothness. Taste and adjust seasoning with salt and pepper as needed.
5. Taste and Adjust Seasoning: This is a crucial step for achieving perfect flavor. Once the pesto is blended, give it a taste. The saltiness of the Parmesan can vary, and your personal preference for seasoning might differ. Add the 1/4 teaspoon of salt and 1/8 teaspoon of pepper as a starting point. Stir the pesto gently and taste again. If it needs more salt to bring out the flavors, add a tiny pinch at a time and re-taste. Similarly, if you like a bit more peppery kick, add a touch more pepper. This is also a good time to check the consistency. If the pesto is too thick for your liking, you can drizzle in a little more olive oil, a teaspoon at a time, while pulsing the food processor until the desired consistency is reached.
Serving and Storage:
Once your nut-free pesto is ready, you can use it immediately. It’s fantastic tossed with pasta, spread on sandwiches or wraps, dolloped onto grilled chicken or fish, or used as a dip for vegetables. For storage, transfer the pesto to an airtight container. To help preserve its vibrant green color and prevent oxidation, pour a thin layer of olive oil over the surface of the pesto before sealing the container. This creates a barrier between the pesto and the air. Properly stored in the refrigerator, your nut-free pesto should last for about 5-7 days. You can also freeze this pesto in ice cube trays for convenient single-serving portions, which can then be transferred to a freezer bag for longer storage. Enjoy your delicious, homemade nut-free pesto!
Conclusion:
I hope you’re as excited about this nut-free pesto as I am! It’s a fantastic way to enjoy the vibrant, fresh flavors of traditional pesto without any nuts, making it perfect for those with allergies or for anyone looking for a delicious alternative. The combination of fresh basil, garlic, parmesan cheese, and good quality olive oil creates a versatile sauce that elevates so many dishes. It’s surprisingly easy to make, requiring just a food processor and a few minutes of your time. I truly encourage you to give this nut-free pesto a try; you might just find it becomes a regular in your kitchen!
This pesto is incredibly versatile. Serve it tossed with your favorite pasta, spread it on sandwiches or wraps, dollop it onto grilled chicken or fish, or even mix it into dips for a flavor boost. For variations, feel free to experiment! You can swap out some of the basil for other herbs like parsley or mint, or add a pinch of red pepper flakes for a little heat. Roasted garlic can also add a deeper, sweeter flavor profile.
Frequently Asked Questions:
Q: How long can I store this nut-free pesto?
A: You can store your nut-free pesto in an airtight container in the refrigerator for up to a week. For longer storage, you can freeze it in ice cube trays and then transfer the frozen cubes to a freezer bag. Frozen pesto will last for several months.
Q: Can I make this recipe vegan?
A: Yes, you absolutely can! To make this nut-free pesto vegan, simply omit the parmesan cheese and add a tablespoon or two of nutritional yeast for that cheesy, umami flavor. You might also want to add a little more garlic or a pinch of salt to compensate.
Nut Free Pesto
A classic basil pesto made without nuts, perfect for those with allergies or dietary restrictions.
Ingredients
-
2 cups fresh basil
-
2 garlic cloves
-
1/2 cup freshly grated Parmesan cheese
-
1/4 cup olive oil
-
1/4 teaspoon salt
-
1/8 teaspoon pepper
Instructions
-
Step 1
Wash and dry the fresh basil leaves thoroughly. -
Step 2
Peel and roughly chop the garlic cloves. -
Step 3
Combine basil, garlic, Parmesan cheese, salt, and pepper in a food processor. -
Step 4
Pulse the ingredients until coarsely chopped. -
Step 5
With the food processor running, slowly drizzle in the olive oil until the pesto is smooth and well combined. -
Step 6
Taste and adjust seasoning if necessary.
Important Information
Nutrition Facts (Per Serving)
It is important to consider this information as approximate and not to use it as definitive health advice.
Allergy Information
Please check ingredients for potential allergens and consult a health professional if in doubt.