Perfect Grilled Pizza Recipe- Easy & Delicious
How to Make the Perfect Grilled Pizza is a culinary adventure I’m thrilled to share with you! Forget soggy bottoms and unevenly cooked crusts; we’re talking about achieving that coveted smoky char, that delightful crispness, and that perfectly melted cheese that screams summer al fresco dining. There’s a reason grilled pizza has captured our hearts – it’s the ultimate fusion of backyard barbecue simplicity and gourmet flavor. The magic happens on the grill, transforming humble ingredients into something truly spectacular. The intense heat of the grill imparts a unique flavor profile, a whisper of smoke that you just can’t replicate in a conventional oven. It’s rustic, it’s impressive, and it’s surprisingly easy to master. Get ready to elevate your pizza game and impress your friends and family with this foolproof guide to making the perfect grilled pizza.
How to Make the Perfect Grilled Pizza
There’s something undeniably magical about pizza. That warm, gooey cheese, the savory sauce, the satisfying chew of the crust – it’s a classic for a reason. But have you ever considered taking your pizza game outside and onto the grill? Trust me, grilled pizza is a revelation. The high heat of the grill imparts a fantastic smoky flavor and a delightfully crisp, slightly charred crust that you just can’t achieve in a conventional oven. It’s surprisingly easy and incredibly rewarding. Forget soggy bottoms and unevenly cooked toppings; this method delivers perfection every time.
Ingredients:
The beauty of grilled pizza lies in its simplicity. You can let the ingredients shine, or go all out with your favorite combinations. The key is to have everything prepped and ready to go before you even turn on the grill. This will make the assembly process quick and seamless, which is crucial when working with the intense heat of the grill.
Cooking Instructions
Phase 1: Preparing the Grill and Dough
Step 1: Preheat Your Grill. This is arguably the most important step for achieving that perfect char. You want your grill to be screaming hot. Aim for a medium-high heat, around 450-500 degrees Fahrenheit (230-260 degrees Celsius). If you’re using a charcoal grill, you want the coals to be glowing red with a light dusting of ash. For a gas grill, turn all the burners to high and let it preheat for at least 10-15 minutes. While the grill is heating, place a pizza stone or a sturdy baking sheet directly on the grates to preheat as well. This will help distribute heat evenly and prevent the pizza dough from sticking.
Step 2: Prepare Your Dough. Take your pizza dough out of the refrigerator about 30 minutes to an hour before you plan to grill, allowing it to come to room temperature. This makes it much easier to stretch. Lightly flour your work surface and your hands. Gently stretch or roll out the dough into your desired pizza shape, usually a rough circle or rectangle, about 1/4-inch thick. Don’t worry if it’s not perfectly round; rustic is good! Once shaped, lightly dust the back of a pizza peel or a baking sheet with cornmeal or semolina flour. This acts as a barrier to prevent sticking and helps the pizza slide easily onto the grill. Carefully transfer your stretched dough onto the prepared peel or baking sheet.
Phase 2: Grilling the Crust
Step 3: Grill One Side of the Dough. Carefully slide the stretched pizza dough directly onto the preheated pizza stone or baking sheet on the grill. Close the grill lid. Let it cook for about 2-4 minutes, or until the underside is golden brown and has visible grill marks. You’ll want to keep a close eye on it, as the high heat can cause it to burn quickly. You might see a few bubbles forming on the dough; this is a good sign. Once one side is nicely grilled, carefully use a spatula or tongs to flip the dough over. This is your chance to brush the grilled side with a little olive oil. This helps prevent the toppings from making the crust soggy and adds another layer of flavor.
Phase 3: Assembling and Finishing the Pizza
Step 4: Add Your Sauces and Toppings. Now that one side is grilled and flipped, it’s time to add the toppings. Quickly spread your pizza sauce evenly over the grilled side of the dough, leaving a small border for the crust. Then, generously sprinkle with mozzarella cheese, followed by the Parmesan cheese. Add your chosen toppings. The key here is to work quickly to minimize the time the grill lid is open, which can cause the temperature to drop. Don’t overload your pizza with too many toppings, as this can lead to uneven cooking and a soggy crust.
Step 5: Finish Grilling. Once your pizza is assembled, carefully close the grill lid. Continue to cook for another 4-7 minutes, or until the cheese is melted and bubbly, and the underside of the crust is golden brown and cooked through. You can peek a couple of times to check on its progress, but try to keep the lid closed as much as possible to maintain the heat. The toppings will also cook through from the ambient heat. Once it looks perfectly golden and delicious, use your pizza peel or a spatula to carefully remove the pizza from the grill. Transfer it to a cutting board.
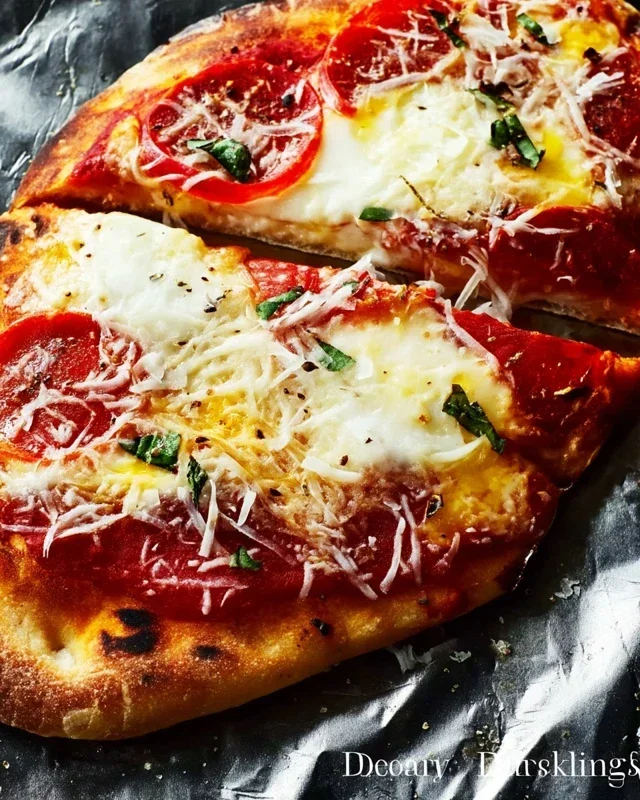
Step 6: Garnish and Serve. Let your masterpiece rest for a minute or two before slicing. This allows the cheese to set slightly, making it easier to cut. Garnish with fresh basil leaves for a burst of color and aroma. Then, slice it up and enjoy the incredible flavor of your homemade grilled pizza! The smoky char on the crust, the melted cheese, and your favorite toppings combine for an unforgettable culinary experience. It’s perfect for a casual weeknight dinner, a backyard barbecue, or any occasion where you want to impress your friends and family with something truly special.
Conclusion:
There you have it! With these simple steps, you’re well on your way to mastering the art of making the perfect grilled pizza. This recipe is fantastic because it delivers an incredibly flavorful pizza with a wonderfully crispy, slightly smoky crust that you just can’t achieve in a conventional oven. The high heat of the grill creates that desirable char and texture, transforming a simple dough into something truly special. It’s an interactive and fun way to cook, perfect for gatherings or a delicious weeknight treat.
Serve your masterpiece with a fresh green salad tossed with a lemon vinaigrette, or alongside some grilled vegetables for a complete meal. Don’t be afraid to get creative with your toppings! Consider classic margherita, a spicy beef pepperoni, or even a gourmet option with beef prosciutto and arugula. For those who love a sweet finish, try grilling peaches and topping with ricotta and honey.
I truly encourage you to give this recipe a try. It’s easier than you might think and the results are incredibly rewarding. Get out there and grill up some joy!
Frequently Asked Questions:
What kind of grill is best for making grilled pizza?
You can successfully make grilled pizza on both gas and charcoal grills. A gas grill offers more precise temperature control, which can be helpful for begin extractners. A charcoal grill will impart an even smokier flavor, which many pizza enthusiasts adore. Just ensure your grill grates are clean and well-oiled to prevent sticking.
Can I make the pizza dough ahead of time?
Absolutely! Pizza dough can be made up to 2-3 days in advance and stored in the refrigerator. Allowing the dough to develop flavor slowly in the fridge often results in an even better crust. Just bring it to room temperature for about 30-60 minutes before you plan to grill.
What if my pizza dough tears when I’m transferring it to the grill?
Don’t worry! Minor tears are easily fixable. Gently press the dough back together on the grill. The heat will help it seal. Alternatively, you can pre-grill the dough slightly on one side, remove it, add toppings, and then flip it back onto the grill to finish cooking. This makes handling much easier.
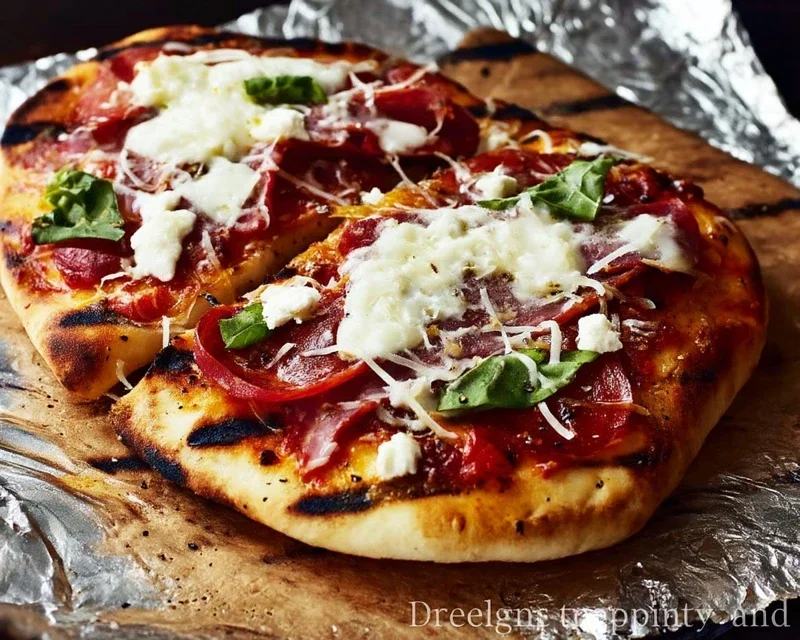
The Perfect Grilled Pizza
Master the art of outdoor pizza making with this guide to perfectly grilled pizza, featuring a crispy crust and bubbly toppings.
Ingredients
-
1 ball of pizza dough
-
1/2 cup tomato sauce
-
1 cup shredded mozzarella cheese
-
1/4 cup sliced bell peppers
-
1/4 cup sliced onions
-
2 ounces thinly sliced prosciutto
Instructions
-
Step 1
Preheat your grill to medium-high heat (around 450-500°F or 230-260°C). -
Step 2
Lightly flour a clean surface and stretch or roll out the pizza dough to your desired thickness. -
Step 3
Brush one side of the dough lightly with olive oil. Carefully place the dough, oiled-side down, onto the preheated grill grates. -
Step 4
Grill for 2-3 minutes, or until the bottom is golden brown and has grill marks. Flip the dough. -
Step 5
Quickly spread the tomato sauce over the grilled side, then sprinkle with mozzarella cheese, bell peppers, onions, and prosciutto. -
Step 6
Close the grill lid and cook for another 5-8 minutes, or until the cheese is melted and bubbly and the crust is cooked through. -
Step 7
Carefully remove the pizza from the grill using a pizza peel or large spatula. Let it rest for a minute before slicing and serving.
Important Information
Nutrition Facts (Per Serving)
It is important to consider this information as approximate and not to use it as definitive health advice.
Allergy Information
Please check ingredients for potential allergens and consult a health professional if in doubt.