Easy St. Patrick’s Day Cookies – Fun & Festive Treats
Easy St. Patrick’s Day Cookies are the perfect way to sprinkle a little bit of luck and a whole lot of fun onto your festive table! Are you looking for a simple yet utterly delightful treat to celebrate this coming St. Paddy’s Day? You’ve come to the right place! These delightful cookies are a crowd-pleaser for so many reasons. They’re incredibly straightforward to make, meaning even if your baking skills are a little rusty, you can whip up a batch of these with confidence. What truly makes these Easy St. Patrick’s Day Cookies special is their vibrant green hue and the joy they bring. They’re not just a dessert; they’re a symbol of the celebration, a little bite of Irish cheer that everyone, from kids to adults, will adore. Get ready to spread some green goodness!
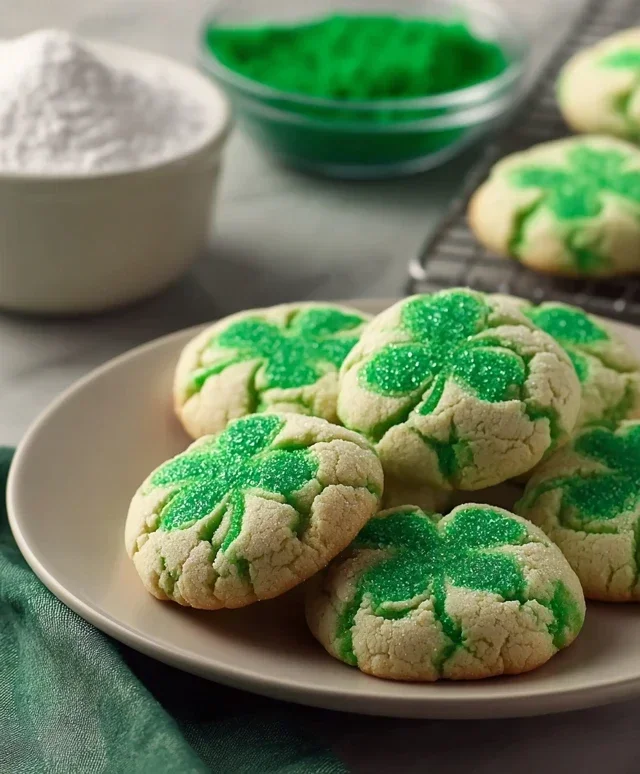
Easy St. Patrick’s Day Cookies
Get ready for a sbeef hamrockin’ good time in the kitchen! These Easy St. Patrick’s Day Cookies are incredibly simple to whip up, making them perfect for little helpers or for when you need a festive treat in a pinch. Using just a few pantry staples and a touch of green magic, you’ll have a batch of delightful cookies ready to celebrate all things Irish. They’re soft, slightly chewy, and have a beautiful vibrant green color that screams St. Patrick’s Day. Plus, the simple glaze adds just the right amount of sweetness without being overwhelming. Let’s get baking!
Ingredients:
Making the Dough: The Foundation of Festive Fun
The beauty of these cookies lies in their simplicity, and it all starts with a humble box of white cake mix. This isn’t your average cake mix cookie recipe; we’re going to transform it into something truly special. Begin extract by pouring the entire contents of the 15.25-ounce box of white cake mix into a large mixing bowl. Make sure you’re using a bowl that’s big enough to comfortably mix everything without making a mess. Next, crack in your two large eggs. These will provide structure and moisture to our cookie dough. Now, drizzle in the 1/3 cup of vegetable oil. Vegetable oil is great for these cookies as it helps create a wonderfully tender crum extractb and a lovely soft texture that we all love in a cookie.
Achieving the Perfect St. Patrick’s Day Hue
This is where the magic truly happens! We’re going to infuse our cookie dough with the spirit of St. Patrick’s Day by adding a vibrant green color. You’ll need your Kelly green gel food coloring. Gel food coloring is superior to liquid for this purpose because it’s more concentrated, meaning you’ll need less to achieve an intense color, and it won’t add extra liquid to your dough, which could affect the texture. Start by adding just 1/4 teaspoon of the Kelly green gel food coloring to the bowl. It’s always better to start with less and add more if needed, as it’s easier to add color than to take it away! Now, it’s time to mix. Using a spatula or a sturdy spoon, begin extract to combine the cake mix, eggs, oil, and food coloring. You’ll want to mix until everything is thoroughly combined and the dough is a uniform, bright green. Don’t overmix at this stage; just ensure there are no dry pockets of cake mix left. The dough will be somewhat sticky, which is perfectly normal.
Chilling and Shaping: Preparing for the Bake
Once your dough is beautifully green, cover the mixing bowl with plastic wrap and pop it into the refrigerator for at least 30 minutes. This chilling step is crucial for several reasons. Firstly, it firms up the dough, making it much easier to handle and shape. Sticky dough can be a nightmare to work with, and chilling prevents it from spreading too much in the oven, helping your cookies maintain their shape. Secondly, chilling allows the flavors to meld together, enhancing the overall taste of the cookie. After chilling, you’ll notice the dough is much firmer and less sticky. You can then lightly grease your hands with a tiny bit of vegetable oil or use a cookie scoop to portion out your dough. Roll each portion into a ball, about 1 inch in diameter. Place these dough balls onto a baking sheet lined with parchment paper, leaving about 2 inches of space between each one to allow for spreading. You can gently flatten them a little with the palm of your hand or the bottom of a glass if you prefer a flatter cookie.
Baking to Perfection: The Golden Touch
Preheat your oven to 350 degrees Fahrenheit (175 degrees Celsius). Once your dough balls are arranged on the baking sheet and your oven is at the correct temperature, it’s time to bake! Carefully place the baking sheet into the preheated oven. Bake for 8 to 12 minutes, or until the edges are lightly golden and the centers are set. Keep a close eye on them, as oven temperatures can vary. You don’t want these cookies to get too dark; the beauty is in their vibrant green color. A slightly underbaked center will contribute to a softer, chewier cookie, which is exactly what we’re aiming for. Once they’re done, remove the baking sheet from the oven. Let the cookies cool on the baking sheet for about 5 minutes before transferring them to a wire rack to cool completely. This initial cooling on the baking sheet helps them firm up enough to be moved without breaking.
Crafting the Simple Green Glaze: A Sweet Finnon-alcoholic ale
While your cookies are cooling, let’s whip up a simple glaze to add an extra touch of sweetness and visual appeal. In a small bowl, combine the 3 tablespoons of granulated sugar and the 6 tablespoons of powdered sugar. The granulated sugar adds a slight crunch and sweetness, while the powdered sugar creates a smooth, opaque glaze. Whisk these sugars together until they are well combined. Now, you’ll need to add a tiny bit of liquid to create the glaze. Start with just a teaspoon of water or milk. Stir it into the sugar mixture until you achieve a smooth, pourable consistency. You’re looking for a glaze that’s thick enough to coat the back of a spoon but thin enough to drizzle. If it’s too thick, add a tiny bit more liquid, just a few drops at a time. If it’s too thin, add a little more powdered sugar. You can also add another tiny drop of green food coloring to the glaze if you want an even more intense green, or leave it white for a nice contrast.
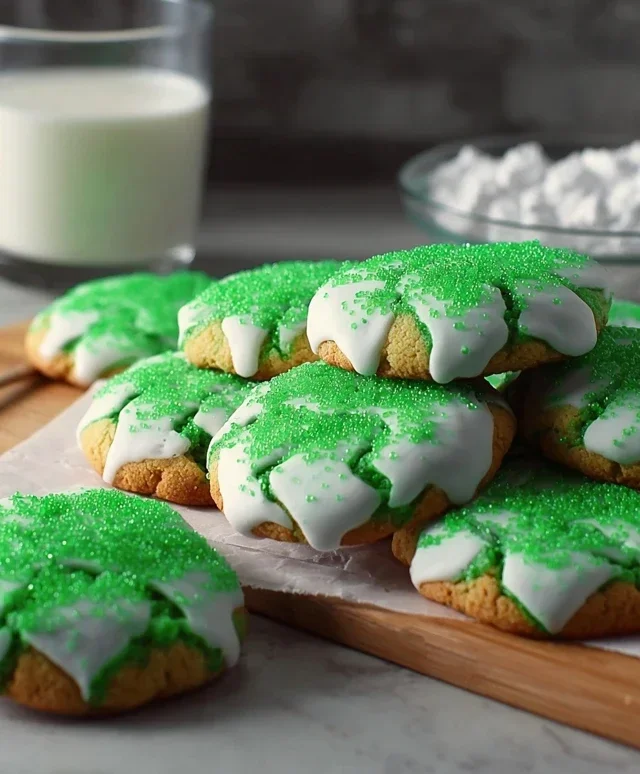
Once the cookies are completely cool, you can either dip the tops of the cookies into the glaze, or you can use a spoon or a piping bag to drizzle the glaze over them. For an extra festive touch, consider adding some St. Patrick’s Day sprinkles before the glaze sets. Allow the glaze to set completely before stacking or serving your beautiful, easy St. Patrick’s Day cookies. Enjoy the luck of the Irish!
Conclusion:
And there you have it – a delightfully simple way to bring a touch of Irish cheer to your St. Patrick’s Day celebrations! These Easy St. Patrick’s Day Cookies are truly a winner because they are incredibly straightforward to make, requiring minimal ingredients and time, making them perfect for bakers of all skill levels, even those with busy schedules. The crisp, buttery base perfectly complements the festive green frosting and playful sprinkles, creating a treat that’s as pleasing to the eye as it is to the palate. They’re fantastic served alongside a glass of milk for an afternoon snack, as part of a St. Patrick’s Day dessert buffet, or even as a sweet surprise for colleagues or classmates. Don’t be afraid to get creative with variations – consider adding a hint of mint extract to the dough for an extra burst of flavor, or experimenting with different shades of green frosting. I wholeheartedly encourage you to give these Easy St. Patrick’s Day Cookies a try; they’re guaranteed to spread smiles and festive spirit!
Frequently Asked Questions:
Can I make these cookies ahead of time?
Absolutely! These cookies can be baked and fully cooled a day or two in advance. Store them in an airtight container at room temperature. Frosting them just before serving or a few hours ahead of time will keep the frosting looking its best.
What if I don’t have green food coloring?
No problem at all! While green is traditional for St. Patrick’s Day, you can get creative. Use yellow and blue food coloring to mix your own green, or opt for a different festive color like gold or white. You could also use edible gold stars or sprinkles for a sparkly, celebratory look without green.
How should I store frosted cookies?
Once the frosting is completely set, store the frosted cookies in a single layer in an airtight container at room temperature. If you stack them, place parchment paper or wax paper between layers to prevent the frosting from sticking.
Easy St. Patrick’s Day Cookies
Simple and festive green cookies perfect for St. Patrick’s Day celebrations.
Ingredients
-
1 box (15.25 oz) white cake mix
-
2 large eggs
-
1/3 cup vegetable oil
-
1/4 teaspoon Kelly green gel food coloring
-
3 tablespoons granulated sugar
-
6 tablespoons powdered sugar
Instructions
-
Step 1
Preheat oven to 350°F (175°C). Line baking sheets with parchment paper. -
Step 2
In a large bowl, combine the white cake mix, eggs, and vegetable oil. -
Step 3
Add the Kelly green gel food coloring and mix until evenly combined and a vibrant green color. -
Step 4
Roll dough into 1-inch balls and place them on the prepared baking sheets, about 2 inches apart. -
Step 5
Gently flatten each cookie with the bottom of a glass dipped in granulated sugar. -
Step 6
Bake for 9-11 minutes, or until the edges are lightly golden. -
Step 7
Let the cookies cool on the baking sheets for a few minutes before transferring them to a wire rack to cool completely. Once cooled, dust with powdered sugar for an extra festive touch.
Important Information
Nutrition Facts (Per Serving)
It is important to consider this information as approximate and not to use it as definitive health advice.
Allergy Information
Please check ingredients for potential allergens and consult a health professional if in doubt.